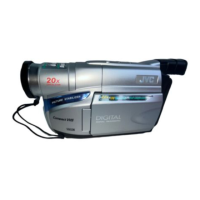
Controk
Diopter Adjustment ( ontrol ................. _-_ pg. 13
_2) Lens Cover Open/(lose Ring ................ _--_ pg. 14
(_ Video Light Switch
[LIGHT OFF/AUTO/()NI ...................... _7_ pg. 19
(_ 5-Second Recrlrding Button
[5 SEC. REC] ........................................ _7_ pg. 17
• Prlwer Zoom Lever [T/WI .................. _--_ pg. 16
• Speal<er Volume ( ontrol IVOL.[ ........ _7_ pg. 30
_} • Picture Stabilizer Button
IRSTABILIZER[ .................................. _--_ pg. 18
• Time Base ( orrector Button ............... _-_ pg. 31
_ Program AE Button {P.AE[ ..................... _--_ pg. 21
1:_ Fade/Wipe Button [EFFECT] ................. _-_ pg. 20
• Retake Rewind Button IRETAKE R] ..... _--_ pg. 17
• Quicl< Review Button [ (D R[ ............. _-_ pg. 17
Rewind Button ]REW[ ....................... _-_ pg. 30
_._ • Retake Forward Button [RETAKE F] .... _--_ pg. 17
• Fast-Forward Button IFF[ ................... _z_ pg. 30
Stop Button [STOP] .............................. _-._ pg. 30
(_) Play/Pause Button
[PLAY/PAUSE] ..................................... _-_ pg. 30
• Select Wheel [PUSH] ........................ _-:_ pg. 22
• Bright Dial [BRIGHT[ .................. _z_ pg. 14, 30
MENU/DISPLAY Button ................. _-:_ pg. 15, 22
_-s_• Recording Mode Button [SP/EP[ ......... _z_ pg. 12
• ( ounter Reset/Memory Bution
]COUNTER R/M[ .............................. _-T_ pg. 31
0_ EIE(T Switch ....................................... _z" pg. 10
_ Recording Start/Stop Button .................. _-:_ pg. 14
(_} Power Switch
[IT!_ OFF, AUT(-), PRO.[ .............. Zz" pg. 14, _0
_9) Battery Release Switch
[BA1TERY RELEASE] .............................. _z" pg. 9
_ PUSH Button ....................................... _-z_ pg. 10
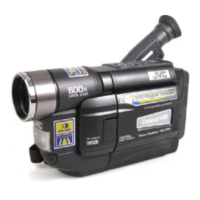
Connectors
t_ DC IN Connector. .................................. _T _ pg. 9
The connectors l_ to _ are located beneath the
cover.
l_ Video Output Connector. ..................... _-z_ pg. 32
Audio Output ( onnector ..................... _-z_ pg. 32
J Terminal IJLIP (Joint Level Intert\lce Protocol)
Connector[
It is used to connect the camcorder to a device
such as a personal cr)lT/puter.
For further details consult your nearest JV(
dealer.
lLIP-controlled editing from camcorder to V(R
is not possible if the VCR is not equipped with a
I terminal.
Indicators
[] Power Lamp ........................................ _T_ pg. 14
Other Parts
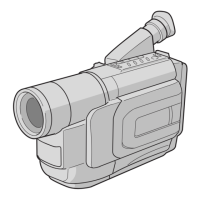
[] Battery Pack Mount ............................... _-T_ pg. 9
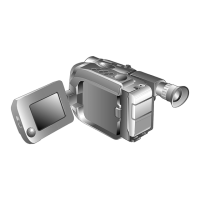
[] Viewfinder. .......................................... _-_ pg. 13
[] Grip Strap ............................................ _-_ pg. 13
[] ( amera sensor
Be careful not to cover this area; a sensor
necessary for shooting is builtdn here.
[] Video Light .......................................... _T_ pg. 19
[] Microphone
For use when recording.
[] Eyepiece .............................................. _T" pg. 35
[] Speal<er ............................................... _-T_ pg. 30
[] LCD Monitor ....................................... _T_ pg. 15
[] Shoulder Strap Eyelets .......................... _-T_ pg. 13
[] (loci< Battery Slot ................................ _-T_ pg. 10
[] Tripod Mounting Socket ....................... _-T_ pg. 13

 Loading...