Operating Manual BRAVO II
7
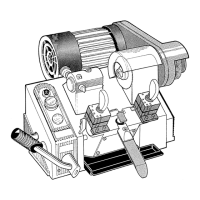
REPLACING THE CUTTER
1) Raise the cutter shield (J) and insert the locking bar (#D400754BA) into the slot in the base and the
hole in the cutter shaft next to the cutter as shown in fig. 9.
2) Use the wrench (#D300783ZZ) that was provided to loosen the nut.
IMPORTANT: the thread is a left handed.
3) When replacing the cutter, make sure that the longest sharpened angle of the cutter is facing to the
right.
4) Clean the cutter and the shaft before installing the cutter.
5) Tighten the lock nut. Make sure to remove the locking bar from the slot before starting the
machine.
Fig. 9
REPLACING THE BRUSH
1) Unscrew the four screws holding the belt shield and remove the shield.
2) Raise the cutter shield (J) and insert the locking bar (#D400754BA) into the groove in the base and
the hole in the cutter shaft as shown in fig. 10.
3) Remove the allen screw with one of the allen keys that was provided.
4) Replace the brush.
5) After you replace everything, make sure that you remove the locking bar from the slot.
Fig. 10
D400754BA
D300783ZZ
J
D400754BA
D301820ZZ
J
 Loading...