Do you have a question about the Kärcher K 2.89 and is the answer not in the manual?
Important safety advice and instruction retention notice.
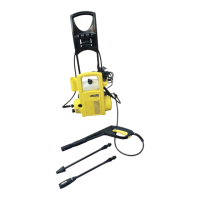
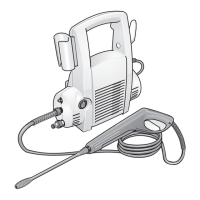
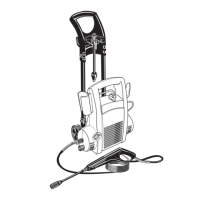
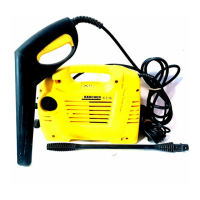
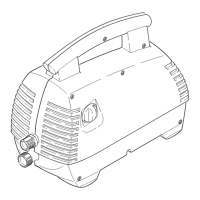
Controls the power supply to the unit.
Point of connection for the high-pressure hose.
Connects to the water supply and filters incoming water.
A connector for various parts.
Adjusts the water spray pressure.
Nozzle for high-impact cleaning.
Connects the unit to the spray lance.
The main handle and trigger component.
Power cord for the unit.
Special lance for cleaning floors.
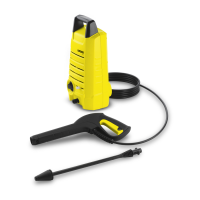
Standard length high-pressure hose.
Provides further details on preparation.
Assemble the spray gun.
Connect the spray lance.
Attach the high-pressure hose.
Connect the water supply.
Ensure full water flow.
Connect the unit to the electrical outlet.
Select the appropriate spray lance.
Turn the unit on using the switch.
Unlock the handgun safety.
Activate the trigger lever.
Be aware of the unit's recoil.
Follow all safety guidelines.
Set the spray to low pressure for detergent.
Detergent is not used with high pressure.
Add detergent to the reservoir.
Location for detergent storage.
Turn on the unit.
Unlock the handgun safety catch.
Activate the trigger lever.
Turn off the unit.
Disconnect the unit from the power source.
Shut off the water supply.
Maintain the detergent filter.
Maintain the water filter.
Protect the unit from frost.
Details on permissible uses and restrictions.
Instructions for assembling the unit.
Guidance on connecting the unit to electricity.
Instructions for connecting to the water supply.
Avoid operating in areas with explosion risk.
Use only approved, undamaged lines.
Use only Kärcher-approved parts.
Ensure proper use by trained operators and supervision of children.
Warnings about directing jets at people, animals, or electrical equipment.
Avoid tyre damage from high-pressure jets.
Recycle packaging materials properly.
Dispose of old appliances responsibly.
Steps to prepare the unit for use.
Instructions for starting and stopping the unit.
How to increase or decrease pressure.
Instructions for filling the detergent reservoir.
Recommended procedure for cleaning with detergent.
How to attach and use accessories.
For stubborn dirt on surfaces like mossy paths.
Protects against spray from the dirt blaster.
For clearing blocked pipes and drains.
For cleaning car bodies and glass surfaces.
For cleaning smooth surfaces like cars or boats.
For removing rust or paint.
For cleaning hard-to-reach areas.
Lance with triple nozzle.
Long lance for cleaning gutters.
Lance designed for floor cleaning.
Extends the reach of the spray lance.
Hose for high-pressure water flow.
Extends the length of the hose.
Kit for suctioning large volumes of water.
For suctioning water from tanks or ponds.
Filters water before it enters the unit.
Prevents water from flowing backward.
For splash-free surface cleaning.
| Max. pressure | 110 bar |
|---|---|
| Water flow rate | 360 l/h |
| Voltage | 220-240 V |
| Hose Length | 4 m |
| Max Pressure | 11 MPa |