Do you have a question about the Kendro HERAcell 240 and is the answer not in the manual?
Information about the operator's role and responsibilities for safe use of the incubator.
Guidance for users to understand unit advantages and protect from harm.
Explains symbols used in the operating instructions and on the unit for clear understanding.
Covers proper use, prohibited uses, and relevant safety regulations for operation.
Details safety measures and hazards associated with CO2 usage in the incubator.
Information on how to separate packing materials for recycling after delivery.
Instructions for checking the unit for shipping damage and completeness upon receipt.
Lists the components supplied with different versions of the incubator.
Specifies requirements for the setup location's environment, such as temperature and humidity.
Details the need for adequate room ventilation for safe operation and gas dispersion.
Outlines minimum dimensions and clearances for unit installation and access.
Provides instructions and warnings regarding how to safely move the unit.
Describes how to safely stack multiple HERAcell® 240 units.
Information on modifying door opening direction or type, service required.
Instructions for inserting and using the pull-out drawer.
Identifies components visible from the front of the incubator with a labeled diagram.
Identifies components and connections on the rear of the incubator with a labeled diagram.
Explains the factors determining the incubator's internal atmosphere: temperature, humidity, CO2.
Describes the automatic decontamination process for the incubator's chamber and components.
Details the function of temperature and CO2 sensors within the system.
Explains the function of the door interlock system for safety and interruption of processes.
Outlines the gas, power, and data connections for the unit, located on the rear.
Describes the internal design of the sample chamber for cleaning and contamination control.
Steps for cleaning the sample chamber and its components before initial operation.
Instructions for installing the internal rack system, including support profiles and brackets.
Instructions for installing center supports for specific insert configurations.
Details on connecting the CO2 gas supply correctly and safely, including pressure settings.
Instructions for safely connecting the unit to the electrical supply, checking ratings.
Guide for connecting the incubator to a PC via the RS 232 serial port.
Instructions for connecting the unit to an external alarm system.
Procedures for initial cleaning of the unit before operation commences.
Description of the main power switch and its operation for switching the unit on/off.
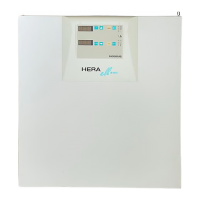
Overview of the control panel layout, displays, keys, and LED indicators.
Explains the self-test routine performed by the microprocessor upon unit startup.
How to display, set, and adjust the desired incubation temperature.
How to display, set, and adjust the desired CO2 concentration.
Instructions for switching between high and low humidity modes for sample chamber.
Procedure for initiating the auto-start routine for stable operation and parameter equalization.
Information on the error diagnostics system, activation delays, and error sources.
A table listing error codes, their possible causes, and corrective actions.
Steps to reset the overtemperature protection after an event has occurred.
Final checks and preparations required before commencing operation of the unit.
Step-by-step guide to starting, loading, and initiating the incubator for use.
Procedures for safely decommissioning the unit and preparing it for disposal.
Precautions and preparatory steps required before cleaning and disinfection procedures.
Instructions for cleaning the sample chamber and exterior surfaces of the incubator.
Methods for manual disinfection of the unit and its components using appropriate agents.
Detailed description of the automatic decontamination routine process and its phases.
Steps to activate and run the ContraCon decontamination routine via the control panel.
How to interrupt or skip phases of the ContraCon decontamination routine.
Recommended daily and annual inspections for unit efficiency and safety.
Guidelines for weekly, quarterly, and annual maintenance tasks.
Procedure for performing comparative temperature measurements to ensure accuracy.
Steps to calibrate the temperature control if deviations are found during checks.
Procedure for performing comparative CO2 concentration measurements.
Steps to calibrate the CO2 regulation if deviations are found during checks.
Instructions for replacing the sterile filter in the CO2 gas supply line.
Steps for safely replacing the unit's fuses.
Instructions for replacing the magnetic door seal.
A comprehensive list of available spare parts and accessories with order numbers.
| Brand | Kendro |
|---|---|
| Model | HERAcell 240 |
| Category | Accessories |
| Language | English |