7
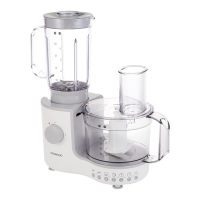
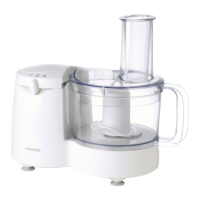
Using The Attachments
Refer to recommended usage
chart for each attachment.
15
16
17
18
19
20
21
22
23
24
25
26
27
28
29
30
31
32
33
34
35
36
37
38
39
40
41
42
43
44
45
46
47
48
49
50
51
52
53
54
55
56
57
58
59
60
61
62
63
64
65
66
67
68
69
70
71
72
73
74
75
76
77
78
79
80
81
82
83
84
85
86
87
88
89
90
91
92
93
94
95
96
97
98
99
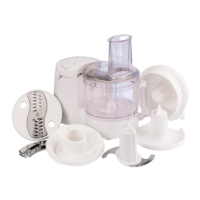
Knife Blade
Refer to Illustrations
A B C D E F G H I J
K L M N O P Q R S T
U V W X Y Z
+
A B C D E F G H I J
K L M N O P Q R S T
U V W X Y Z
This blade is the most versatile of all
the attachments. The texture you get is
determined by the length of processing
time. For coarser textures use the
‘pulse’ feature checking the consistency
regularly.
Hints and Tips
l
Cut food such as meat,
bread, vegetables into cubes
approximately 2cm before
processing.
l
Biscuits and bread should be broken
into pieces and added down the
feed tube whilst the appliance is
running.
l
When making pastry use fat straight
from the fridge cut into 2cm cubes.
Take care not to over-process.
l
Cake Making - Sponge type
cakes are best made by the ‘all
in one method’. A ‘soft tub’
margarine used straight from
the refrigerator is recommended.
Process until smooth.
l
Yeast dough- Place the dry
ingredients into the bowl. With the
appliance running add the liquid
down the feed tube. Process until it
becomes smooth in appearance and
elastic to touch. Allow the dough to
rise then re-knead for 10 seconds.
16
17
18
19
20
21
22
23
24
25
26
27
28
29
30
31
32
33
34
35
36
37
38
39
40
41
42
43
44
45
46
47
48
49
50
51
52
53
54
55
56
57
58
59
60
61
62
63
64
65
66
67
68
69
70
71
72
73
74
75
76
77
78
79
80
81
82
83
84
85
86
87
88
89
90
91
92
93
94
95
96
97
98
99
Emulsifying Disc
Refer to illustration
A B C D E F G H I J
K L M N O P Q R S T
U V W X Y Z
Use for light mixtures only e.g. cream,
mayonnaise.
Hints and Tips
l
Mayonnaise - Place the egg and
seasonings into the bowl and mix
for a few seconds. With the machine
running gradually add the oil down
the feed tube in a slow steady
stream.
Slicing and Grating Plates
17
18
19
20
21
22
23
24
25
26
27
28
29
30
31
32
33
34
35
36
37
38
39
40
41
42
43
44
45
46
47
48
49
50
51
52
53
54
55
56
57
58
59
60
61
62
63
64
65
66
67
68
69
70
71
72
73
74
75
76
77
78
79
80
81
82
83
84
85
86
87
88
89
90
91
92
93
94
95
96
97
98
99
1
2
3
4
5
6
7
8
9
10
11
12
13
14
15
16
17
18
19
20
21
22
23
24
25
26
27
28
29
30
31
32
33
34
35
36
37
38
39
40
41
42
43
44
45
46
47
48
49
50
51
52
53
54
55
56
57
58
59
60
61
62
63
64
65
66
67
68
69
70
71
72
73
74
75
76
77
78
79
80
81
82
83
84
85
86
87
88
89
90
91
92
93
94
95
96
97
98
99
1
2
3
4
5
6
7
8
9
10
11
12
13
14
15
16
17
18
19
20
21
22
23
24
25
26
27
28
29
30
31
32
33
34
35
36
37
38
39
40
41
42
43
44
45
46
47
48
49
50
51
52
53
54
55
56
57
58
59
60
61
62
63
64
65
66
67
68
69
70
71
72
73
74
75
76
77
78
79
80
81
82
83
84
85
86
87
88
89
90
91
92
93
94
95
96
97
98
99
Refer to illustration
A B C D E F G H I J
K L M N O P Q R S T
U V W X Y Z
To assemble the plate carrier
1 Select the desired plate and fit into
the carrier with the cutting side
uppermost.
l
Locate one end of the plate under
the rim and press the other end
into position. It will only fit one way
round.
Using the cutting plate
1 Put the food into the feed tube.
2 Switch on and push down evenly
with the pusher - never put your
fingers in the feed tube.
l
Do not let the bowl fit up as far as
the cutting disc: empty regularly.
l
Do not exceed the ‘MAX’ mark on
the bowl.
Hints and Tips
l
Use fresh ingredients.
l
Do not cut food up too small.
Fill the feed tube fairly full, this
prevents food from slipping
sideways during processing.
l
When slicing or grating: food placed
upright comes out shorter than
food placed horizontally.
l
After using a cutting plate there will
always be a small amount of waste
on the plate or in the food
 Loading...