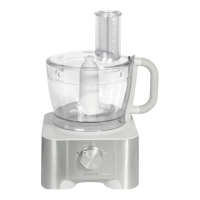
to use the cutting discs
1
Fit the drive shaft and bowl onto the power unit.
2 Holding by the centre grip, place the disc onto the drive shaft with
t
he appropriate side uppermost.
3
Fit the lid.
4 Put the food in the feed tube.
5
Switch on and push down evenly with the pusher - never put
y
our fingers in the feed tube.
h
ints
●
Use fresh ingredients
●
Don’t cut food too small. Fill the width of the feed tube fairly full.
T
his prevents the food from slipping sideways during processing.
●
Food placed upright comes out shorter than food placed
horizontal.
●
T
here will always be a small amount of waste on the disc or in
the bowl after processing.
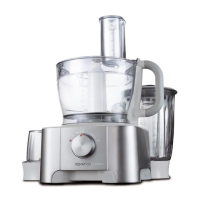
citrus press
Use the citrus press to squeeze the juice from citrus fruits (eg
oranges, lemons, limes and grapefruits).
cone
sieve
to use the citrus press
1 Fit the drive shaft and bowl onto the power unit.
2 Fit the sieve into the bowl - ensuring the sieve handle is locked
into position directly over the bowl handle.
3 Place the cone over the drive shaft turning until it drops all the
way down.
4 Cut the fruit in half. Then switch on and press the fruit onto the
cone.
●
The citrus press will not operate if the sieve is not
locked correctly.
care & cleaning
●
Always switch off and unplug before cleaning.
●
Handle the blades and cutting discs with care - they are
extremely sharp.
●
Some foods may discolour the plastic. This is perfectly normal
and won’t harm the plastic or affect the flavour of your food. Rub
with a cloth dipped in vegetable oil to remove the discolouration.
power unit
●
Wipe with a damp cloth, then dry. Ensure that the interlock area
is clear of food debris.
●
Store excess cord in the storage area at the back of the machine
.
liquidiser (if supplied)
1 Empty the jug before unscrewing it from the blade unit.
2 Wash the jug by hand.
3 Remove and wash the sealing ring.
4 Don’t touch the sharp blades - brush them clean using hot
soapy water, then rinse thoroughly under the tap. Don’t
immerse the blade unit in water.
5 Leave to dry upside down.
b
owl/lid and attachments
●
Wash by hand, then dry.
●
Alternatively they can be washed on the top rack of your
d
ishwasher. A short low temperature program is recommended.
service & customer care
●
I
f the cord is damaged it must, for safety reasons, be replaced
by KENWOOD or an authorised KENWOOD repairer.
If you need help with:
●
u
sing your appliance
●
s
ervicing or repairs
Contact the shop where you brought the appliance.
●
Designed and engineered by Kenwood in the UK.
●
M
ade in China.
IMPORTANT INFORMATION FOR CORRECT DISPOSAL
OF THE PRODUCT IN ACCORDANCE WITH EC
DIRECTIVE 2002/96/EC.
At the end of its working life, the product must not be disposed of as
urban waste.
It must be taken to a special local authority differentiated waste
collection centre or to a dealer providing this service.
Disposing of a household appliance separately avoids possible
negative consequences for the environment and health deriving
from inappropriate disposal and enables the constituent materials
to be recovered to obtain significant savings in energy and
resources. As a reminder of the need to dispose of household
appliances separately, the product is marked with a crossed-out
wheeled dustbin.
carrot and coriander soup
25g (1oz) butter
1 onion chopped
1 clove garlic crushed
590g carrot cut into 1 cm cubes
cold chicken stock
10-15ml (2-3tsp) ground coriander
salt and pepper
1 Melt the butter in a pan, add the onion and garlic and fry until
soft.
2 Place the carrot into the liquidiser, add the onion and garlic. Add
sufficient stock to reach the 1.2L level marked on the goblet. Fit
the lid and filler cap.
3 Blend on maximum speed for 5 seconds for a coarse soup or
longer for a finer result.
4 Transfer the mixture to a saucepan, add the coriander and
seasoning and simmer the soup for 30 to 35 minutes or until
cooked.
5 Adjust the seasoning as necessary and add extra liquid if
required.
4

 Loading...