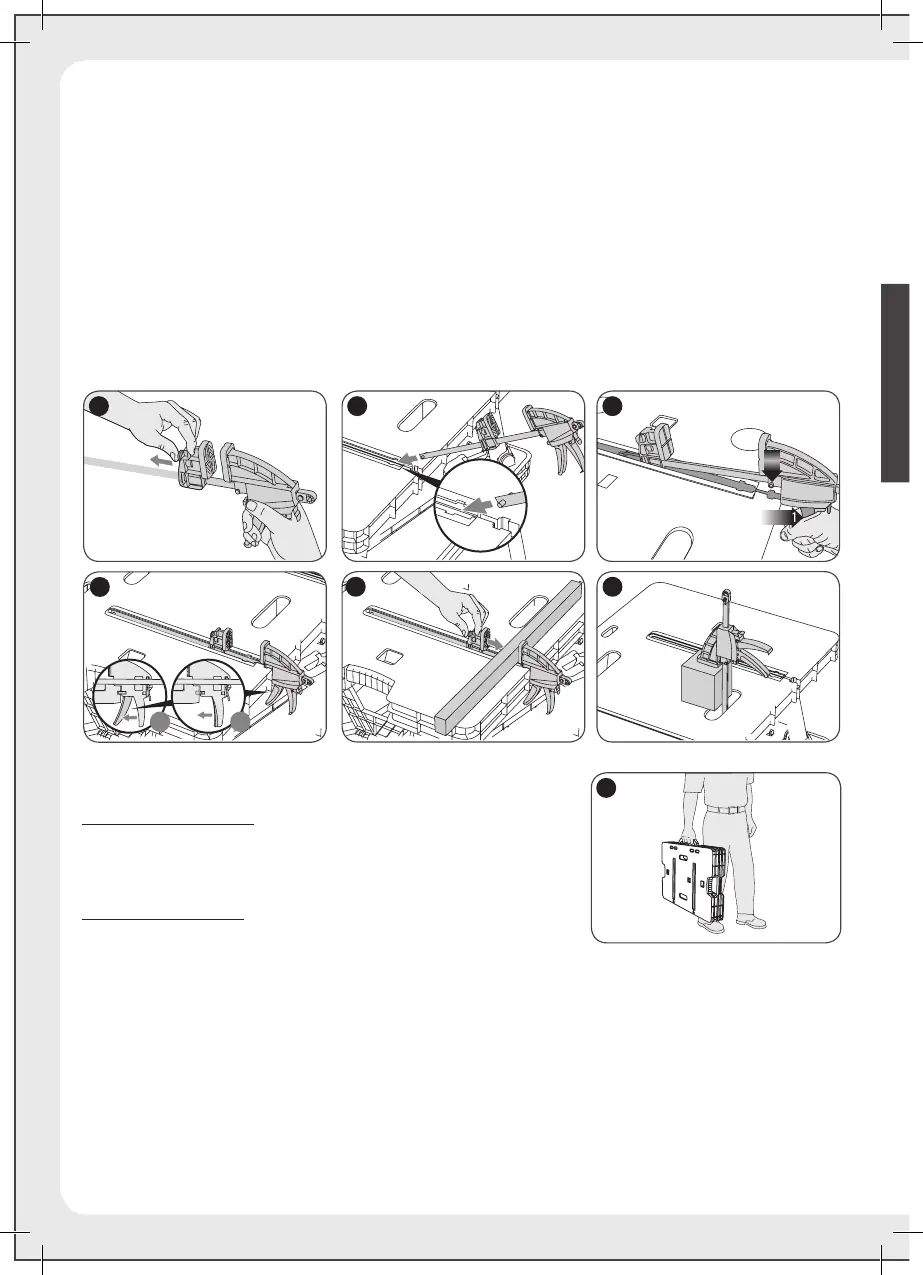
J1 - To expand the opening of the clamp jaws, press in on the release lever and move the jaw as
shown. The jaw that is attached to the handle can also be moved in the same manner or by
squeezing and releasing the front handle.
J2 - Line up the round post on the end of the clamp bar with the mating openings on both sides of
the main slot in the tabletop as shown.
J3 - To lock the clamp in a horizontal position, squeeze the front handle and line up the round protruding
tabs with the mating openings in the tabletop (behind the openings mentioned in J2 above).
J4 - With the clamp in a fully horizontal position, release the front handle to lock the clamp in place.
(To remove the clamp, squeeze the handle and lift up.)
J5 - Depress the release lever and move the front jaw into position against the material to be
clamped. Squeeze the front handle to apply pressure.
J6 - To clamp vertically, insert the clamp through the slot in the tabletop as shown.
TRANSPORTING
Carry the unit by the convenient carrying handle as shown in
figure K.
MAINTENANCE
Use only mild soap and damp cloth to clean the tool. Never let
any liquid get inside the tool; never immerse any part of the
tool into a liquid.
Patents Pending
K
J3
J4
J6 J5
J1 J2
FOR CUSTOMER SERVICE PLEASE VISIT OUR WEBSITE AT: WWW.KETER.COM
4