Do you have a question about the Keter FACTOR 6x6 and is the answer not in the manual?
Instructions for preparing the ground for shed assembly, including leveling and space requirements.
Specifications for the required external floor dimensions.
Essential pre-assembly steps, tool requirements, and personnel needed for assembly.
Lists necessary tools and indicates that two people are needed for assembly.
List of parts required for assembling the shed doors.
List of parts required for assembling the shed floor.
List of parts required for installing the shed window.
List of parts required for assembling the shed roof.
Lists of parts for walls and various types of screws.
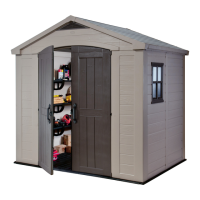
List of parts for optional shelving units.
Instructions for assembling the shed floor using specified parts.
Instructions for attaching wall panels to the floor base.
Instructions for positioning the window panel with the correct side facing out.
Instructions for attaching front, back, and side wall panels.
Instructions for installing corner and additional side wall panels.
Instructions for attaching the rear wall panel and the window wall panel.
Instructions for attaching wall panels and installing roof support beams.
Detailed instructions for assembling the shed doors with all components.
Instructions for fitting door frames and assembling the primary roof structure.
Instructions for attaching the first and second sets of roof panels.
Instructions for installing a support beam and the remaining roof panels.
Instructions for securing roof panels and completing the assembly, noting two-person requirement.
Instructions for installing roof trim pieces and attaching door handles.
Instructions for attaching door handles and installing locking mechanisms.
Instructions for installing door hinges and components for door latching.
Instructions for attaching the right door handle and installing its locking mechanisms.
Instructions for installing the main window into the shed structure.
Instructions for installing window frame components and securing the complete frame.
Guide for assembling shelves and information on their maximum weight capacity.
Guidelines for securing the shed to a foundation using appropriate screws.
Important recommendations for safe use, maintenance, cleaning, and handling of the shed.
Further advice on safety, cleaning, storage, wind protection, and tool usage.
Details on what the warranty covers, including manufacturing defects, and what it excludes.
Information on warranty limitations and how to contact Keter customer service for assistance.
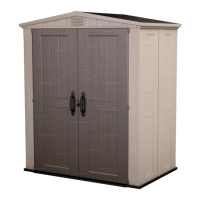
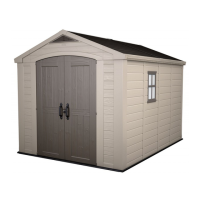
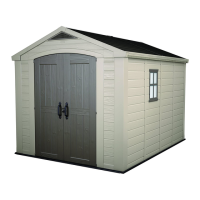
| Type | Plastic shed |
|---|---|
| Door type | Double |
| Lock type | Padlock |
| Roof type | Gable roof |
| Roof color | Brown |
| Wall color | Beige |
| Handle color | Black |
| Roof material | Resin |
| Frame material | Steel |
| Number of doors | 2 door(s) |
| Snow load (max) | 75 kg/m² |
| Integrated floor | Yes |
| Number of shelves | 1 shelves |
| Number of windows | 1 |
| Internal floor area | - m² |
| Depth | 1955 mm |
|---|---|
| Width | 1780 mm |
| Height | 2080 mm |
| Weight | 77700 g |
| Package depth | 1940 mm |
| Package width | 1240 mm |
| Internal depth | 1820 mm |
| Package height | 290 mm |
| Internal length | 1620 mm |