Do you have a question about the Kettler 7172-000 and is the answer not in the manual?
Key safety precautions and guidelines for handling the table during use and assembly.
General instructions for the assembly process and a list of all parts included in the package.
Instructions for aligning the footlock with the stemtube and inserting the drift pin.
Guide to installing both locking and non-locking wheels onto the wheelbase assemblies.
Instructions for attaching H-Pads, crossbars, and accessories to the wheelbases.
Instructions for assembling the racquet and ball holder unit.
Instructions for securing the assembled racquet holder to the wheelbase.
Instructions for attaching the protective glides to the table tops.
Instructions for assembling the main frame structure onto the table tops.
Instructions for temporarily installing safety knobs to the wheelbases.
Instructions for locking safety knob 1 and aligning Glides with the Wheelbase.
Instructions for bolting the crossbar to the wheelbase assemblies.
Instructions for opening tops, locking knobs, and removing temporary safety knobs.
Instructions for assembling the net post panel and flange components.
Instructions for attaching safety knobs and covering unused holes on the wheelbase.
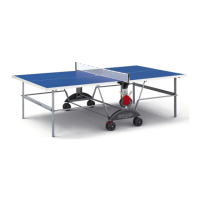
Guide to opening the table into its playing configuration.
Instructions for installing the protective shrouds onto the wheelbases.
Instructions for setting up the net, placing string, and adjusting net tension.
Instructions for removing protective plastic film and folding the table for storage.
Comprehensive overview of the product's limited warranty terms and conditions.
Guidance on how to order replacement parts, including necessary information and contact details.
| Brand | Kettler |
|---|---|
| Model | 7172-000 |
| Category | Fitness Equipment |
| Language | English |








 Loading...