12
Eliminating Potential Plastic Odor
Like many new products, you may notice a slight plastic or metallic odor. If this persists,
we recommend this cleaning procedure to eliminate any odor.
a. PREPARE
Step 1: Turn power “OFF”, unplug and drain the Brewer as instructed in the Care and
Maintenance section on page 10 of this guide.
CAUTION: Water may be hot. Remember to replace the Drain Cap.
Step 2: Add 1 tablespoon of baking soda OR
2 tablespoons of white vinegar to 2 cups (16 oz)
of warm water; stir the water to fully dissolve the baking soda or white vinegar. Pour this
solution into the Brewer.
Step 3: Plug Brewer in, turn power “ON” and add 6 more cups of fresh water, or until the
Brewer is full. (Indicated by four flashes of the green light and 4 beeps.) Wait for water to reach
brewing temperature (Green “Ready” Light will go on.) This should take 6 - 8 minutes.
b. FILL AND CLEAN
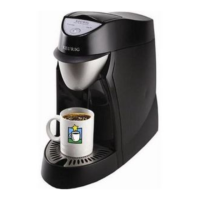
Step 1: When ready, place a mug or cup on the Drip Tray, open and close the Brew Drawer, and
press the Brew Button to run a brew cycle. DO NOT INSERT A K-CUP. Pour contents of the
mug back into the Brewer. Repeat this step for a total of 4 cycles
Step 2: When step 1 is complete, let the Brewer sit for 30 minutes.
Step 3: Turn power “OFF” and drain the Brewer as instructed in the Care and Maintenance
section on page 10 of this guide.
CAUTION: Water may be hot. Remember to replace the Drain Cap.
c. RINSE
Step 1: Fill the Brewer with fresh water. Turn Brewer “ON” and wait 6 – 8 minutes for the water
to heat up and the Green “Ready” Light to go on.
Step 2: When ready, place a mug or cup on the Drip Tray; open and close the Brew Drawer, and
press the Brew Button to run a brew cycle. DO NOT INSERT A K-CUP. Repeat this step until
flashing blue light indicates that the Brewer needs water (about 8 cycles).
Step 3: Turn power “OFF” and drain the Brewer as instructed in the Care and Maintenance
section on page 10 of this guide.
CAUTION: Water may be hot. Remember to replace the Drain Cap.
d. READY TO BREW COFFEE OR TEA
Now you are ready to brew coffee or tea again. Plug Brewer in, turn power “ON”, fill with fresh
water, wait for the water to reach brewing temperature (Green “Ready” Light will go on), insert
K-Cup, and brew.
 Loading...