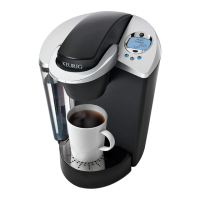
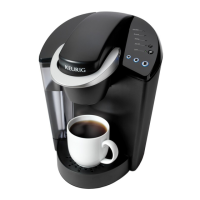
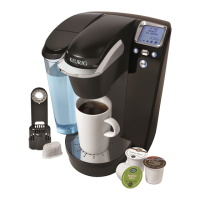
The Keurig K60/K65 Special Edition & Signature Brewers are single-cup home brewing systems designed to provide a convenient and customizable coffee, tea, or hot cocoa experience. These brewers utilize K-Cup® packs to deliver a fresh-brewed beverage with ease.
Function Description
The primary function of the Keurig K60/K65 brewer is to quickly and efficiently brew single servings of hot beverages from K-Cup® packs. The brewing process involves puncturing the K-Cup® pack, forcing hot water through the grounds, and dispensing the brewed beverage into a cup. The brewer is designed for household use and offers various features to enhance the user experience, including programmable settings and multiple brew sizes.
Usage Features
The Keurig K60/K65 brewers offer a range of features that make them user-friendly and adaptable to individual preferences:
- Customizable Brew Sizes: Users can choose from three brew sizes: Small Cup (5.25 oz.), Small Mug (7.25 oz.), and Large Mug (9.25 oz.). This allows for customization based on desired beverage strength and cup size. The smaller the brew size, the more intense the flavor.
- K-Cup® Pack Compatibility: The brewers are designed to work exclusively with Keurig Brewed® K-Cup® brand packs, offering access to over 250 varieties of coffee, tea, and hot cocoa. For a stronger taste, Extra Bold K-Cup® packs (with up to 30% more ground coffee) are available.
- Hot Water Dispensing: Beyond brewing K-Cup® packs, the brewer can also dispense hot water, useful for making hot cocoa from packets, soups, or other cooking needs.
- Iced Beverage Brewing: The system supports brewing iced teas and coffees directly over ice. Users are advised to place a tall cup filled with ice on the Drip Tray Plate (which can be removed for taller cups) and select their preferred K-Cup® pack and brew size. A special "Brew Over Ice" icon on K-Cup® packs indicates those specifically crafted for this purpose. It is important not to brew into a glass cup to prevent cracking or breaking.
- Programmable On/Off Features: The brewer offers flexible power management options:
- Always ON: The brewer can be left on continuously, ensuring it's always ready to brew without waiting for water to heat up.
- Auto Off: Users can program the brewer to automatically turn off after a specified period (up to 9 hours) of inactivity following the last brew.
- On/Off Time: For scheduled brewing, the brewer can be programmed to turn on at a specific "ON TIME" and turn off at a specific "OFF TIME." This ensures hot water is ready within a desired window. The clock must be set for this feature to function.
- Adjustable Brew Temperature: The default brew temperature is 192°F, but users can adjust it down by 5 degrees (to 187°F) if they prefer a cooler beverage. This setting can be accessed through the LCD Control Center.
- LCD Control Center: The LCD Control Center serves as the central interface for monitoring brewer status and programming settings. It displays the current time (if set), "READY TO BREW" or "NOT READY" status, "ADD WATER" alerts, "DESCALE" reminders, and guides users through programming options for clock, auto off, on/off time, and brew temperature.
- Water Reservoir: The brewer features a removable Water Reservoir with a lid, making it easy to fill and clean. It is recommended to use bottled or filtered water for the best taste. The "MAX FILL" line indicates the maximum water level. The brewer will not operate if the reservoir is empty or not properly seated, displaying an "ADD WATER" message.
- Drip Tray Assembly: The Drip Tray Assembly, consisting of a Drip Tray Plate and Drip Tray, collects overflow and can be removed to accommodate taller mugs or travel mugs.
- Power Button: A single power button controls the brewer's main power, allowing users to turn it on or off. Pressing it during a brew cycle will stop the process.
- Safety Precautions: The manual emphasizes several safety measures, including not touching hot surfaces, ensuring proper grounding, not immersing the brewer in liquids, and exercising caution with the sharp needles that puncture K-Cup® packs. It also warns against lifting the handle during brewing due to extremely hot water.
Maintenance Features
Regular maintenance is crucial for the longevity and optimal performance of the Keurig K60/K65 brewer. The manual provides clear instructions for cleaning and descaling:
- Cleaning External Parts: The housing and other external components should be cleaned regularly with a damp, soapy, non-abrasive cloth. The brewer should never be immersed in water or other liquids.
- Cleaning the Drip Tray Assembly: The Drip Tray and Drip Tray Plate should be periodically inspected and rinsed clean. They can accumulate up to 8 oz. of overflow. To remove, slide the assembly toward you, keeping it level. These parts should be cleaned with a damp, soapy, non-abrasive cloth and rinsed thoroughly; they are not dishwasher safe.
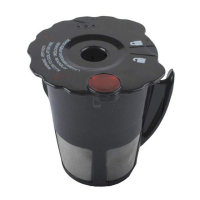
- Cleaning the K-Cup® Pack Holder Assembly:
- Parts Cleaning: The K-Cup® Pack Holder Assembly can be removed by lifting the handle and pushing up on the bottom of the holder from underneath. It is top-shelf dishwasher safe (use low temperature cycles). After cleaning, it snaps back into place using two front ribs as a guide.
- Funnel Cleaning: The funnel, which is part of the K-Cup® Pack Holder, can be removed by pulling it until it snaps off. It is dishwasher safe and snaps back on for replacement.
- Exit Needle Cleaning: The exit needle, located at the inside bottom of the K-Cup® Pack Holder Assembly, can become clogged with coffee grounds. It can be cleaned using a paper clip or similar tool by detaching the funnel and inserting the paper clip into the needle to loosen and push out the clog. Caution is advised due to the sharp needles.
- Cleaning the Water Reservoir & Water Reservoir Lid: These components should be periodically inspected and cleaned. They are not dishwasher safe and should be cleaned with a damp, soapy, non-abrasive cloth and rinsed thoroughly. The inside of the reservoir should not be dried with a cloth to avoid leaving lint.
- Filter Screen Cleaning: The filter screen at the base of the Water Reservoir can be cleaned by rinsing it with a strong stream of water, using a sprayer, or by filling the reservoir with about two inches of clean water and agitating it. Any water filter inside the reservoir should be removed before cleaning. After cleaning, the reservoir should be thoroughly rinsed to ensure no cleaning solutions remain.
- Descaling the Brewer: Calcium deposits or scale can build up in the brewer, affecting performance. Descaling is recommended every 3-6 months, or sooner if the "DESCALE" indicator appears on the LCD Control Center. The descaling procedure involves three steps:
- First Descaling Solution Rinse: Empty the water reservoir, disable "Auto Off" features, and pour an entire bottle of Keurig™ Descaling Solution into the reservoir, followed by an equal amount of water. Power on the brewer, place a large mug on the drip tray, and run a cleansing brew using the largest brew size (without a K-Cup® pack). Discard the contents.
- Second Descaling Solution Rinse: Repeat the brew process without a K-Cup® pack until "ADD WATER" is indicated. Let the brewer stand for at least 30 minutes while still on. After 30 minutes, discard any residual solution and thoroughly rinse the water reservoir.
- Fresh Water Rinse: Fill the water reservoir with fresh water to the MAX FILL line. Place a large mug on the drip tray and run a cleansing brew using the largest brew size (without a K-Cup® pack). Discard the contents. Repeat this process for at least 12 brews, refilling the reservoir as needed. If "DESCALE" is still indicated after this, the procedure should be repeated.
- Purging the Brewer: If the brewer has not been used for more than one week, it is recommended to purge the water from the internal tank. This involves removing, rinsing, and refilling the water reservoir, then performing two cleansing brews using the largest mug button without a K-Cup® pack.
- Storage: Before storing, the water reservoir should be emptied, and the brewer should be stored in an upright, frost-free environment to prevent water leakage or damage from freezing. If stored in a cold environment, allow at least two hours for it to reach room temperature before use. After storage, it's recommended to rinse the water reservoir and run three cleansing brews without a K-Cup® pack.
The manual also provides troubleshooting tips for common issues like the brewer having no power, brewing a partial cup, the clock not displaying, or the brewer turning on/off automatically unexpectedly. For persistent problems, users are directed to contact Keurig Customer Service.