EN
38
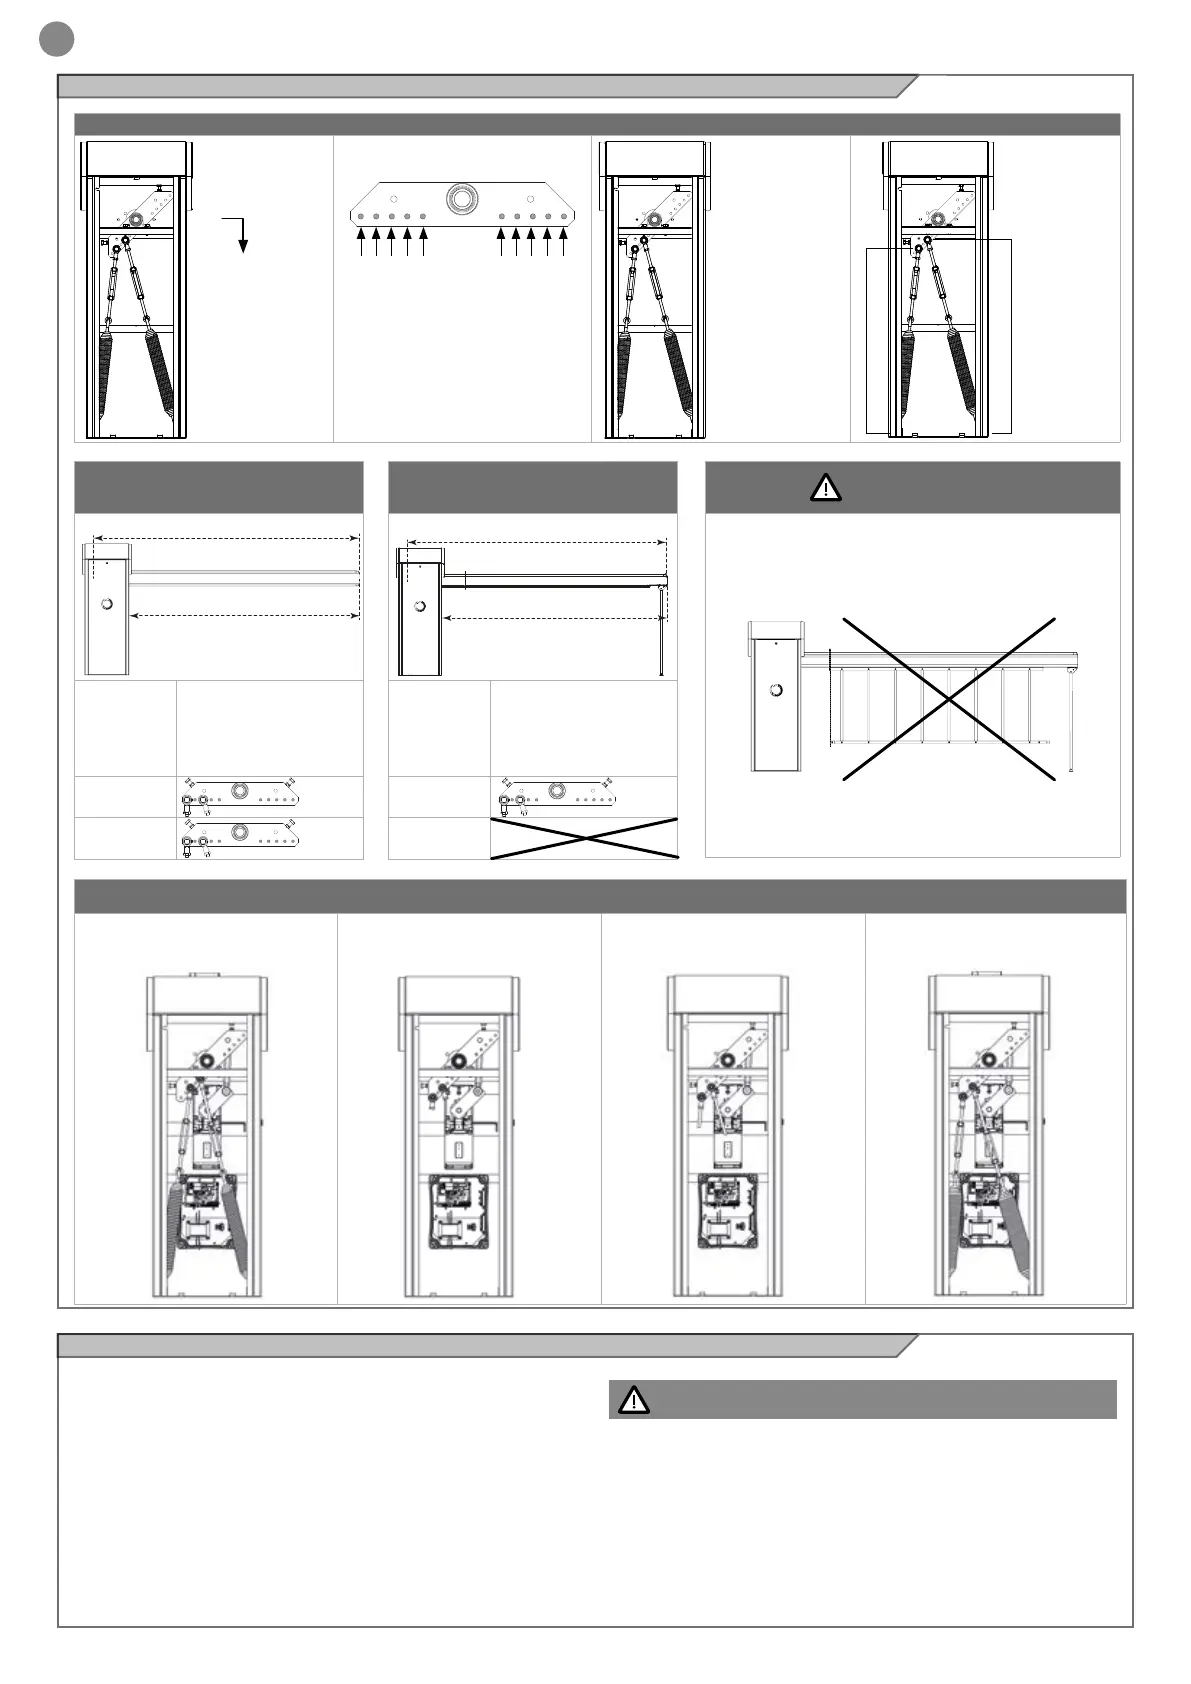
SPRING FIXING
1 - Remove the springs, the
spring tensioners and the threa-
ded bars.
2 - Move and secure the articu-
lated heads in positions 1 and 3.
3 - Screw in the new threaded
bars: the short bar 1 and the
long bar 3.
4 - Fix the new springs with ten-
sioners and a 45° balance arm..
BAR + RUBBER PROFILE
+ MOBILE SUPPORT
L =
BAR LENGTH
(mm)
POSITION
7400
8400
5.9 - ALT624K with ASTL8 Accessories and bar weight balancing
L= LUNGHEZZA ASTA
PL=LUNGHEZZA PASSAGGIO (L-350 mm)
KEY
BAR + RUBBER PROFILE
L =
BAR LENGTH
(mm)
POSITION
7400
8400
ATTENTION !
L= LUNGHEZZA ASTA
PL=LUNGHEZZA PASSAGGIO (L-350 mm)
1 52 43 34 25 1
HOLE NUMBERS
V
D
V
D
1
2
1V1
3D2
1V1
3D2
1V1
3D2
NO KIT FENCE
example of spring
positioning and type:
3D1
3 = HOLE NUMBER
D = SPRING POSITION
1 = SPRING TYPE
SPRING POSITION
V = vertical position
D = diagonal position
SPRING TYPE
1=spring + short
tie rod
2=spring + long
tie rod
N.B. The LED strips are always included in the balance system
5.10 - Balancing
To balance the bar proceed as follows:
- disconnect the power supply and release the bar as described in
paragraph 5.3
- open the barrier door (Fig. 7)
- move the bar manually, keeping its opening angle at approximately
45°
- check that the balancing of the bar opened to an angle of 45° is en-
sured, i.e. the springs must be able to correctly balance the weight
of the bar (Fig. 19)
- if the bar balance is not ensured, bring the bar back to a vertical po-
sition and work the tensioners to increase or decrease the tension of
the springs until the bar reaches a stable balanced condition at 45°
Stretch the springs progressively so that both can equally con-
tribute to balancing
- tighten the tensioner lock nuts to prevent them from becoming loo-
se during normal operation and lock the bar again
- restore the power supply and check that the automation system is
working properly
We recommend to check the correct balance every 6 months or
every 50,000 opening/closing cycles
ATTENTION !
L=BAR LENGTH
L=BAR LENGTH
PL=PASSAGE WIDTH (L-350 mm)
PL=PASSAGE WIDTH (L-350 mm)