Chapter 6: Replacing Assemblies
To remove and replace the power supply
133
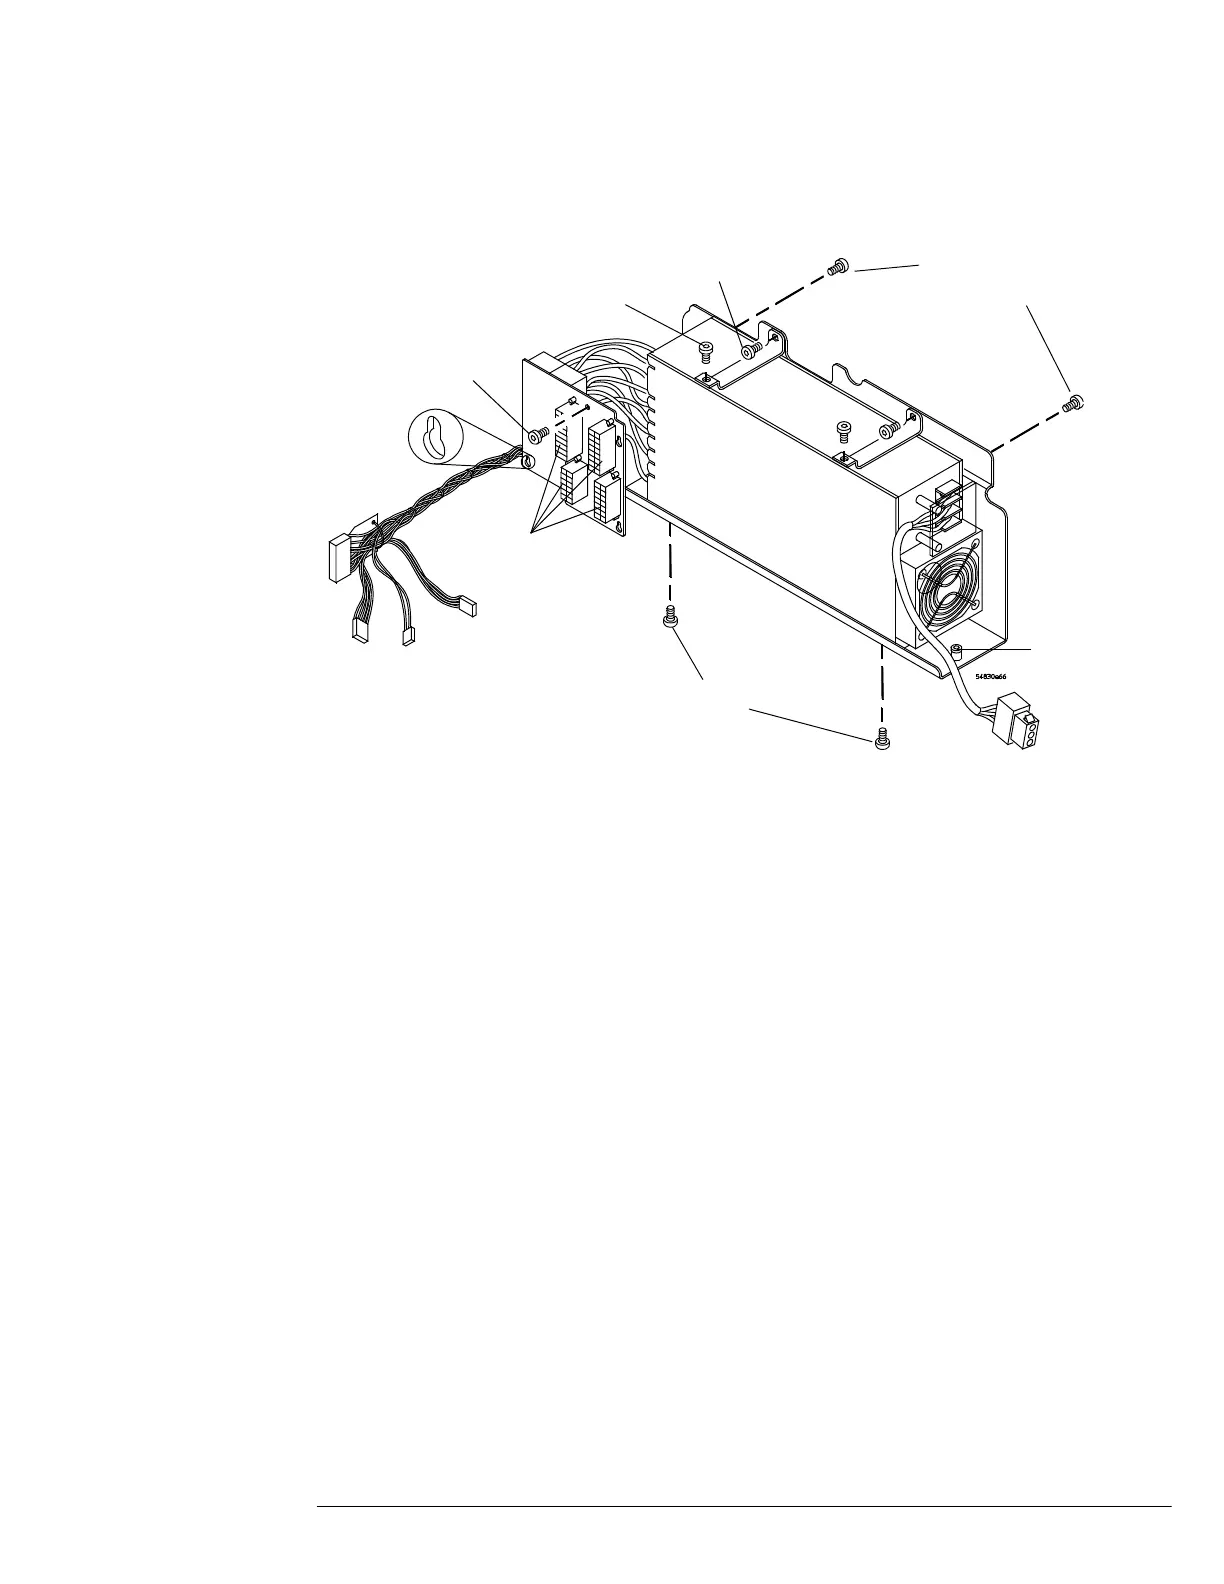
Figure 6-33
Removing the power supply and brackets
4 Disconnect the 4 cables from the power interface board connectors and remove
the Torx T10 screw securing it to the frame.
5 Slide the power interface board up to remove it from the standoffs.
Note the detail of the key-hole slots in See Figure 6- 33.
6
Remove the two Torx T10 screws that hold the top support brackets to the
chassis.
When re- assembling, torque the two Torx T10 screws to 5 in- lb.
7
Remove the two Torx T20 screws that hold the top support brackets to the
power supply bracket.
When re-assembling, torque the Torx T20 screws to 18 in-lb.
8
Loosen the two Torx T20 screws at both ends of the power supply bracket that
secure the bracket to the frame.
These screws are part of the power supply bracket and can not be removed from
the bracket.
9
Remove the power supply and power supply bracket from the chassis taking
care to avoid damaging any of the cables.
10 Remove the two Torx T20 screws from the side of the power supply bracket.
When re-assembling, torque the Torx T20 screws to 18 in-lb.
11
Remove the two Torx T20 screws from the bottom of the power supply bracket.
When re-assembling, torque the Torx T20 screws to 18 in-lb.
12
Separate the power supply from the power supply bracket.
13 To replace the power supply, reverse the removal procedure.
Power supply
Support
bracket T10
screws (2)
T20 screws
(side bracket)
T20 screws
(bottom
bracket)
T20 screws (2
bracket to
frame)
Power
interface
board
connectors
T10
screw
Detail of
key-hole
slots (4)
Support
bracket T20
screws (2)
 Loading...