Assemble units as described herein only. To do otherwise
may result in instability. All screws, nuts and bolts must be
tightened securely and must be checked periodically after
assembly. Failure to assemble properly, or to secure parts
may result in assembly failure and personal injury.
5
Genesis
®
Desking - Crank Height-Adjustable Desk
Assembly Instructions
Crank Height-Adjustable Desk
Chain Installation
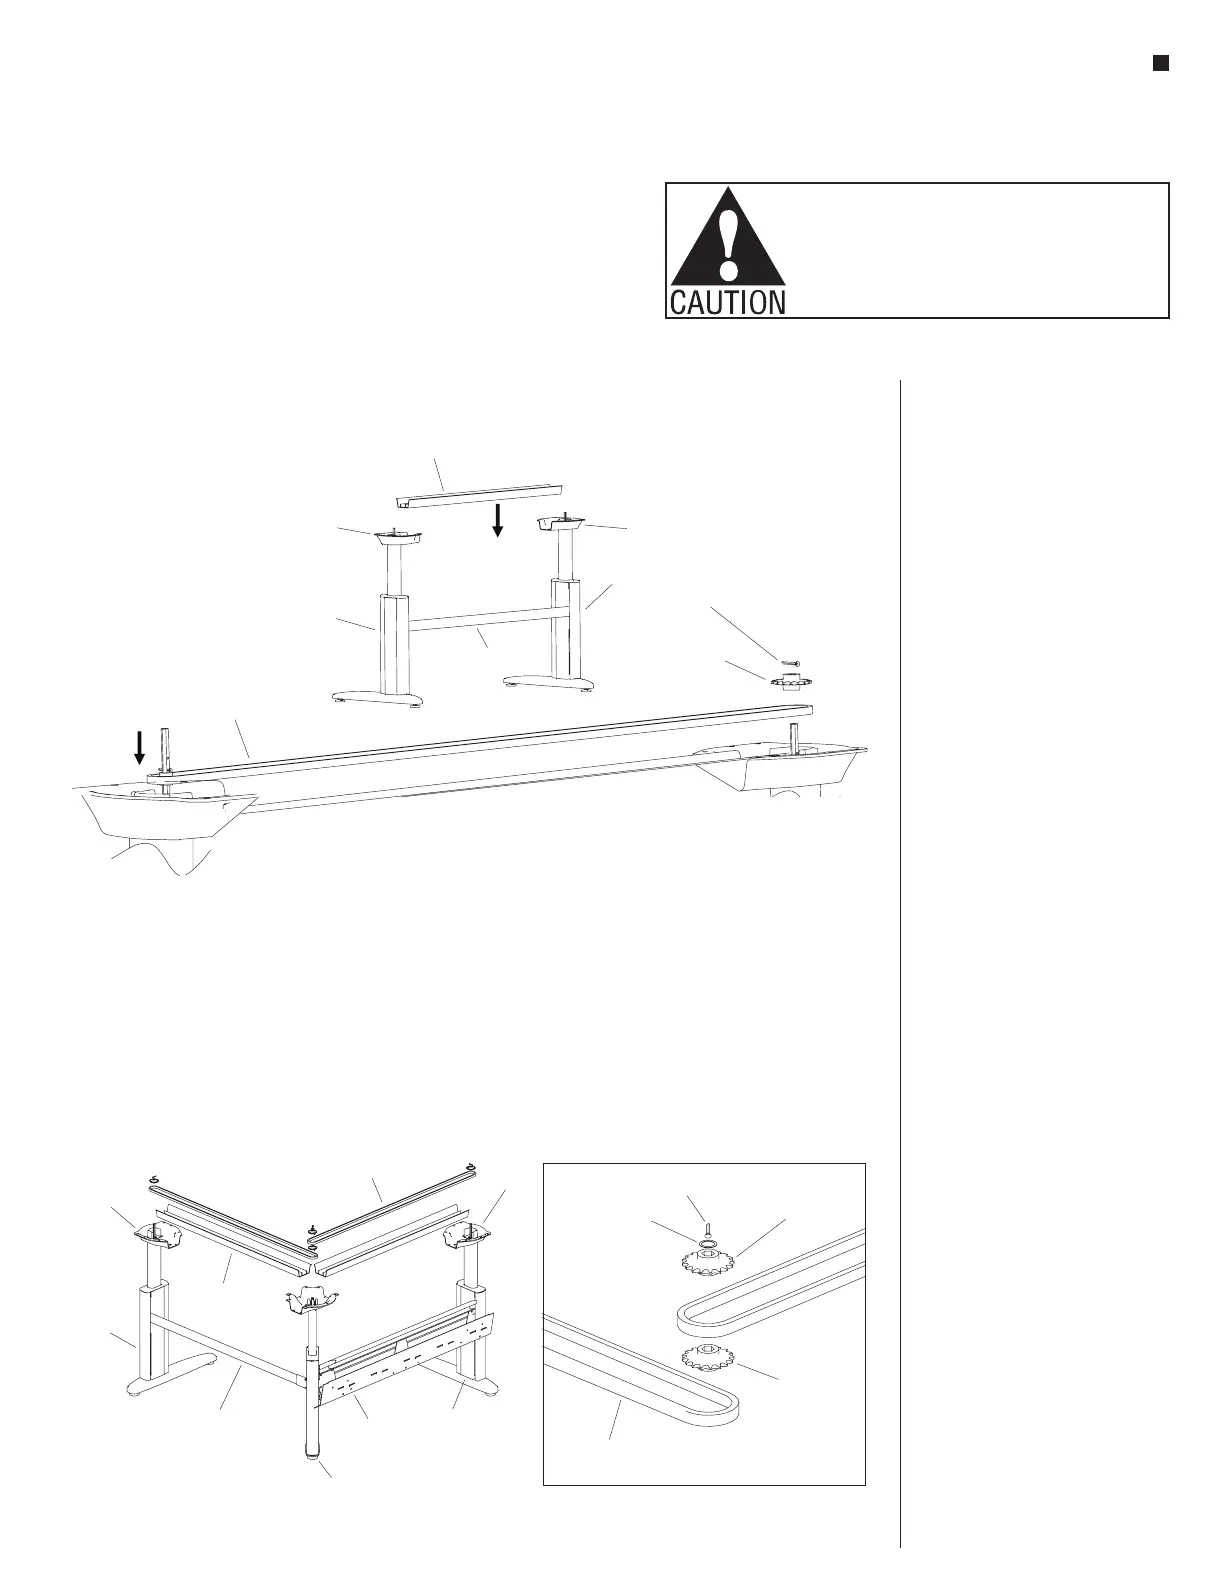
1. With the cross brace and/or wire
trough securely attached to legs, lay
the plastic chain channel in the leg
pockets (Figure 10).
2. Remove the cotter pin and plastic
sprocket from the hexagonal shaft in
each leg.
3. Insert sprockets into chain loop and
slide sprockets down over hexagonal
shafts, leaving equal amounts of
slack on both sides. Make sure each
side of the chain loop is positioned
within the leg pocket.
Note: On three leg desks, there are
two sprockets and a washer on the
post leg hexagonal shaft. The washer
is positioned on top of the top
sprocket (Figure 11 & Detail E).
4. Secure each sprocket with a cotter
pin.
chain
standard leg
leg pocket
plastic chain channel
leg pocket
standard
leg
cotter
pin
plastic sprocket
cross brace
wo Leg Desk
chain
leg pocket
leg
leg
standard
leg
wire
trough
post leg
cross brace
plastic chain
channel
Figure 11 - Three Leg Desk
chain
cotter pin
plastic sprocket
washer
plastic
sprocket


 To Next Page