10
Striptheinsulation:
•
When adding a length of wire to the existing harness, use the same size wire as the original
wire.
•
Perform one of the following items in order to find the correct wire size:
Find the wire on the schematic and convert to regional wiring gauge size.
If you are unsure of the wire size, begin with the largest opening in the wire stripper and work down until
achieving a clean strip of the insulation.
•
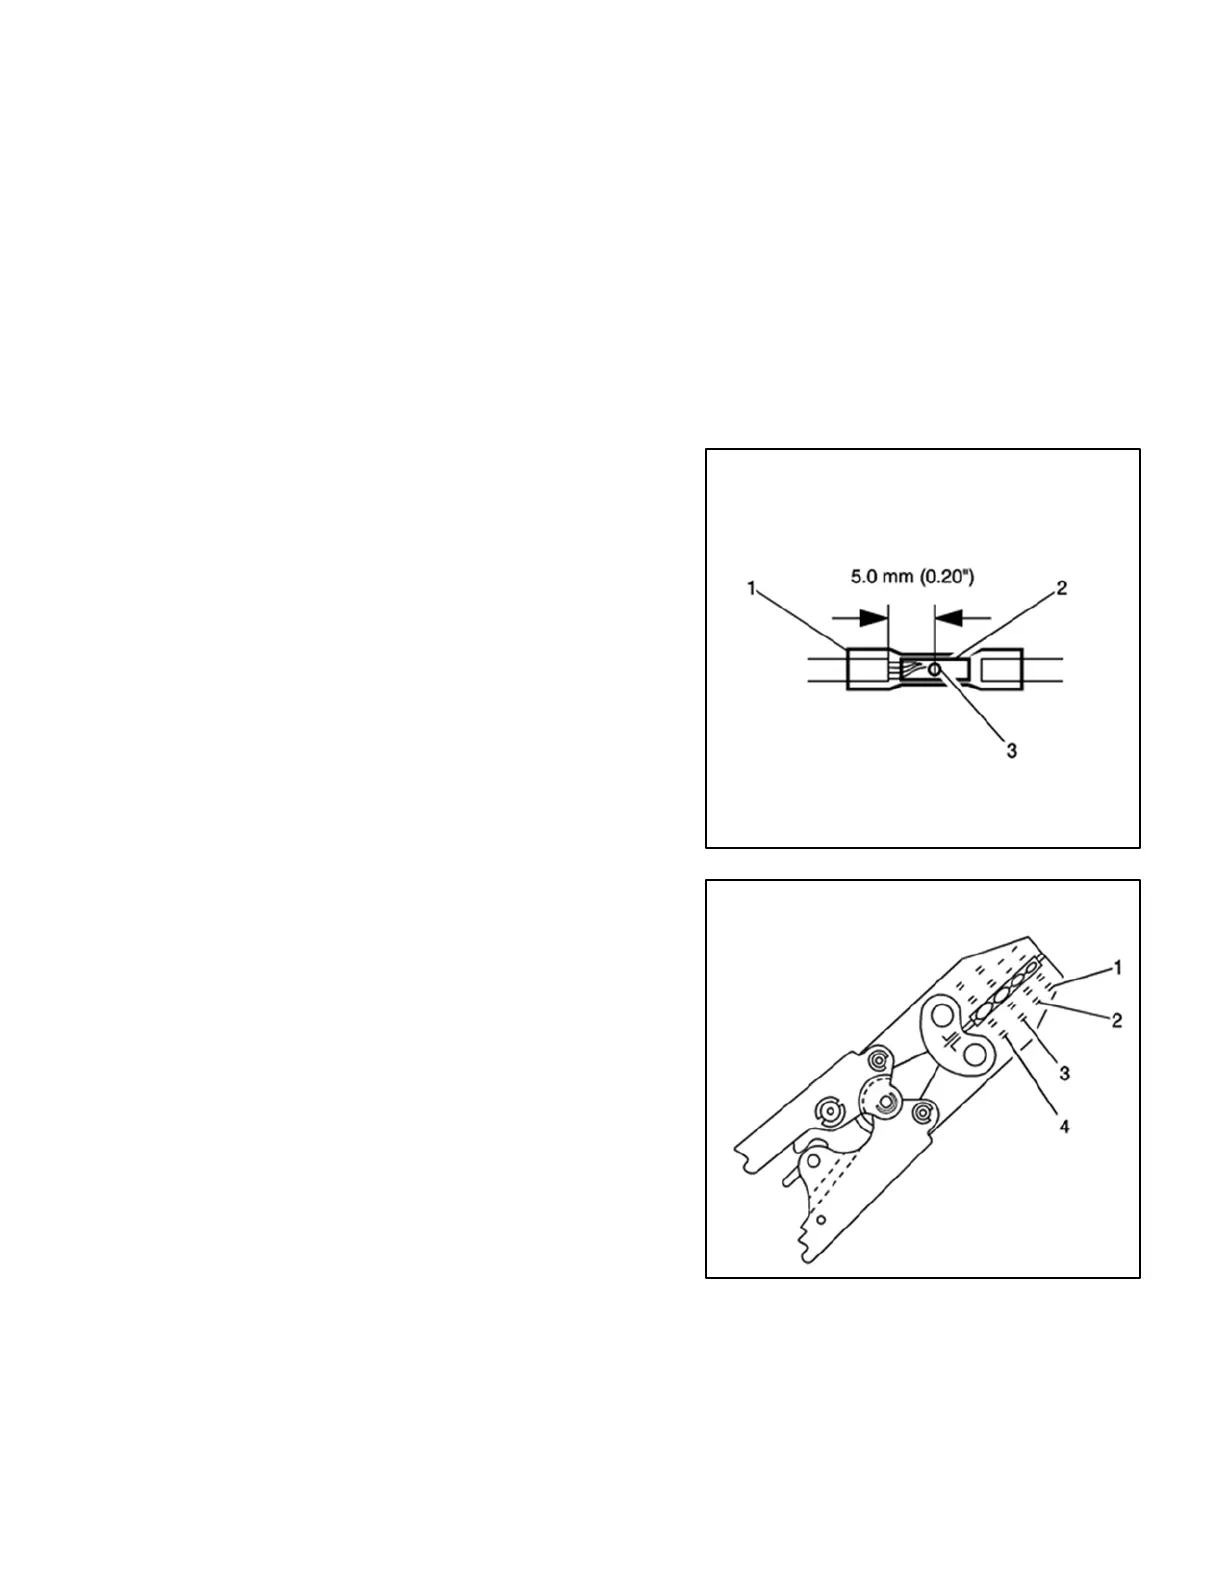
Strip approximately 5.0 mm (0.20 in) of insulation from each wire to be spliced.
•
Do not nick or cut any of the strands. Inspect the stripped wire for nicks or cut strands.
•
If the wire is damaged, repeat this procedure after removing the damaged section.
For high temperature wiring, slide a section of high
temperature SCT1 shrink tubing down the length of wire
to
be spliced. Ensure that the shrink tubing will not interfere
with the splice procedure.
Select the proper DuraSeal splice sleeve according to the
wire size. Refer to the above table at the beginning of the
repair procedure for the color coding of the DuraSeal
splice sleeves and the crimp tool nests.
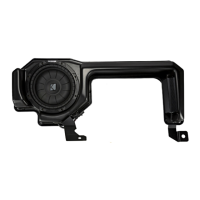
The EL-38125-10 splice sleeve crimping tool has four crimp
nests. The largest crimp nest (4) is used for crimping 10
and 12 gauge wires. The second largest crimp nest (3) is
used for crimping 14 and 16 gauge
wires. The third
largest crimp nest (2) is used for crimping 18 and 20
gauge wires. The smallest crimp
nest (1) is used for
crimping 22 to 26 gauge wires. The crimp nests are
referenced in the table (farther
above) under the crimp
tool nest color.



 To Next Page