(Mounting, continued)
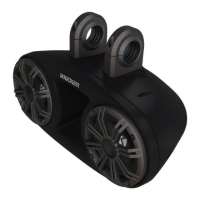
Similar cautions must be observed when mounting speakers through the package tray
of a car. Watch for trunk springs, hinges, and folding seat mechanisms. When running the
wires be careful not to crush them with seat bolts or door sill screws.
Wiring
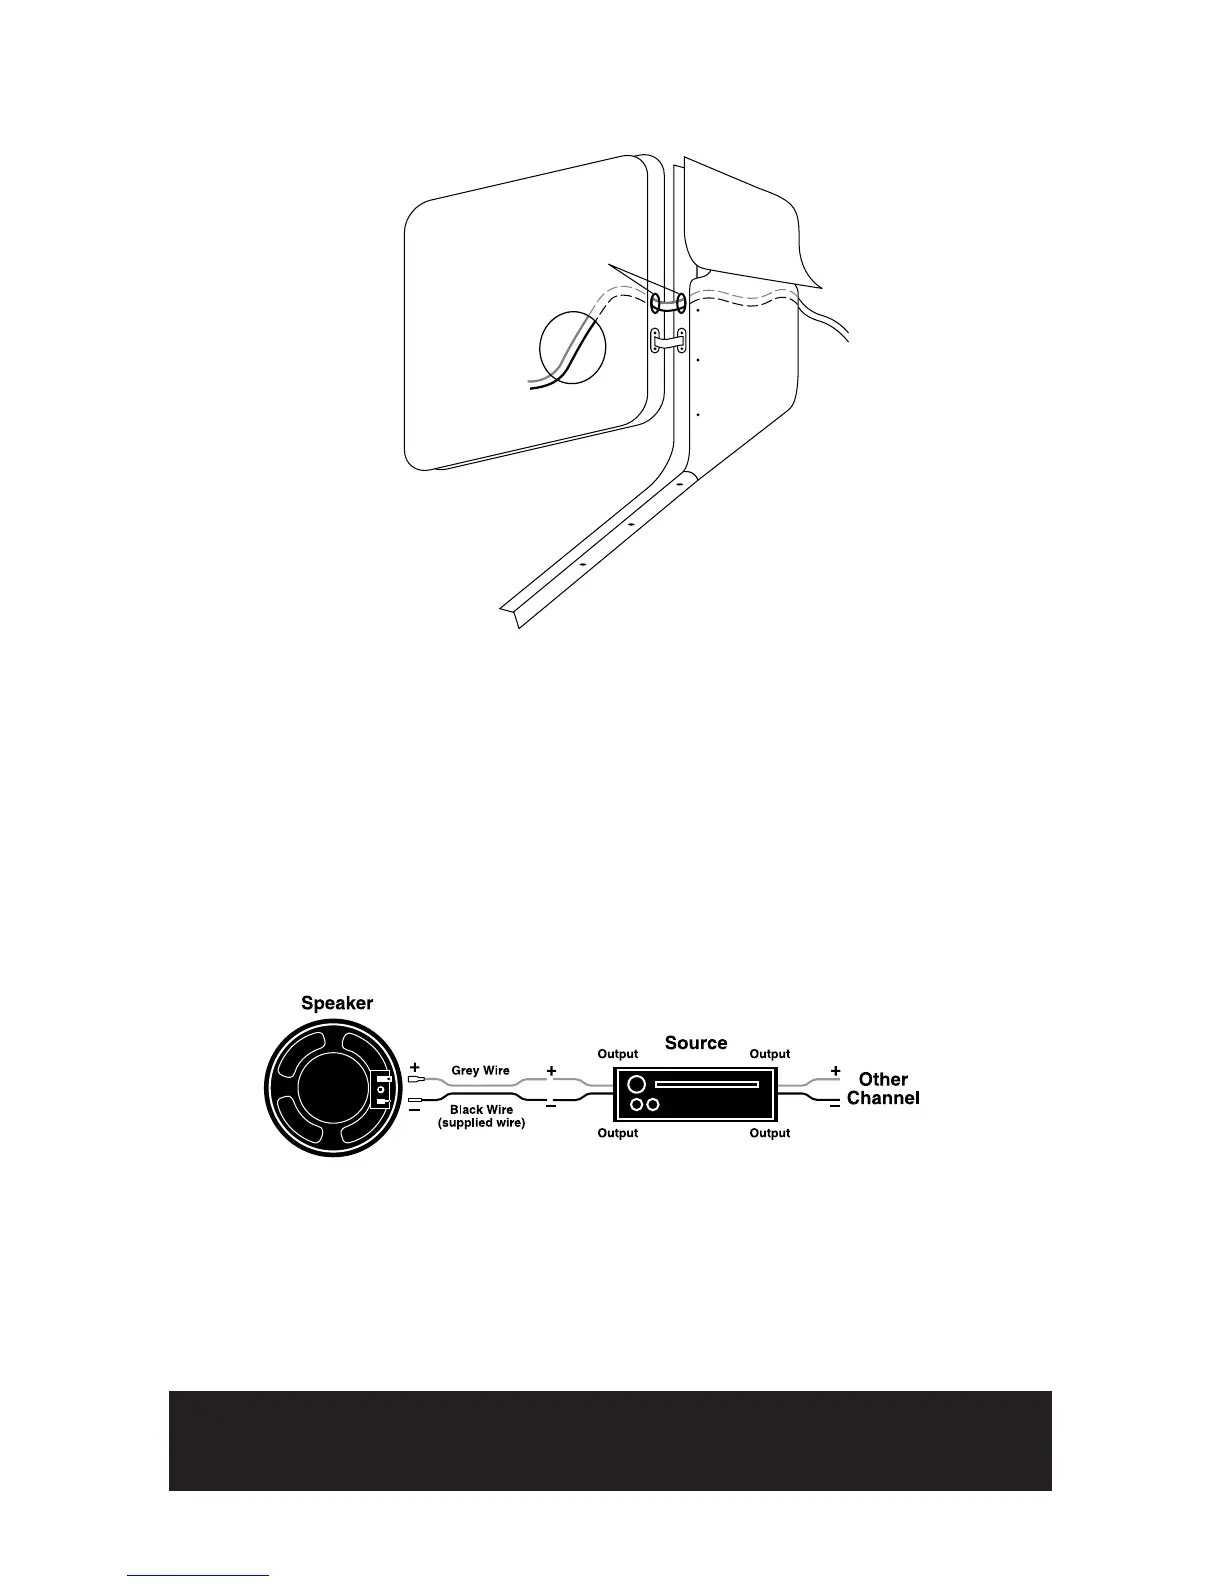
Hooking up the supplied wires to your IMPULSE driver is very straightforward. The wires
come with different size ends that will only plug on one way. The larger connector is
crimped on the gray wire and connects to the positive terminal of the speaker. The other
end of these wires connects to your source in a similar manner. The gray wire connects to
the positive output of the amplifier or radio. The black wire connects to the negative out-
put of the amplifier or radio. These connections can be made with crimp-on connectors or
solder and good electrical tape.
If you have more questions about the installation of your KICKER component, see
the Authorized KICKER Dealer where you made your purchase. You may also call our
Technical Services Line at (405)624-8583 or contact us via the Technical Services
page on www.kicker.com.
For superior midbass performance ask your Authorized Kicker Dealer for
the KICKER Impulse I6.0 midbass component system which comes with a two
way passive crossover network optimized for use with your coax or 3-way.
 Loading...