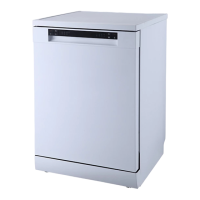
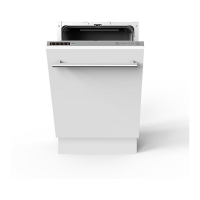
This document describes the FS60DISHUK / FS60DISHEU dishwasher, a free-standing appliance designed for domestic household use.
Function Description
The dishwasher is equipped with a control panel featuring several buttons and indicators for operation.
- Power (1): Turns the dishwasher on/off.
- Half Load (2): Used for six place settings or less; the Rapid option is not available with this setting.
- Program (3): Cycles through six wash programs: Intensive, Universal, ECO, 90 Min, Glass, and Rapid.
- Delay (4): Sets a delayed start time for 3, 6, or 9 hours.
- Start/Pause (5): Starts or pauses the selected program; the door must be closed first.
- Fast Drying (6): Reduces drying time; the Rapid option is not available with this setting.
- Child Lock (7): Prevents accidental operation of the control panel (except the Power button); press and hold for three seconds to lock or unlock.
The display (8) shows the selected program with corresponding indicators:
- Intensive: For heavily soiled items, including pots and pans with dried-on food.
- Universal: For normally soiled pots, pans, and glasses.
- *ECO (EN60436): Similar to Universal but uses less water and energy; this is the most efficient program in terms of combined energy and water consumption and complies with EU Ecodesign Legislation.
- 90 Min: Similar to Universal but with a shorter cycle.
- Glass: For lightly soiled cups and glasses with a drying cycle.
- Rapid: For lightly soiled cups and glasses that do not need a drying cycle.
Warning indicators (10) include:
- Rinse Aid: Lights up when the rinse aid reservoir needs refilling.
- Salt: Lights up when the salt reservoir needs refilling.
- Water Supply: Lights up when the tap at the mains water inlet needs to be turned on.
Important Technical Specifications
- Dimensions:
- Height (H): 845 mm
- Width (W): 598 mm
- Depth (D1, door closed): 600 mm
- Depth (D2, door opened at 90°): 1150 mm
- Place Settings: 12
- Energy Efficiency Index (EEI): 55.9 (Energy efficiency class E)
- Cleaning Performance Index: 1.125
- Drying Performance Index: 1.065
- Energy Consumption (per cycle, ECO program): 0.923 kWh
- Water Consumption (per cycle, ECO program): 11.0 L
- Program Duration (ECO program): 3:50 (h:min)
- Airborne Acoustical Noise Emissions: 55 dB(A) re 1 pW (Emission class D)
- Water Pressure: Maximum 1 MPa, Minimum 0.04 MPa
- Electrical Connection: Class I appliance, must be earthed. Supplied with a 3-core mains cable (Brown = Live, Blue = Neutral, Green and Yellow = Earth). Replacement fuse rated at 13 Amps (UK only).
Usage Features
Before First Use:
- Water Hardness Setting: The appliance's water softener can be adjusted from H1 (very soft) to H6 (very hard). This setting should match your local water supply's hardness. If water is very soft (H1), dishwasher salt is not required. The factory default is H3. To adjust, turn on the appliance, then within one minute, press the Program button until the Salt indicator flashes. Cycle through H1-H6 with the Program button and release to store.
- Filling the Salt Container: Remove the lower basket, unscrew the cap, and fill the container with 500 ml of water before adding dishwasher-compatible salt. Use the provided funnel (06) to add salt until it reaches the rim. Avoid overfilling. The salt indicator light usually turns off after the first complete wash cycle.
- Filling the Rinse Aid Dispenser: The rinse aid dispenser is located on the detergent panel inside the door. Turn the cap anti-clockwise 90° to remove it. Carefully pour dishwasher-compatible rinse aid into the container, guided by the optical indicator. The optical indicator shows a complete dark dot when full. Refill when the indicator is no lower than 1/4 full. The rinse aid dispenser has six settings (factory set at 4). Adjust anti-clockwise to increase rinse aid if water drops remain on dishes, or clockwise to reduce if white streaks appear.
- Adding Detergent: Use only dishwasher-compatible powder or tablets. Follow manufacturer guidelines for quantity. For heavily soiled dishes and powder detergent, use both main wash (A) and pre-wash (B) compartments. Tablets should only be placed in the main wash compartment. For shorter rapid wash cycles, powder detergent is recommended as tablets may not fully dissolve.
Loading Baskets:
- Only wash dishwasher-safe items. Avoid wood, aluminum, copper, bone china, or lead crystal glasses.
- Remove residual food from items. For baked-on food, soak first.
- Small, light items should not be washed as they may be dislodged.
- Ensure glasses and fragile items do not touch each other.
- All containers (glasses, cups, pans) should be placed upside down and stable.
- Large carving knives should be laid flat in the upper basket, not upright.
- Ensure no items block the rotation of the spray arms.
- For best results with a small number of items, spread them across all baskets.
Adjusting the Upper Basket:
The upper basket height can be adjusted by holding the handles on both sides and raising or lowering until it clicks into place. This creates more space for larger utensils in either the upper or lower basket. Long items should be laid flat to avoid obstructing spray arm rotation. Glass supports can be used for fragile stems or folded vertically.
Starting a Wash Program:
- Load the dishwasher, add detergent, and close the door.
- Press the Power button. The default ECO program will be selected (ECO icon flashes).
- To select a different program, press the Program button [>] to cycle through options.
- Press the Start/Pause button to begin the cycle.
Changing or Cancelling a Wash Program:
Press the Power button to cancel the current cycle. Press Power again to reset to ECO and select a new program. If detergent has already been dispensed, check the dispenser before starting a new program.
Adding Items During a Wash Program:
Carefully open the door to disengage the lock. Do not fully open if spray arms are still rotating to avoid scalding. A warning beep will sound every sixty seconds if the door is open during a program. Close the door promptly to resume or press the Power button to cancel.
Unloading Baskets:
After the program finishes, an audible beep will sound eight times, and the display will show "-:--". Press the Power button to turn off the appliance, open the door, and allow items to cool before handling (they will be hot). Empty the lower basket first, then the upper basket.
Maintenance Features
Filter Cleaning:
The filter system consists of a flat mesh filter and a two-part cylindrical filter (coarse and fine). It is recommended to clean the filters weekly.
- Remove the bottom basket and turn the lower spray arm parallel to the front.
- Twist the top of the cylindrical filter (2) anti-clockwise 45° and lift out the assembly.
- Squeeze the two lugs (4) on the coarse filter (2) and lift it out of the micro filter (3).
- Slide the flat mesh filter out from underneath the spray arm.
- Remove large food debris and wash filters with a brush in warm soapy water.
- Reassemble in reverse order, ensuring lugs are correctly seated and the assembly locks into place with a 45° clockwise turn.
- WARNING: Never use the appliance without filters in place.
Spray Arm Cleaning:
Check spray arms weekly for blockages from limescale or food particles.
- Bottom Arm: Remove the bottom rack, pull the arm vertically upwards, clean jets with a small brush and running water, then push down until it clicks into place.
- Top Arm: Can be removed with the top rack in place. Slide the top rack forwards, unclip the front and back from the underside of the top rack. Unscrew the locking nut clockwise to remove the spray arm from the feeder pipe. Clean jets with a small brush and running water. Reassemble by tightening the locking nut and clicking the feeder arm into place. Ensure the feeder pipe engages with the water supply when the top rack is pushed in.
Dishwasher Cleaning:
- Regularly wipe door seals with a damp cloth to remove debris. Prevent water from entering the lock or electrical components.
- WARNING: Do not use abrasive cleaners or scouring pads as they will scratch the finish.
- After each wash, leave the door slightly ajar to disperse moisture and odors.
- Unplug the appliance before cleaning.
- Occasionally use proprietary dishwasher cleaning and descaling products to maintain internal cleanliness.
General Safety and Installation:
- Installation must be performed by a suitably qualified person, strictly following local building regulations and these instructions.
- The appliance must not be used with an external timer or remote control system.
- Remove all packaging before first use and clean all parts.
- Do not use outdoors, in bathrooms, or humid environments.
- Children under 8 years old must be supervised.
- Do not leave unattended while in use.
- Use on a stable, flat, clean, dry, non-slip surface.
- For domestic household use only.
- WARNING: This appliance is for cleaning crockery and cutlery only. Do not use for cleaning clothes, shoes, steaming food, or similar tasks.
- WARNING: Risk of fire and electrical shock.
- WARNING: Knives and other sharp utensils must be loaded in the basket with points down or placed horizontally.
- Do not open the door when running unless necessary, and be careful of hot steam/water.
- Keep all dishwasher chemicals and detergents out of reach of children and pets.
- The door is spring-loaded; do not let it slam.
- Do not put other loads on the open door as the product may tilt.
- Do not change appliance specifications.
- Ensure ventilation openings are not blocked.
- Deactivate after each use.
- Do not operate with wet hands.
- Do not stand or apply pressure on the open door.
- Do not use as a work or storage surface.
- If installed behind a furniture panel, ensure the door is never closed during operation.
- Never leave the door open except during loading/unloading to avoid tripping hazards.
- No warranty claims for damage from misuse or improper handling.
- Use new hose-sets provided; dispose of old ones at a local recycling center.
- Never attempt to dismantle the appliance.
- Before maintenance, deactivate and disconnect from mains.
- Allow disconnection from supply after installation.
- Clean regularly to prevent surface deterioration.
- Do not use a steam cleaner.
Error Codes:
- Water Supply light on: Insufficient water. Check water pressure and supply tap.
- Rapid and 90 Minute program lights flicker: Water not hot enough. Heating element issue – contact Customer Services.
- ECO program light flickers: Water overflow. Possible leakage – contact Customer Services.
- Universal, Rapid, and ECO program lights flicker: Display issue. Contact Customer Services.
- WARNING: Do not attempt repair yourself. Contact Customer Services.
Availability of Spare Parts:
Spare parts are available for a minimum of seven years for professional repairers, or ten years for professional repairers and end-users. Contact Customer Service or visit www.kingfisherspares.com. Information is also available at www.kingfisher.com/products.
Recycling & Disposal:
Waste electrical products (WEEE) should not be disposed of with household waste. Recycle where facilities exist. Consult local authorities or the retailer for recycling advice. The crossed-out wheelie bin symbol indicates that the product should not be treated as normal household waste and must be handed over to an electrical and electronic equipment collection point for recycling. Correct disposal helps prevent negative environmental and public health consequences.