30
EN
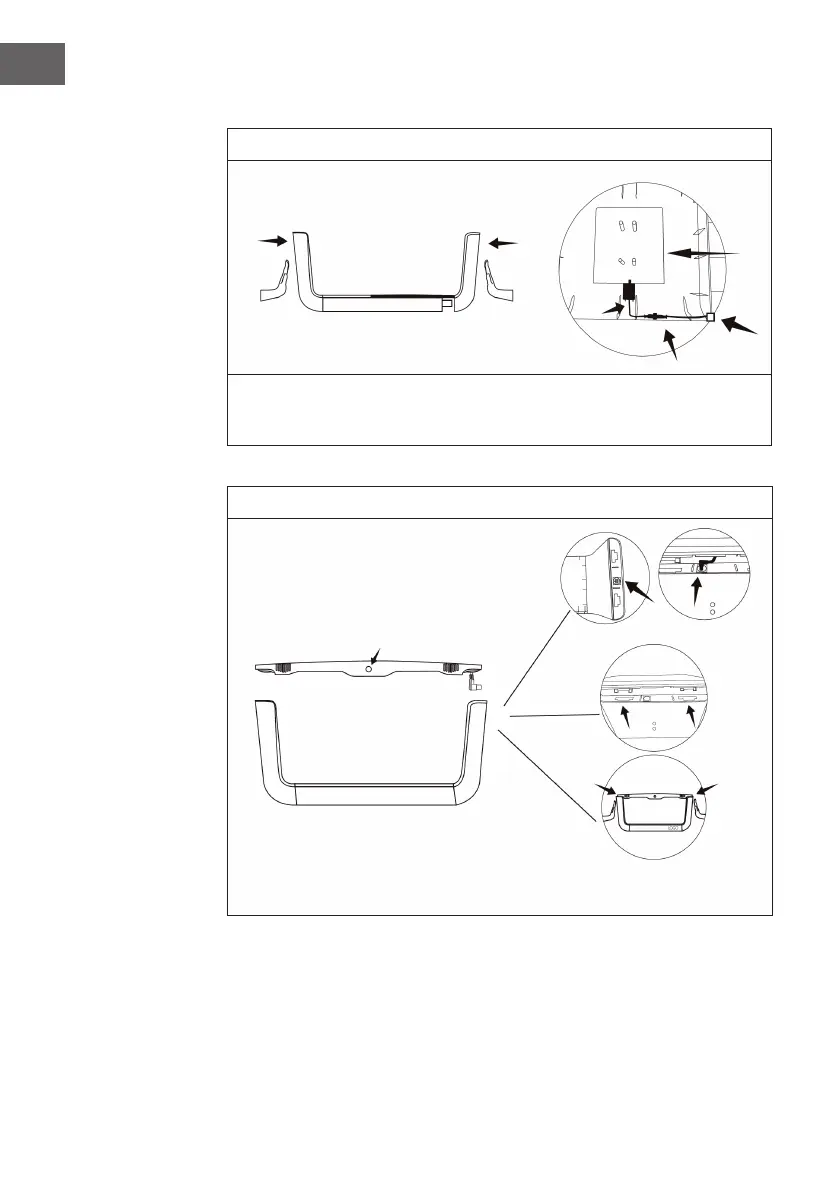
Assembly
1
Make sure that the logo is facing forward. Before installing, pull the pump from right
side plate and then x the four supporting columns and the pump as shown in the
gure (note that the outlet of the pump is facing inward).
2
Top with button on the front
Insert the power cord from the
roof into the right panel
After the roof is clamped, push the both
sides to the middle and the assembly is completed