Do you have a question about the Kluber Lubrication Klubermatic PRO and is the answer not in the manual?
Purpose of the manual and definitions of key terms used throughout the document.
Explanation of safety symbols, liability, and warranty terms.
Roles for safe operation and broad safety advice.
Safety for installation, lubricants, electrical equipment, and batteries.
Steps for system assembly and replacing the lubrication canister.
Calculating lubricant needs and discharge intervals.
Configuring system parameters via the control menu.
Procedure for saving chosen configurations.
Instructions for powering the system on and off.
Details on product contents, checking delivery, and proper storage.
Product identification, manufacturer, and approved applications.
Detailed technical specifications, operating ranges, and performance data.
Description of the lubricator's parts: cover, LC, battery, drive unit.
Instructions for attaching the drive unit to a fixing device for wall-mounting.
Steps for inserting the battery and the lubrication canister.
Procedure for attaching the protection cover to the drive unit.
Overview of the control unit's display, LEDs, and their meanings.
Details on the MODE/SAVE and ON/OFF/SELECT buttons.
Pre-operation checks and system readiness.
Steps for starting the system and checks during operation.
Using charts to find the correct discharge period based on lubricant needs.
Guide to navigating the menu for LC size, Time, Outlets, and PIN settings.
Detailed explanation of menu sections: LC size, time, outlets, PIN.
How to perform an additional lubricant discharge.
Understanding system behavior and shutdown at low temperatures.
Formula and example for calculating remaining lubricant life.
Indications for replacement and the procedure.
Configuring the system for the new PRO LC size.
Detailed steps for replacing the lubrication canister and battery.
Interpreting error codes and indicators on the display.
Chart for diagnosing and resolving malfunctions.
Instructions for environmentally responsible product disposal.
Steps for system assembly and replacing the lubrication canister.
Calculating lubricant needs and discharge intervals.
Configuring system parameters via the control menu.
Using impulse mode with an external control system.
Procedure for saving chosen configurations.
Instructions for powering the system on and off.
Details on product contents, checking delivery, and proper storage.
Product identification, manufacturer, and approved applications.
Detailed technical specifications, operating ranges, and performance data.
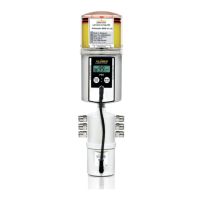
Description of the lubricator's parts: cover, LC, battery, drive unit, cable.
Instructions for attaching the drive unit to a fixing device for wall-mounting.
Steps for placing the PRO LC into the protection cover.
Steps for inserting battery, PRO LC, and securing the cover.
Procedure for connecting the lubricator to the control system.
Overview of the control unit's display, LEDs, and their meanings.
Details on the MODE/SAVE and SELECT buttons.
Pre-operation checks and system readiness.
Steps for starting the system and checks during operation.
Using charts to find discharge period based on lubricant needs.
Guide to navigating the menu for LC size, Time, Outlets, and PIN settings.
Detailed explanation of menu sections: LC size, time, outlets, PIN.
How to perform an additional lubricant discharge.
Understanding system behavior and shutdown at low temperatures.
Formula and example for calculating remaining lubricant life.
Using impulse mode with an external control system.
Indications for replacement and the procedure.
Configuring LC size and detailed steps for canister replacement.
Interpreting error codes and signals from the control system.
Chart for diagnosing and resolving malfunctions.
Instructions for environmentally responsible product disposal.
Overview and comparison to PRO/PRO C systems.
Programming discharge strokes, pause times, and operational modes.
Understanding system life and overriding settings.
Using impulse and mixed operational modes.
Guide to setting LC size, time, outlets, strokes, and PIN.
Description of distributor parts and available accessories.
Steps to activate individual outlets on the lubricator system.
Steps for assembling the distributor and connecting it to the lubricator.
Calculating lubricant needs for multiple outlets.
Configuring and initiating the complete system.
Details on product contents, checking delivery, and proper storage.
Product identification, manufacturer, and approved applications.
Detailed technical specifications, dimensions, and operating parameters.
Description of the distributor's housing and grease line connections.
Details on plugs for sealing and connecting cables.
Steps for fitting connections and sealing unused outlets.
Warnings regarding the distributor's housing and screws.
Procedure for attaching and connecting the distributor and lubricator.
Steps for mounting the distributor and lubricator separately.
Pre-installation checks and system readiness.
Steps for setting up and initiating the system.
Instructions for powering the system on.
Instructions for powering the system off.
Calculating discharge period considering multiple outlets.
Using additional discharge and calculating remaining period.
Steps to select and activate specific outlets on the distributor.
Procedures for system initialization after setup or component exchange.
Steps to activate and initiate the automatic prefilling process.
Interpreting error codes and using the troubleshooting guide.
Instructions for environmentally responsible product disposal.
Spare lubrication canisters and protective covers for PRO systems.
Spare drive units and backup batteries for PRO systems.
Spare parts for PRO C, including cables and connectors.
Spare parts for the MP-6 distributor, plugs, and grease lines.
Grease cartridges for prefilling and protective boxes.
Manufacturer's declaration of compliance with EU directives.
Manufacturer's declaration of compliance with EU directives.
Manufacturer's declaration of compliance with EU directives.
Dimensions and screw locations for mounting the system.
| Brand | Kluber Lubrication |
|---|---|
| Model | Klubermatic PRO |
| Category | Lubrication systems |
| Language | English |