1601 W. DEER VALLEY RD. PHOENIX, AZ 85027 | T. 800-552-5669 | TECHSUPPORT@KNOXBOX.COM | KNOXBOX.COM | PAGE 9
OPE-MVUSER-0473-D
©Knox Company. All rights reserved.
MEDVAULT
®
INSTALLATION GUIDE
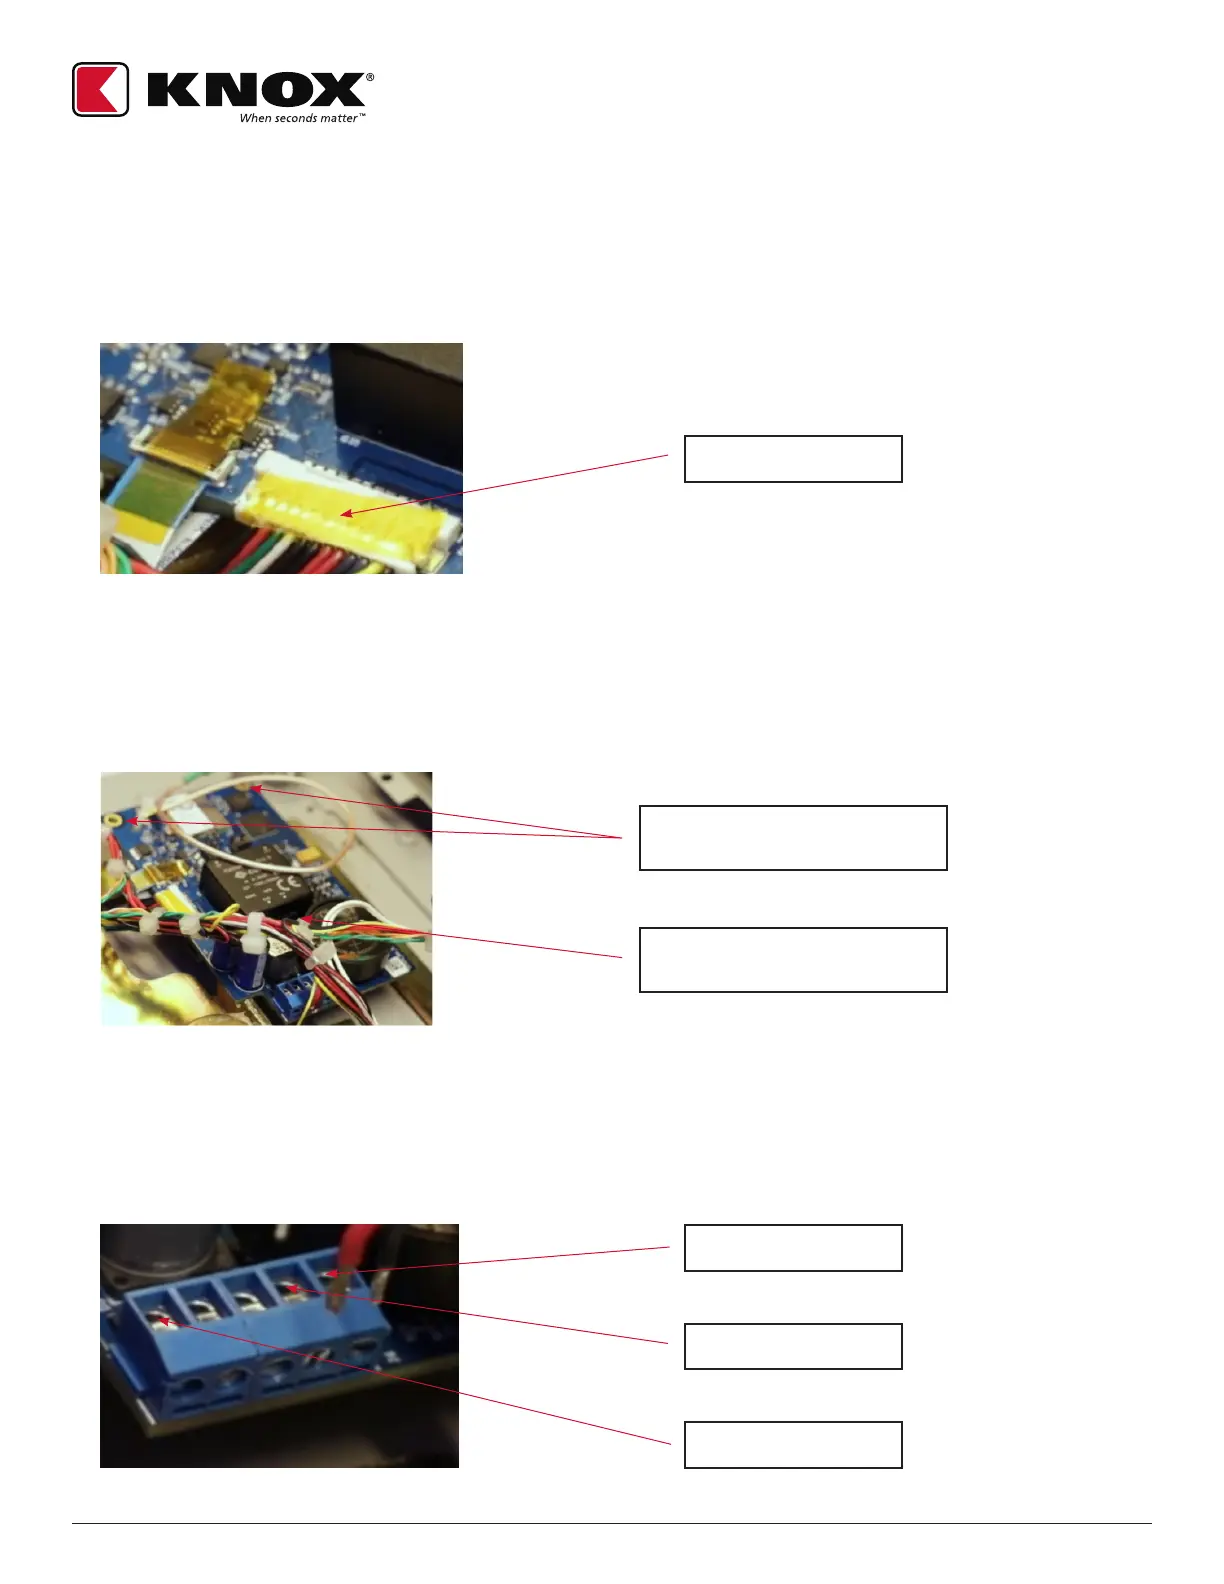
Step #13 Add Kapton tape to Connectors
• Using the Kapton tape strips supplied in the kit, apply Kapton tape over the keypad display connection
and the IO connection
• Kapton tape length will extend onto circuit board
Step #14 Install the New board
• Insert two (2) of the original board fastening screws into the two holes in the top edge of the board and
secure using a screwdriver. Do not over-tighten.
• In the third location near the terminal block, insert and tighten the screw that is included in the retrofit
kit. This screw is a dierent length.
Step #15 Connect Power Wires to terminal block
• Insert the black ground wire into position number 5 (left to right) in the terminal block and tighten
with a screwdriver.
• Insert the red power wire in position #4. The last wire to install is the yellow light wire in position
number 1. Ensure the wires are installed in the correct position in the terminal block.
Kapton Tape
Black Ground Wire
Red Power Wire
Yellow Light Wire
Fasten with screw from
original circuit board
Fasten with screw from
Retrofit Kit

 Loading...
