Content
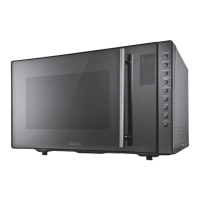
1 x Mini oven
1 x Baking grate with handle
1 x Baking tray
1 x Rotisserie incl. clamps and handle
1 x Crumb tray
1 x Instruction manual
Technical Data
Rated voltage : 220 - 240 V~
Rated input power : 1350 - 1650 W
Rated frequency : 50/60 Hz
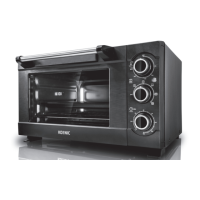
Control elements
A
Temperature control
B
Operation indicator lamp
C
Mode selection control
D
Timer/ On (C) / OFF
E
Power cord with plug
F
Door handle
G
Rotisserie handle
H
Grate handle
I
Crumb tray
J
Baking grate
K
Baking tray
L
Oven door
M
Lower heating elements
N
Rotisserie with clamps
O
Holding bracket
P
Receptacle drive
Q
Upper heating elements
R
Oven lighting
Use
Temperature control
Fig.
4
Adjust the desired temperature up to
230 °C using the temperature control.
Mode selection
Note:
The convection fan runs automatically with all
modes and cannot be switched on or o.
Fig.
5
Select the desired mode using the
mode selection control. Consider
following symbols and explanations:
O
Upper and lower heat
Upper heat
Lower heat
Upper heat with rotisserie
activated
Upper and lower heat with
rotisserie activated
The mini oven starts to operate only
after the Timer or On/O switch is set
accordingly.
Installation
Fig.
1
Place the product on an even, solid and
heat resistant surface. Consider the
distance to the next socket outlet.
To ensure sucient air circulation follow
minimum clearances as given below:
Sides: 12 cm
Back: 12 cm
Up: 30 cm
Warning
The product must not be installed and placed
into furniture. The product must not be
installed directly below a plate, cupboard or
cabinet.
Fig.
2
Insert the crumb tray below the lower
heating elements.
Fig.
3
Connect the power plug to a suitable
mains socket.
IM_KMO4341_180306_V05_HR.indb 17 6/3/18 2:01 pm