20
Assembly
Floor support
1
Attach both floor support parts together and
put on the charging base.
2
Plug one end of the adapter into the DC IN
jack of the charging base .
3
Connect the adaptor to an electrical outlet.
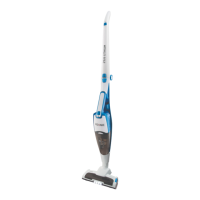
Handstick vacuum cleaner
4
Raise the handle and lock into place. To fold
back the handle, press the unlocking knob
and release the handle.
5
Plug the handstick vacuum cleaner into the
floor nozzle and lock into place. To release
the floor nozzle, press the unlocking knob
and pull the handstick vacuum cleaner out
of the nozzle.
6
Insert the handheld vacuum cleaner into
the handstick vacuum cleaner and lock into
place.
Note: Make sure that the contacts of the
handheld vacuum cleaner and handstick
vacuum cleaner are not dirty. Clean the
contacts if necessary.
Charging batteries
7
Insert the handstick vacuum cleaner into the
charging base.
Note:
• Make sure that the contacts of the
handstick vacuum cleaner and charging
base are not dirty. Clean the contacts if
necessary.
• When the handstick vacuum cleaner is
inserted into the charger, the product is
automatically switched o, should it have
still been left on by accident.
• It is normal for the charging base and
vacuum cleaner to become hot. It’s not a
cause for concern.
• The vacuum cleaner can be charged at
any time when it is not in use.
8
The LED indicator flashes in blue and
indicates the battery is being charged. The
indicator turns on steady blue, when the
battery is fully charged.
LED indicator
LED color Condition
Red flashing
During operation, when
battery level is low
Blue flashing During charging
Blue steady
Charging completed. Fully
charged
IM_KVR296_160105_V06_HR.indb 20 5/1/16 4:26 PM
 Loading...