3
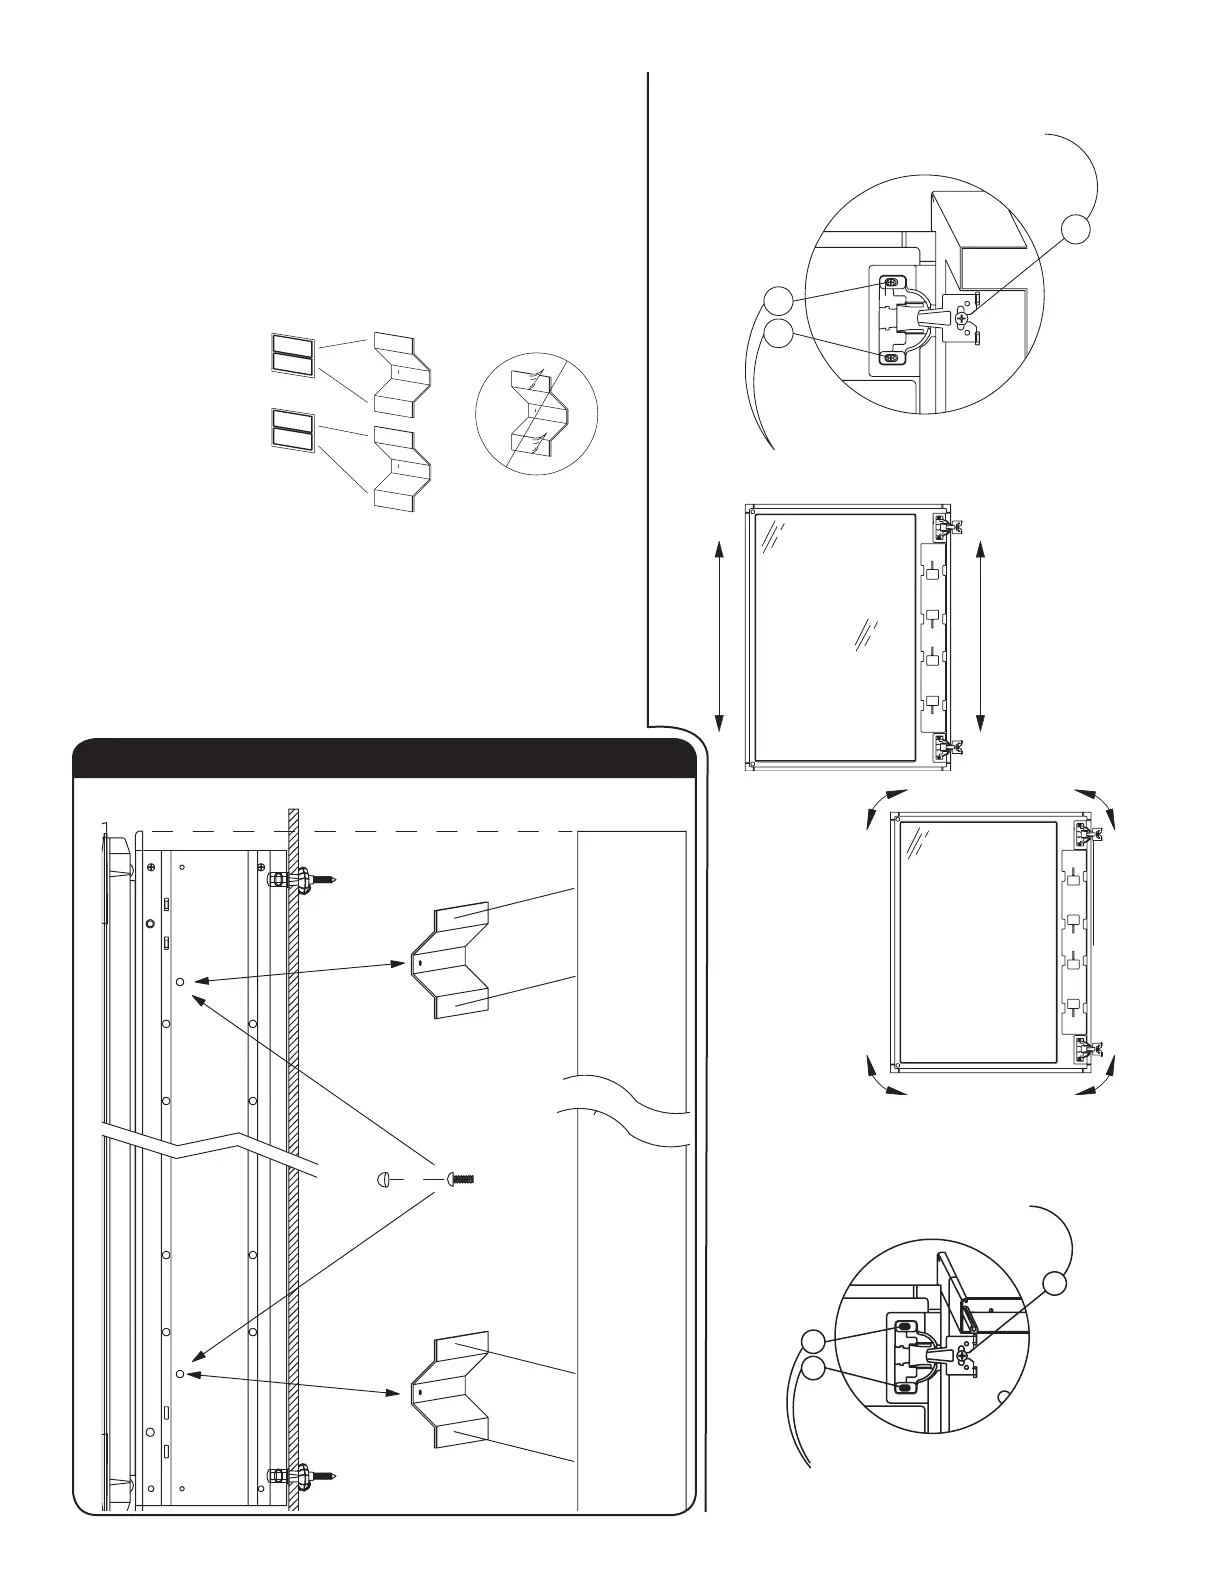
3. ATTACHING SIDE KITS TO A SURFACE
MOUNTED CABINET
1. Apply foam tape to Side kit bracket
A. Peel tape from sheet, leave liner on.
B. Apply as shown to side kit brackets, be sure they are
clean and dry.
C. DO NOT PEEL RELEASE LINER UNTIL YOU
HAVE TEST FIT THE MIRRORS ON THE
CABINET!
2. Attach the side kit brackets to the cabinet as shown
in Fig. 6
3. Test t the side kits, then clean the back of the side kits
with rubbing alcohol.
4. Peel the release tape from the brackets and apply the
side kits, push rmly to set.
5. Cover the screw heads with the screw caps.
Align top of side kit with top of flange
Side kit bracket
(Fits tight under the
flange of cabinet)
#8 x 3/8" screws
self thread into
Side Kit brackets
Side Kit brackets
2 pieces
26" high
Fig. 6
4. DOOR ADJUSTMENTS
A. This screw releases the door from the cabinet and
allows up and down adjustment. Fig.7
B. These screws allow you to plumb
the door as shown in Fig. 8.
C. The screws you use for attaching the hinges.
(Supplied with hinges)
Fig. 7
Fig. 8
1070225-2-A
 Loading...