6HFWLRQ
(OHFWULFDO6\VWHPDQG&RPSRQHQWV
4. Pull out the thin shipping strip from behind the
thrust washer (cup), and slide the brush holder/
end cap into position. See Figure 7-36.
5. Install the thru bolts and torque to 4.5-5.7 N·m
(40-50 in. lb.). See Figure 7-37.
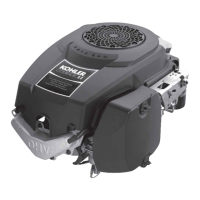
'HOFR5HP\6WDUWHUV
)LJXUH,QVWDOOLQJDQG7RUTXLQJ7KUX%ROWV
6. Lubricate the drive sha with Kohler starter drive
lubricant (Kohler Part No. 52 357 01-S). Install the
drive components following the instructions for
servicing the starter drive.
6ROHQRLG6KLIW(OHFWULF6WDUWHUV
The following subsection covers the Delco-Remy
solenoid shi electric starter. Much of the information
in the proceeding subsection relates to this type starter
also, so it is not repeated here.
2SHUDWLRQ±6ROHQRLG6KLIW6WDUWHU
When power is applied to the starter the electric
solenoid moves the drive pinion out onto the drive
sha and into mesh with the flywheel ring gear. When
the pinion reaches the end of the drive sha it rotates
the flywheel and cranks the engine.
When the engine starts and the start switch is released
the starter solenoid is deactivated, the drive lever
moves back, and the drive pinion moves out of mesh
with the ring gear into the retracted position.
)LJXUH'HOFR5HP\6WDUWHU
6WDUWHU'LVDVVHPEO\
1. Remove the hex nut and disconnect the positive
(+) brush lead/bracket from the solenoid terminal.
2. Remove the three Torx head screws securing the
solenoid to the starter. See Figure 7-39.
7RU[+HDG6FUHZV
)LJXUH5HPRYLQJ6ROHQRLG6FUHZV
3. Unhook the plunger pin from the drive lever.
Remove the gasket from the recess in the
housing. See Figures 7-40 and 7-41.
NOTE: Test procedure for checking starter solenoid
on page 7-35.

 Loading...