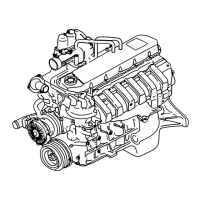
10. Alternator
10.1.8 Performance test
r
i
Ammeter
l-l
I
Lamp
I
I
Voltmeter
-I
Variable
___:_.__ I
n+-----NoTE’
\ J
_’
7
SW2
I
0
7
, [rl
Battery
!_I
0
\
Minimum position
Fig. 20 Test Circuits
NOTE: The 0.2552 resistor is connected when the battery is discharging.
Measurement jigs required:
@I Voltmeter
: DC voltmeter 0 to 30 V, Class 0.5
@ Ammeter : DC ammeter 0 to 100 A, Class 1
@ Variable resistor : 0 to 0.2X& 1 kW
@ Resistor : 0.25Q 25 W
(1 set)
(1 set)
(1)
(1)
(1)
(2)
(3)
(4)
Voltage measurement for adjustment
With the test circuits shown in Fig. 20, open SW1 and close SW2, increase the alternator revo-
lution to the rated speed of 5000 rpm and measure the voltage.
Adjustment voltage: Acceptable if the measured value is between 14.2 V and 14.8 V.
Revolution at 13.5 V
With the test circuits shown in Fig. 20, open SW1 and close SW2, gradually increase the alterna-
tor revolution until the voltmeter reads 13.5 V and measure the revolution. The measured value
is the operating speed at 13.5 V.
Operating speed: Acceptable if the measured value is 1050 rpm or less.
Output current measurement
With the test circuits shown in Fig. 20, set the variable resistor to the min. position, close SW1
and SW2, and increase each output of the alternator. Adjust the variable resistor so that the
voltmeter reads 13.5 V and measure the current. The measured value is at each output current.
Cautions on performance test
(a)
Use thick wires having a min. cross section of 8 mm2 and max. length of 2.5 m long con-
necting the alternator E3 and battery (+) terminals, and the E and battery (-) terminals.
(b)
Use switches having small contact resistances.
10-13
 Loading...