Do you have a question about the Kongsberg V series and is the answer not in the manual?
Explains the structure and organization of the manual's content.
Details conventions for names, styles, and symbols used throughout the manual.
Describes how pictures and illustrations are used to convey information.
Notes the availability of the manual in multiple languages.
Provides guidance on interacting with XL-Guide dialog boxes.
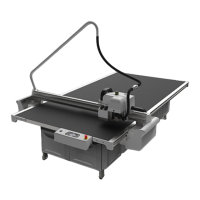
Introduces the safety standards and potential hazards associated with the XN table.
Outlines the safety responsibilities of the manufacturer, customer, and operators.
Specifies the essential training and understanding required for system operators.
Clarifies the intended use of the system and defines non-intended use.
Identifies hazardous areas around moving parts, marked by specific floor markings.
Explains the meaning and application of various warning signs used in the manual.
Details the various safety devices integrated into the machine for protection.
Recommends specific protective equipment for operators to ensure safety.
Describes the steps to follow in the event of system malfunctions.
Highlights residual safety risks that users should be aware of despite safety measures.
Defines terminology and naming conventions for machine components and axes.
Explains the function and operation of the main power switch.
Details the operation and switch positions of the emergency stop button.
Describes the DynaGuard safety system and its function.
Introduces the functions and buttons found on the operator's control panel.
Explains the role and components of the pressurized air system.
Lists and briefly describes the application programs available with XL-Guide.
Introduces the main elements of the XL-Guide Graphical User Interface (GUI).
Details the functions and sub-menus accessible from the main menu.
Describes the general functions available through the main toolbar.
Explains the File View window and its purpose in managing job files.
Covers the buttons and functions available in the File View toolbar.
Describes the Job View window where designs are displayed for manipulation.
Details the various buttons and functions within the Job View toolbar.
Explains how to view job previews within the File View.
Describes the status bar at the bottom of the GUI and its function.
Explains the message box displayed for critical situations requiring operator action.
Details the Message Display for additional troubleshooting information.
Describes how to view table coordinates and positions within the system.
Lists keyboard shortcuts for quick access to various functions.
Outlines the fundamental assumptions for running the machine and its procedures.
Provides a step-by-step guide for powering up the system and preparing for operation.
Explains how to reset the safety system after an interruption.
Details the procedure for safely powering down the system.
Guides the user on how to resume operation after a safety system activation.
Sets the stage for job preparation, emphasizing safety and system readiness.
Explains Job Setup as a link between logical tool numbers and physical tools.
Describes how to position material and select board size for a job.
Details the methods for opening input files into the system.
Explains how to set the correct flute or grain direction for the material.
Guides on configuring vacuum sections for optimal material hold-down.
Discusses specifying job speed settings for accuracy or speed.
Outlines the steps for checking and executing a prepared job.
Refers to standard procedures for corrugated production without registration marks.
Directs users to relevant sections for folded carton production.
Covers milling production procedures, recommending high quality mode.
Refers to standard procedures for creating a pen plot.
Explains how to work with the X-pad for measuring modes.
Provides rules for preparing materials with thickness between 45-50 mm.
Outlines the procedure for preparing hard board materials.
Explains how to achieve deeper crease patterns or mill thicker materials.
Describes how to add a crease line on the front side of a material.
Guides on defining or modifying reference point settings.
Illustrates solving tool combination limitations using multiple job setup files.
Explains functions and parameters essential for proper VL-system operation.
Discusses selecting operating modes and reducing speed for specific lines.
Details how to adjust the overall acceleration of the machine.
Covers configuration of continuous and incremental jog movements.
Describes accessing table options for various settings.
Guides on establishing fixed and panel reference points for operations.
Explains the necessity of exact ruler registration for proper table operation.
Details the calibration process for tool height reference.
Explains measuring the table top surface to create a map for cutting depth.
Describes measuring the table dimensions for system registration.
Guides on obtaining the correct angle between the X and Y axes.
Covers vacuum control modes, quick release, and settings for two pumps.
Explains access to system-wide options and settings.
Describes how to select units for the GUI display.
Explains how to select the display language for the GUI.
Details available input file formats and setup options.
Covers functions for optimizing sequencing, tool use, geometry, and double cuts.
Explains vacuum section configuration and usage of two vacuum pumps.
Details functions for setting park positions from files or current locations.
Explains how to specify the COM port for router communication.
Describes how to define colors for lines in Job Setup within Job View.
Explains how to maintain and select available board sizes.
Guides on altering the flute or grain direction for materials.
Covers scaling and rotation of designs within the system.
Explains how to create multiple copies of a job and layout modes.
Details the counter function for jobs executed on top of a matrix.
Explains that input file coordinates use the selected reference point as origin.
Guides on selecting job setup files from a drop-down list.
Describes how to access the Job Setup dialogue for creation and editing.
Explains the various parameters within the Job Setup configuration.
Refers to extended setup options available for each line in Job Setup.
Defines Job Setup as a table linking logical tools to physical tools and their behavior.
Explains how to select a Job Setup file from the Job View drop-down list.
Details how to access the Job Setup dialogue for creating and editing files.
Describes parameters like depth unit, speed unit, tool selection, and depth settings.
Refers to extended setup options available for each line in Job Setup.
Indicates access to additional options via Job Setup -> More.
Explains the system's ability to operate in Single or Multi Design Layout modes.
Covers functions for positioning, rotating, and stepping designs in Multi Design mode.
Guides on setting up snap functions, gap distances, and nudge steps.
Introduces the Tool Configuration dialog for all tool settings and adjustments.
Explains how to execute tool adjustment wizards for calibration.
Details the procedure for setting lag values for rotating tools.
Guides on calibrating tool height relative to the table top.
Explains how to adjust angular offset for rotating tools.
Details the process for adjusting the center offset of tools.
Describes fine-tuning angle and center offset values manually.
Explains adjusting the tool offset relative to the laser pointer.
Covers functions for ignoring, deleting, or adding tools to the tool list.
Provides guidelines for handling and caring for precision tools.
Discusses tool inserts that feature a built-in motor.
Offers an overview of available tool heads like FlexiHead and MultiCUT.
Explains the procedure for mounting and dismounting the tool head.
Introduces the FlexiHead as a multi-purpose tool head.
Details the MultiCUT special purpose tool head, including its components and operation.
Explains the three functions of the Measuring Foot.
Describes the Class II laser pointing device used for adjustments and job execution.
Covers the X-Pad measuring device, its calibration, and limitations.
Details adjustments for the i-cut camera, including aperture and focus.
Introduces the Crease Tool as a multi-purpose tool for creasing.
Describes the ø60 mm Crease Tool for avoiding liner cracking.
Explains the Static Knife as a multi-purpose tool for various knife blades.
Details the two models of the Reciprocating Knife tool.
Explains the mounting of the detachable material foot for hold down function.
Describes the MicroCut tool for applications requiring exact cutting depth.
Introduces the Foam Knife tool for cutting foam materials up to 1".
Describes the Bevel Knife for 45-degree angled cuts and setting cutting depth.
Introduces the Bevel Knife U20 for 20-degree angled cuts.
Describes the VI45 Knife Tool and its knife adapter.
Explains the KissCut tool for vinyl cutting and its pressure adjustments.
Describes the RotaCut tool for light materials and its adjustment procedures.
Introduces the Rigid Material Knife and its tool adjustment parameters.
Details the RBI 90-16 insert for rigid boards and its tool adjustment.
Covers various drill tools including Flexi Drill and Reboard Drill.
Explains the Ball Point Pen tool for pen drawing and its adjustments.
Covers Liquid Ink Tool and Fibertip Tool for ink drawing applications.
Introduces the Braille Tool for creating braille signage.
Explains the Vacuum hole cleaner tool for clearing dust from vacuum holes.
Outlines daily checks and cleaning procedures for the equipment.
Details weekly cleaning and oiling of guide-ways and bearings.
Refers to maintenance procedures for external equipment like PCs and compressors.
Explains the location and replacement procedure for fuses in the Main Power Unit (MPU).
Details the location and replacement of fuses for the X1 Amplifier.
Covers the location and replacement of fuses for the X2 Amplifier.
Explains the location and replacement of fuses for the Y and Z amplifiers.
Details the location and replacement of fuses related to tool rotation and reciprocating knives.
Describes the components and container emptying procedure for Vacuum Cleaner 25.
Introduces the Zefiro vacuum cleaner, noting its filling level and filter shaking.
Addresses common machine issues like no reaction, safety system reset, and servo errors.
Lists common tool-related issues such as cutting quality and milling problems.
Discusses connection issues between XL-Guide and the machine.
Covers issues related to outside table limits and regmarks in i-cut.