EasyManua.ls Logo

KRAFTtech 241-9853 User Manual

KRAFTtech 241-9853
23 pages
To Next Page IconTo Next Page
Page #1 background imageLoading...
Page #1 background image
OPERATING MANUAL
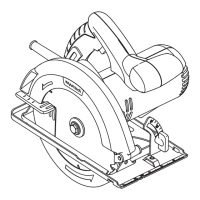
Compact Circular Saw
241-9853
IMPORTANT:
Carefully read this Owner’s Manual before using this tool. Pay close atten-
tion to all Safety Instructions, Warnings, and Caution sections. Use this tool
properly, and only for its intended use
.
Safety symbols in this Manual are used to flag possible dangers. The safety
symbols and their explanations require the operators full understanding. The
safety warnings do not, by themselves, eliminate any danger, and they are not a
substitute for proper accident prevention measures.
This Safety Alert Symbol indicates caution, warning, or danger. Failure to obey
a safety warning can result in serious injury to yourself or others. To reduce the risk
of injury, fire, or electric shock, always follow the safety precautions.
Questions and Answers:

KRAFTtech 241-9853 Specifications

General IconGeneral
BrandKRAFTtech
Model241-9853
CategorySaw
LanguageEnglish

Summary

Rules for Safe Operation

Know the Tool

Read manual and labels before using the saw. Keep manual for reference.

Important Service Information

Tool service by qualified technician only. Contact helpline for details.

General Safety Instructions

Understand all instructions to prevent injury, shock, or fire.

General Safety Precautions

Work Area and Electrical Safety

Keep area clean, lit, free from flammables, and bystanders. Use plugs correctly and avoid grounded surfaces.

Cord and Extension Cord Safety

Handle cords carefully, use correct extension cords for outdoor use and proper gauge.

Personal Safety Guidelines

Stay alert, use common sense, dress properly, avoid accidental starts, maintain balance, use safety gear.

Tool Use and Care

Proper Operation and Maintenance

Secure workpiece, use correct tool, disconnect power before adjustments, keep tools sharp.

Accessory and Alteration Warnings

Use manufacturer-recommended accessories. Do not alter or misuse the tool.

Service and Parts

Qualified Service and Parts

Service by qualified personnel only. Use identical replacement parts.

Specific Safety Rules for Circular Saws

Hand Positioning and Body Stance

Keep hands away from blade. Position body to side of blade to avoid kickback.

Lower Blade Guard Operation

Ensure lower guard functions correctly; do not tie it open. It must operate automatically.

Kickback Prevention Techniques

Support workpiece properly, use correct blade size, avoid binding or forcing cuts.

Specific Safety Rules for Circular Saws (Continued)

Kickback Causes and Prevention

Kickback from pinched blades. Avoid misuse, incorrect depth, dull blades, improper support, forcing cuts.

Handling Binding and Restarting

Release trigger if binding. Stop saw before removal. Center blade when restarting.

Panel Support and Blade Condition

Support large panels. Use sharp blades. Check depth/bevel adjustments.

Product Description and Applications

Know Your Circular Saw

Familiarize yourself with the saw's operating features and safety requirements.

Component Identification

Identifies parts of the saw through a diagram and numbered list.

Saw Applications

Suitable for cutting all types of wood and wood products.

Product Description and Applications (Continued)

Kickback Hazards and Prevention

Kickback from blade stalling. Avoid incorrect depth, knots, twisting, dull blades, poor support, forcing cuts.

Depth Setting and Workpiece Inspection

Set blade depth correctly (max 1/4" below material). Inspect workpiece for knots/nails before cutting.

Product Description and Applications (Continued)

Blade Usage and Maintenance

Use sharp, clean blades. Support workpiece, use steady pressure. Avoid warped wood. Hold saw firmly.

Saw Blade Care

Keep blades sharp and clean. Remove gum/pitch with approved solvents, not gasoline.

Changing the Saw Blade

Blade Change Safety and Procedure

Disconnect power. Follow steps to remove and install blade, washers, and screw.

Inner Flange Bushing Importance

Ensure inner flange bushing is replaced if removed to prevent improper tightening and potential injury.

Changing the Saw Blade (Continued)

Blade Installation Details

Retract guard, align teeth/arrow, fit blade, replace washer, tighten screw securely.

Blade Guard System Operation

Lower guard protects operator. Do not alter or use if damaged. Check for free movement and instant closing.

Danger of Underside Blade Exposure

Blade exposed on underside during cuts. Keep hands away from cutting area to prevent serious injury.

Starting and Stopping the Saw

Starting and Stopping Procedure

Depress lock-off and trigger to start. Release trigger to stop. Allow blade to stop fully.

Kickback During Startup Warning

Contacting workpiece before blade reaches full speed can cause dangerous kickback.

Adjustments

Depth-of-Cut Adjustment

Set correct blade depth (max 1/4" deeper than material) to avoid rough cuts and kickback.

Adjustments (Continued)

Cutting Angle Adjustment

Loosen knob, tilt body to desired angle using gauge, tighten knob to secure base plate.

Operation

General Cutting Best Practices

Hold saw firmly, avoid placing hand on workpiece, support workpiece correctly, support near cut.

Workpiece Support and Control

Support workpiece so cut is to operator's side. Maintain proper control to prevent accidents.

Operation (Continued)

Workpiece Clamping and Guidelines

Clamp workpiece securely. Place saw on supported portion. Draw guideline before cutting.

Cord Management and Safety

Keep cord away from cutting area. Unplug and reposition if it hangs up during cut.

Damaged Cord Danger

Using a saw with a damaged cord can cause serious injury or death. Replace immediately.

Cross-Cutting and Rip Cutting

Guideline Alignment and Trial Cuts

Align guideline with kerf indicator. Note offset distances. Make trial cuts for accuracy.

Cross-Cutting and Rip Cutting (Continued)

Rip Cutting with a Straight Edge

Secure workpiece, clamp straight edge, saw along edge for rip cut. Do not bind blade.

Bevel Cutting

Making Bevel Cuts

Align cutting line with notch for 45° cuts. Make trial cuts. Adjust angle between 0° and 45°.

Bevel Cutting (Continued)

Bevel Cut Safety Lock

Ensure bevel adjustment lever is securely locked to prevent serious injury.

Performing a Bevel Cut

Hold saw firmly, rest base on workpiece, start saw, guide into workpiece, make cut, release trigger.

Pocket Cutting

Pocket Cut Setup and Procedure

Set bevel to 0°, depth, swing guard up. Rest base, raise handle, start saw, guide into workpiece.

Pocket Cutting Safety Warnings

Always cut forward. Reverse cutting causes kickback. Release guard. Proceed to end of cut.

Pocket Cutting (Continued)

Completing Pocket Cut

Release trigger, stop blade, lift saw, clear corners.

Blade Guard Raised Position Warning

Never tie lower guard up. Exposed blade can cause serious injury.

Maintenance

Pre-Maintenance Safety and Cleaning

Unplug before maintenance. Do not use water/chemicals on electrical parts. Keep vents clean.

Troubleshooting

Common Troubleshooting Issues

Covers motor start, blade binding/burning, and saw vibration issues with causes and suggested actions.

Exploded View

Parts List

Parts List (Items 1-27)

Lists components like Stator, Bearings, Screws, Brushes, Rotor, Housing, Switches, Guards.

Parts List (Continued)

Parts List (Items 28-52)

Lists components like Handles, Cord Guard, Power Cord, Levers, Nuts, Washers, Base Plate, Blade, Wrench.

KRAFTtech LIMITED WARRANTY

Warranty Coverage and Proof

2-year warranty against defects. Requires proof of purchase for repair or replacement.

Warranty Limitations and Exclusions

Excludes wear, abuse, misuse, improper use, commercial use, consumables, and unauthorized repairs.

KRAFTtech LIMITED WARRANTY (Continued)

Additional Warranty Limitations

Warranty applies to original purchaser only. No liability for indirect damages.

Consumer Rights Under Warranty

Warranty grants specific legal rights that may vary by province.