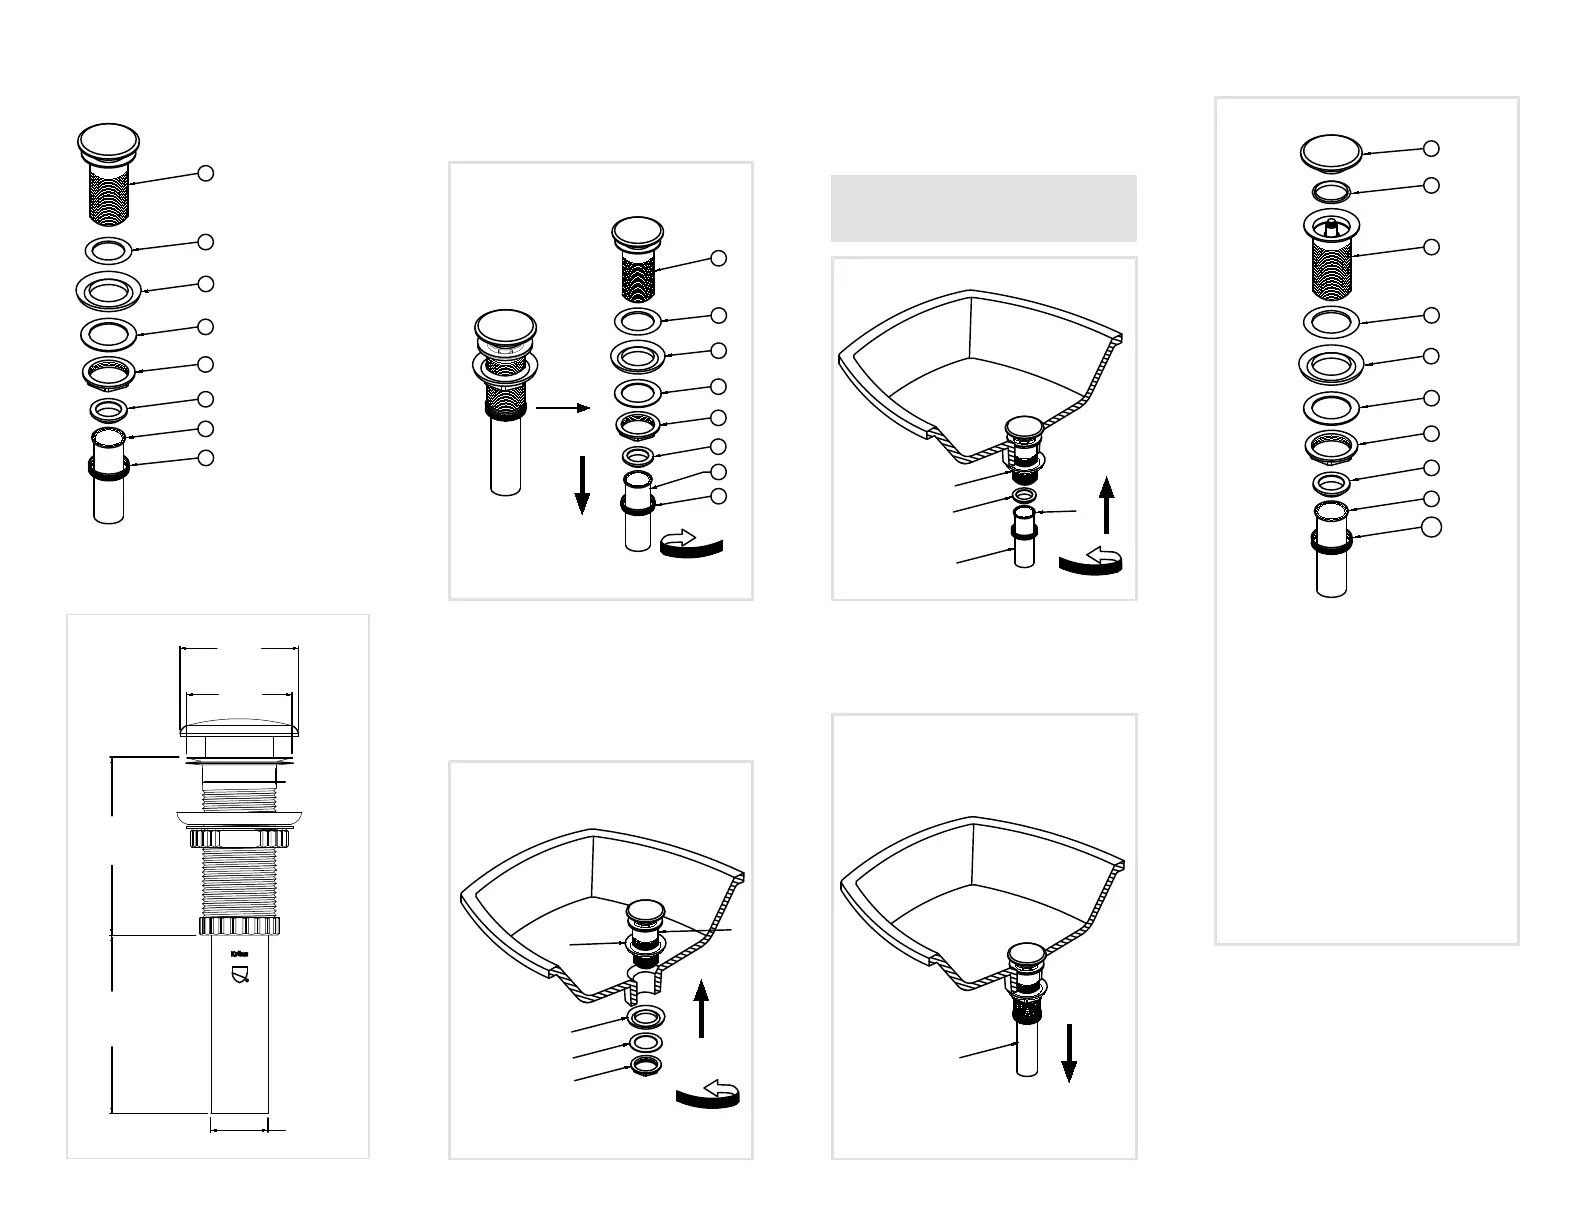
PU-20 DIAGRAM AND PARTS LISTS
STEP 1
Remove connector (h), tail pipe (g), mounting
nut (e), plastic washer (d) and concave washer
(c) from drain body (a).
STEP 3
Tighten mounting nut (e) with adjustable
wrench until snug. Thread connector (h) with
tailpipe (g) attached, onto drain body (a) and
hand-tighten.
STEP 2
Install drain body (a), with rubber washer
(b) attached, into the drain hole. From
underneath, attach concave washer (c) (narrow
end up), plastic washer (d) and mounting nut
(e) to drain body (a).
STEP 4
Connect tailpipe (g) to p-trap.
DIMENSIONS
REPLACEMENT PART LIST
Installer Tip: Make sure tailpipe washer (f)
is installed in tailpipe
CARE & MAINTENANCE
* To keep the product clean & shining, follow
the steps below:
1. Rinse with clean water & dry with a soft cloth.
2. Do not clean with soaps, acid, polish,
abrasives or harsh cleaners.
3. Do not use cloth with a coarse surface.
*This installation manual is subject to change without notice
a. Drain Body
b. Thin Gasket
c. Concave Gasket
d. Plastic Washer
e. Nut
f. Gasket
g. Tailpiece
h. Nut
a
b
c
d
e
f
g
h
1. Drain Cap
2. Gasket
3. Drain Body
4. Thin Gasket
5. Concave Gasket
6. Plastic Washer
7. Nut
8. Gasket
9. Tailpiece
10. Nut
1
2
3
4
5
6
7
8
9
10
a
b
c
d
e
f
g
h
Ø 2 3/4"
(70mm)
Ø 2 3/8"
(59mm)
Ø 1 5/8"
(41 mm)
4"
(100mm)
3 1/2"
(90mm)
Ø 1 1/4"
(32 mm)
U
P
C
C
R
h
e
f
g
a
b
c
d
e
g