EasyManua.ls Logo

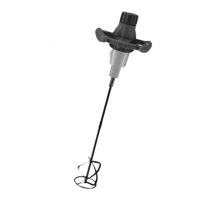
KRAUSE & BECKER 69856 User Manual

KRAUSE & BECKER 69856
16 pages
To Next Page IconTo Next Page
Page #1 background imageLoading...
Page #1 background image

Questions and Answers:

KRAUSE & BECKER 69856 Specifications

General IconGeneral
BrandKRAUSE & BECKER
Model69856
CategoryHand Mixer
LanguageEnglish

Summary

Warning Symbols and Definitions

DANGER Symbol Definition

Defines DANGER symbol, indicating a hazardous situation resulting in death or serious injury if not avoided.

WARNING Symbol Definition

Defines WARNING symbol, indicating a hazardous situation resulting in death or serious injury if not avoided.

CAUTION Symbol Definition

Defines CAUTION symbol, indicating a hazardous situation resulting in minor or moderate injury if not avoided.

NOTICE Symbol Definition

Defines NOTICE symbol, addressing practices not related to personal injury.

Important Safety Information

General Power Tool Safety Warnings

Read all safety warnings and instructions to prevent electric shock, fire, and serious injury.

Work Area Safety

Keep work area clean, well-lit, and free from distractions to prevent accidents and maintain control.

Electrical Safety

Matching Plugs and Outlets

Ensure power tool plugs match outlets and avoid adapter plugs for safety.

Contact with Grounded Surfaces

Avoid contact with grounded surfaces to reduce electric shock risk.

Operation in Wet Conditions

Do not expose tools to rain or wet conditions to prevent electric shock.

Cord Care and Handling

Do not abuse the cord; keep it away from heat, sharp edges, and moving parts.

Using Outdoor Extension Cords

Use outdoor-suitable extension cords for outdoor operation to reduce shock risk.

Personal Safety

Operator Alertness

Remain alert, use common sense, and avoid operating while tired or under the influence.

Personal Protective Equipment

Always wear appropriate safety equipment like eye protection.

Prevent Unintentional Starting

Ensure the switch is off before connecting or picking up the tool to prevent accidents.

Remove Tools Before Adjustments

Remove any adjusting key or wrench before turning the tool on.

Maintain Balance and Footing

Keep proper footing and balance for better control and to avoid overreaching.

Dress Appropriately

Avoid loose clothing, jewelry, and keep hair away from moving parts.

Use Approved Safety Equipment

Use only safety equipment approved by an appropriate standards agency.

Power Tool Use and Care

Use Correct Tool

Use the correct power tool for your application for better and safer results.

Check Trigger Functionality

Do not use the tool if the switch/trigger does not work properly; it must be repaired.

Disconnect Power Before Adjustments

Disconnect power before adjustments, accessory changes, or storage to prevent accidental starting.

Store Tools Safely

Store idle tools out of children's reach and away from untrained users.

Maintain Power Tools

Maintain power tools by checking for misalignment, damage, or other conditions affecting operation.

Use According to Instructions

Use the tool, accessories, and bits according to instructions and working conditions.

Mixer Safety Warnings

Maintain Labels and Nameplates

Maintain labels and nameplates; contact for replacements if unreadable or missing.

Avoid Unintentional Starting

Prepare to begin work before turning the tool on to avoid accidental starting.

Do Not Lay Down Until Stopped

Do not lay the tool down until it has come to a complete stop to maintain control.

Maintain Firm Grip

Maintain a firm grip with both hands to resist starting torque when using a handheld tool.

Do Not Leave Unattended

Do not leave the tool unattended when plugged in; turn off and unplug first.

Product is Not a Toy

This product is not a toy; keep it out of reach of children.

Pacemaker User Safety

People with pacemakers should consult their physician before use due to electromagnetic fields.

Specific Hazard Warnings

Chemical Dust Exposure

Warns about potential carcinogens and reproductive harm from dust generated by certain activities.

Cord Lead Exposure

Warns about lead exposure from handling the product cord, a known carcinogen and reproductive harm agent.

Vibration Safety

Risk of Vibration Injury

Explains risks of physical injury from repeated or long-term vibration exposure.

Medical Advice for Vibration

Advises medical consultation for regular users or those with pre-existing conditions.

Avoid Smoking During Use

Discourages smoking during use as nicotine can increase vibration-related injury risk.

Wear Protective Gloves

Recommends wearing suitable gloves to mitigate vibration effects on the user.

Use Lowest Vibration Tools & Light Grip

Suggests using low-vibration tools and a light grip for effective use.

Incorporate Vibration-Free Periods

Recommends incorporating breaks from vibration during the workday.

Handle Abnormal Vibration

Advise stopping use immediately if abnormal vibration occurs and maintaining the tool.

Grounding Requirements

Three-Prong Plug Grounding

Grounded tools require a three-wire cord and grounding plug connected to a properly grounded outlet.

Double Insulated Tools

Double insulated tools do not require grounding and have a special double insulation system.

GFCI Protection

GFCI Plug Functionality

GFCI provides additional protection from electric shock; use identical replacement parts.

Extension Cords

Cord Type and Gauge

Use appropriate wire gauge extension cords based on distance and tool amperage for optimal performance.

Using Multiple Extension Cords

When using multiple cords, ensure each meets minimum wire size requirements.

Outdoor Cord Marking

Use outdoor-rated extension cords marked "W-A" or "W" for outdoor use.

Cord Condition and Repair

Ensure extension cords are properly wired and in good condition; repair or replace damaged cords.

Protect Extension Cords

Protect extension cords from sharp objects, excessive heat, and damp or wet areas.

Symbology and Warnings

Double Insulated Symbol

Indicates a tool with double insulation, not requiring grounding.

CSA and UL Symbols

Indicates compliance with Canadian Standards Association and Underwriters Laboratories standards.

Voltage and Amperage Symbols

Symbols indicating Volts AC and Amperes for tool specifications.

RPM Symbol

Symbol indicating No Load Revolutions Per Minute.

Eye Injury Warning

Warning for risk of eye injury; wear ANSI-approved goggles with side shields.

Manual Read Warning

Warning to read the manual before set-up and/or use.

Fire Risk Warning

Warning for risk of fire; do not cover ventilation ducts or keep flammable objects nearby.

Electric Shock Warning

Warning for risk of electric shock; properly connect power cord to appropriate outlet.

Specifications

Electrical Rating

Specifies the tool's electrical rating as 120V~/60Hz / 10A.

No Load Speed

Details the tool's no-load speed for low and high settings, 100-400 RPM and 150-700 RPM.

Spindle Thread

Indicates the spindle thread size is M14.

Functions

Handle and Speed Dial

Identifies the handles for grip and the speed dial for adjusting mixer speed.

Trigger and Gear Switch

Identifies the trigger for operation and the gear switch for selecting speed ranges.

Spindle

Identifies the spindle where mixing paddles are attached.

Operating Instructions

Tool Setup and Paddle Installation

Instructions for setting up the tool and installing the mixing paddle correctly.

Setting the Gear Range

Guidance on selecting the appropriate speed range based on material being mixed.

Adjusting the Speed

How to adjust the tool's speed using the Speed Dial, marked from #1 to #5.

Workpiece and Work Area Setup

Designate Work Area

Designate a clean, well-lit work area, ensuring it's free from distractions or hazards.

Route Power Cord Safely

Route the power cord safely to the work area, avoiding tripping hazards or damage.

Position Mixing Drum

Place the mixing drum on a flat, level ground surface in the work area.

Add Material to Drum

Pour the material to be mixed into the mixing drum, referring to manufacturer instructions.

General Operating Instructions

GFCI Plug Precautions

Read and follow GFCI plug precautions, including testing before each use.

Start Mixing Paddle

Hold paddle above material, squeeze trigger to start, and slowly lower into material.

Adjust Speed During Mixing

Adjust Speed Dial as needed while mixing; stop and change gear if tool bogs down.

Post-Mixing Procedure

Remove paddle, release trigger, unplug tool, and clean paddle. Spray with oil for storage.

Maintenance and Servicing

Pre-Use Inspection

Before each use, inspect for loose hardware, misaligned parts, damaged cords, or other safety issues.

Post-Use Cleaning and Storage

Immediately clean the mixing paddle, unplug tool, and store indoors; spray paddle with oil for rust prevention.

Damaged Cord/GFCI Replacement

If the supply cord or GFCI unit is damaged, it must be replaced by a qualified service technician.

Troubleshooting

Tool Will Not Start

Lists possible causes like GFCI reset, cord connection, power issues, or thermal breaker.

Mixing Paddle Wobbles

Addresses a loose mixing paddle on the spindle and how to tighten it.

Unsatisfactory Mixing Results

Covers tool speed issues and material consistency for optimal mixing performance.

Performance Decrease / Overheating

Identifies causes like worn brushes, internal damage, or straining the motor.

Parts List and Diagram

Parts List

Provides a detailed list of all parts with their corresponding numbers, descriptions, and quantities.

Assembly Diagram Reference

Refers to the assembly diagram for visual representation of parts and their placement.

Assembly Diagram

Component Identification

Visual representation of the tool's components with numbered parts for assembly reference.

Serial Number Recording

Area to record the product's serial number or purchase date for reference.

Limited 90 Day Warranty

Warranty Coverage and Limitations

Details warranty coverage for defects in materials and workmanship and its limitations.

Warranty Claim Procedure

Explains how to take advantage of the warranty, including returning the product with proof of purchase.