Krowne • 100 Haul Rd. Wayne, NJ 07470 krowne.com
10-4 Faucets Installation Manual
Installation Instructions
1. Turn off water supply at main source before proceeding with installation.
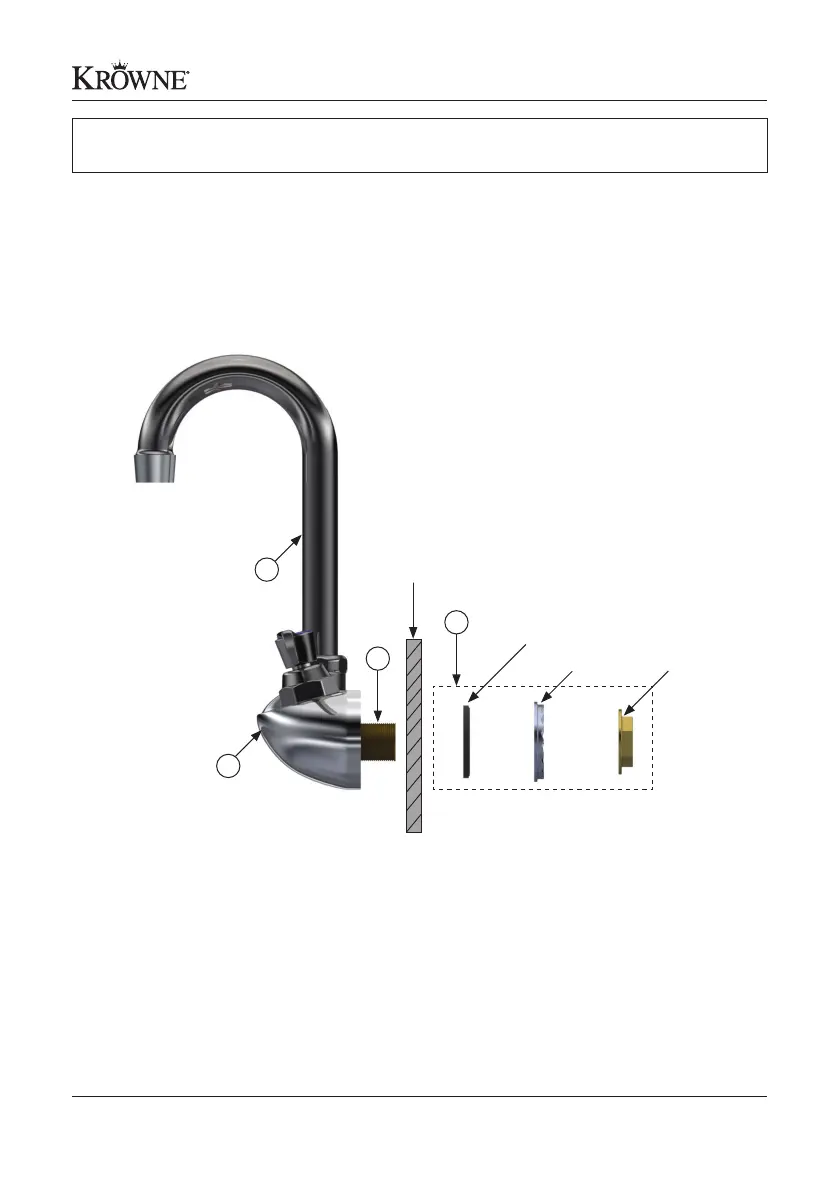
2. Apply thread sealant tape or pipe joint compound to the ends of each threaded nipple (A).
3. From the front of the sink, insert the threaded nipples into the faucet holes in the sink.
4. From the back of the sink, place the included rubber washer, rosette, and ange nut in
the mounting kit (B) onto the threaded nipples (A) and tighten with a wrench.
5. From the front of the sink, install the spout (C) and tighten properly onto the faucet body (D).
6. From the back of the sink, install the water supply lines and tighten properly.
Note: Before starting installation, if you would like water lines included with your kit, please order
Krowne’s E-Z Install Flexible Water Line Kit with Mounting Hardware (model 21-443L). These kits
do not use thread sealant tape or pipe joint compound. Kits come with 1/2” compression 90°
ttings on one side and 3/8” compression ttings that secure directly onto the supply stops.
These are available in 22”, 24” and 30” lengths.
WARNING: Plumbing connections should be made by qualified personnel
who will observe all applicable plumbing, sanitary and safety codes.
C
D
Sink/Mounting
Surface
A
B
Black Rubber Washer
Rosette Flange Nut