EasyManua.ls Logo

Kubota B01 Series - User Manual

Kubota B01 Series
29 pages
Print Icon
To Next Page IconTo Next Page
Loading...
1 of 29
INSTALLATION & OWNER
S MANUAL
Kubota B01
Premium Cab p/n: 1KB01PR
Standard Cab p/n: 1KB01ST
Fits Tractor Models: B2301 and B2601
(*=Not including accessories)
Premium Cab Shown with Optional Front and Rear LED Work Lights
Available Options:
1. Front LED Work Lights (P/N: 9LEDW4)
2. Rear LED Work Lights (P/N: 9LEDW3)
3. Strobe Light (P/N: 9LEDS2)
4. Dome light (P/N 9LEDD14)
5. Heater (P/N: 9PH20S62)
6. Switch Panel (P/N: 9PSF1)
7. Side View Mirrors (P/N: 9PM5)
9. Rear View Mirror (P/N: 9PM3)
8. Rear Wiper (P/N: 9PWK85F)
Note: Front wiper (P/N: 9PWK110) is supplied with premium cab kit only.
Approximate Installation Time *
Experienced Dealer Technician – 3.5 Hours
Average Dealer Technician – 4.5 Hours
Do-It-Yourself – 5.5 Hours
Approximate Product Specifications
Floorboard to Roof Height: 62 inches
Weight: 290 lbs. (Premium), 221 lbs. (Standard)
Cab Width: 41 inches
Rev. D, 07/12/2019
p/n: IM-1KB01PR
The contents of this envelope are the property of the owner. Leave with the owner when installation is complete.
While this cab kit was designed to fit on the vehicle(s) listed above, manufacturing tolerances and vehicle
assembly may affect cab fitment. It is the responsibility of the cab installer to check all vehicle pedals and
levers for full functionality and, as required, adjust the cab fitment to prevent any interference of the cab
components with the travel of pedals or levers.
Question and Answer IconNeed help?

Do you have a question about the Kubota B01 Series and is the answer not in the manual?

Summary

Warnings, Tips, and Required Tools

General Information Before You Start

General advice and prerequisites for cab installation and operation.

Helpful Hints

Practical tips to assist with the cab installation process for better results.

Tools Required

A comprehensive list of tools needed for the cab installation.

Cab Installation

Step 1: Vehicle Prep

Preparing the tractor vehicle by removing components and installing initial hardware.

Step 2: Seal Kit

Installing the seal kit, including flex brushes, for weatherproofing the cab.

Step 3: Floorboard Mounts

Mounting the floorboard brackets that support the cab structure.

Step 4: Sideframes;Rear Legs

Assembling and attaching the sideframes and rear legs to the tractor.

Step 5: Sideframes (Standard Cab)

Attaching sideframes and rubber trim for standard cab models.

Step 6: Mounting Sideframes

Securing the sideframes to the floorboard mounts and tractor fenders.

Step 7: Cowl

Installing the cowl section to the front of the sideframes.

Step 8: ROPS Mount

Attaching the ROPS mounts and brackets to the sideframes.

Step 9: Switch Power Wiring Harness

Installing the switched power wiring harness for electrical accessories.

Step 10: Windshield Support

Installing the support structure for the windshield.

Step 11: Windshield Installation

Mounting the main windshield assembly to the support.

Step 12: Rear Panel Header

Installing the header assembly for the rear panel.

Step 13: Roof Installation

Lifting and securing the cab roof, including gas shock installation.

Step 14: Removable Rear Panel

Installing the removable rear panel for backhoe operation.

Step 15: Rear Curtain

Installing the rear curtain for standard cabs.

Step 16: Tighten All Fasteners

Final check and tightening of all installed fasteners.

Step 17: Underseat Filler (Premium Cab)

Installing the underseat filler for premium cab models.

Step 18: Underseat Filler (Standard Cab)

Installing the underseat filler for standard cab models.

Step 19: Wiper Kit

Installing the front windshield wiper kit.

Step 20: Door Installation and Adjustment

Installing and adjusting the cab doors, including gas shocks.

Step 21: Turn Signal Lights

Re-installing turn signal lights to the fender brackets.

Step 22: ROPS Warning Decal

Applying the ROPS warning decal to the ROPS tube.

Step 23: Finishing Touches

Final finishing touches, including rubber foam and caution labels.

Cab Features & Operation

Pop-Out Windshield

Description and operation of the pop-out windshield for ventilation.

Lift-Off Doors

Instructions on how to remove the cab doors for ventilation.

Pop-Up Roof

Features and operation of the hinged, gas shock-supported roof.

Removable Rear Panel

How to remove and reinstall the rear panel for backhoe operation.

Removable Rear Curtain

Standard Cab Specifics

Instructions for removing and storing the rear curtain included on standard cabs.

Care and Maintenance

Lubrication and Hardware Checks

Periodic lubrication of moving parts and tightening of hardware.

Cleaning Instructions

Guidelines for cleaning glass, vinyl, and painted surfaces.

Common Cab Parts

Premium Cab Parts

Standard Cab Parts

Additional Service Parts

Optional Accessories

Bolt Torque Specifications

General Torque Specification Table

General torque values for various bolt sizes and grades when specific values are not given.

Metric Bolt Torque Specifications

Torque specifications for metric bolts based on size, property class, and thread pitch.

Overview

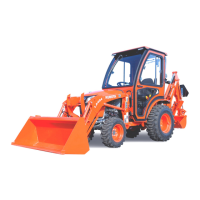
The Kubota B01 Premium Cab (p/n: 1KB01PR) and Standard Cab (p/n: 1KB01ST) are aftermarket enclosures designed to fit Kubota tractor models B2301 and B2601. These cabs provide weather protection and enhance operator comfort.

Function Description:

The cabs enclose the operator's station, offering protection from the elements. They feature various components such as a roof, windshield, sideframes, doors, and rear panels/curtains. The Premium Cab includes additional features like a removable rear panel and a front wiper, while the Standard Cab utilizes a rear curtain. The design allows for adjustment and alignment to accommodate vehicle variations and ensure proper fitment. Safety warnings emphasize that the cab does not provide protection from rollovers, flying objects, or lightning.

Important Technical Specifications:

  • Approximate Installation Time (excluding accessories):
    • Experienced Dealer Technician: 3.5 Hours
    • Average Dealer Technician: 4.5 Hours
    • Do-It-Yourself: 5.5 Hours
  • Approximate Product Specifications:
    • Floorboard to Roof Height: 62 inches
    • Weight: 290 lbs. (Premium Cab), 221 lbs. (Standard Cab)
    • Cab Width: 41 inches
  • Hardware: Various SAE and Metric fasteners are used, with specific torque specifications provided for different bolt sizes and property classes. For example, a 5/16-18 bolt (SAE Grade 5) has a torque range of 17-20.5 pounds-feet (23-28 Newton-Meters), while an M10 bolt (Metric Property Class 8.8, Course Thread) has a range of 34-40 pounds-feet (46.1-54.2 Newton-Meters). Plated Grade 8 bolts require a 15% torque reduction.
  • Wiring Harness: A switched power wiring harness (P/N: 9SV-WH-00004) is included, rated for 10 amps and two accessories maximum, featuring a 10A fuse.

Usage Features:

  • Pop-Out Windshield: Both cab versions come with a pop-out windshield for ventilation. To open, the latches are lifted and rotated to rest in the over-center position.
  • Lift-Off Doors: For added ventilation, the doors can be removed without tools. This involves disconnecting the gas shock, rotating the door 90 degrees, and lifting it off. Hinge washers should be stored safely.
  • Pop-Up Roof: The cab features a hinged and gas shock-supported roof, allowing for backhoe operation on B2301 & B2601 models and providing additional ventilation. To operate, press the yellow lever on the quick-release latches and pull down slightly on the grab handles. To lock, pull down on the plastic grab handles until each latch double-clicks.
  • Removable Rear Panel (Premium Cab Only): This feature facilitates backhoe operation. To remove, lift the pop-up roof, detach the underseat filler Velcro, release the two lower latches, and lift the panel from outside the cab. Reinstallation involves aligning the top pins with receivers and pushing in the lower corners for double latching.
  • Removable Rear Curtain (Standard Cab Only): Similar to the rear panel, the rear curtain can be removed for backhoe operation. This involves disengaging snaps on the rear panel header, detaching Velcro from the underseat filler and sideframes.

Maintenance Features:

  • Lubrication: Periodically re-apply lubrication (preferably grease) to door striker pins, door latch assemblies, and door hinges.
  • Hardware Check: Check and tighten all hardware after 40 hours of operation, and then periodically inspect and tighten for the remainder of the unit's life.
  • Cleaning:
    • Painted surfaces should be washed with commercial automotive cleaning products.
    • Glass windows can be cleaned with glass cleaner.
    • Acrylic windows (some cab windows are acrylic) must not be cleaned with harsh chemicals; use mild soap and water to prevent damage.
    • Vinyl components should be washed with a mild solution of warm soapy water.
    • Clear vinyl can be easily scratched; exercise care when cleaning frost or snow. Avoid rolling curtains in cold weather as they may stiffen and crack.
  • Seal Kit (Premium Cab Only): The seal kit includes flex brushes for sealing around floorboard mounts and differential lock levers. Proper installation involves ensuring the flattest side of the brush faces down and bristles butt up against each other without gaps or overlap.
  • Wiper Kit (Premium Cab Only; optional for Standard Cab): Includes a wiper motor, arm, and blade. Wiring involves running the loom through the windshield support and cowl, securing it with P-clips and self-drilling screws, and connecting it to the switched power harness.

Kubota B01 Series Specifications

General IconGeneral
BrandKubota
ModelB01 Series
CategoryTractor Accessories
LanguageEnglish

Related product manuals