Fixing the Aluminum Pipe
One tip of the aluminum pipe should be attached to the
kitchen chimney and the other tip to the plastic chimney
of the cooker hood.
If you wish, you can use the reducing pipe (F) at this
stage. Make sure that the connection is tight enough not
to come out when the cooker hood is working at the
highest operating range. For this purpose, fix the pipe
with the clamp (L).
Once the pipe is fixed, install the electrical connection
and start assembling the sheet metal chimneys.
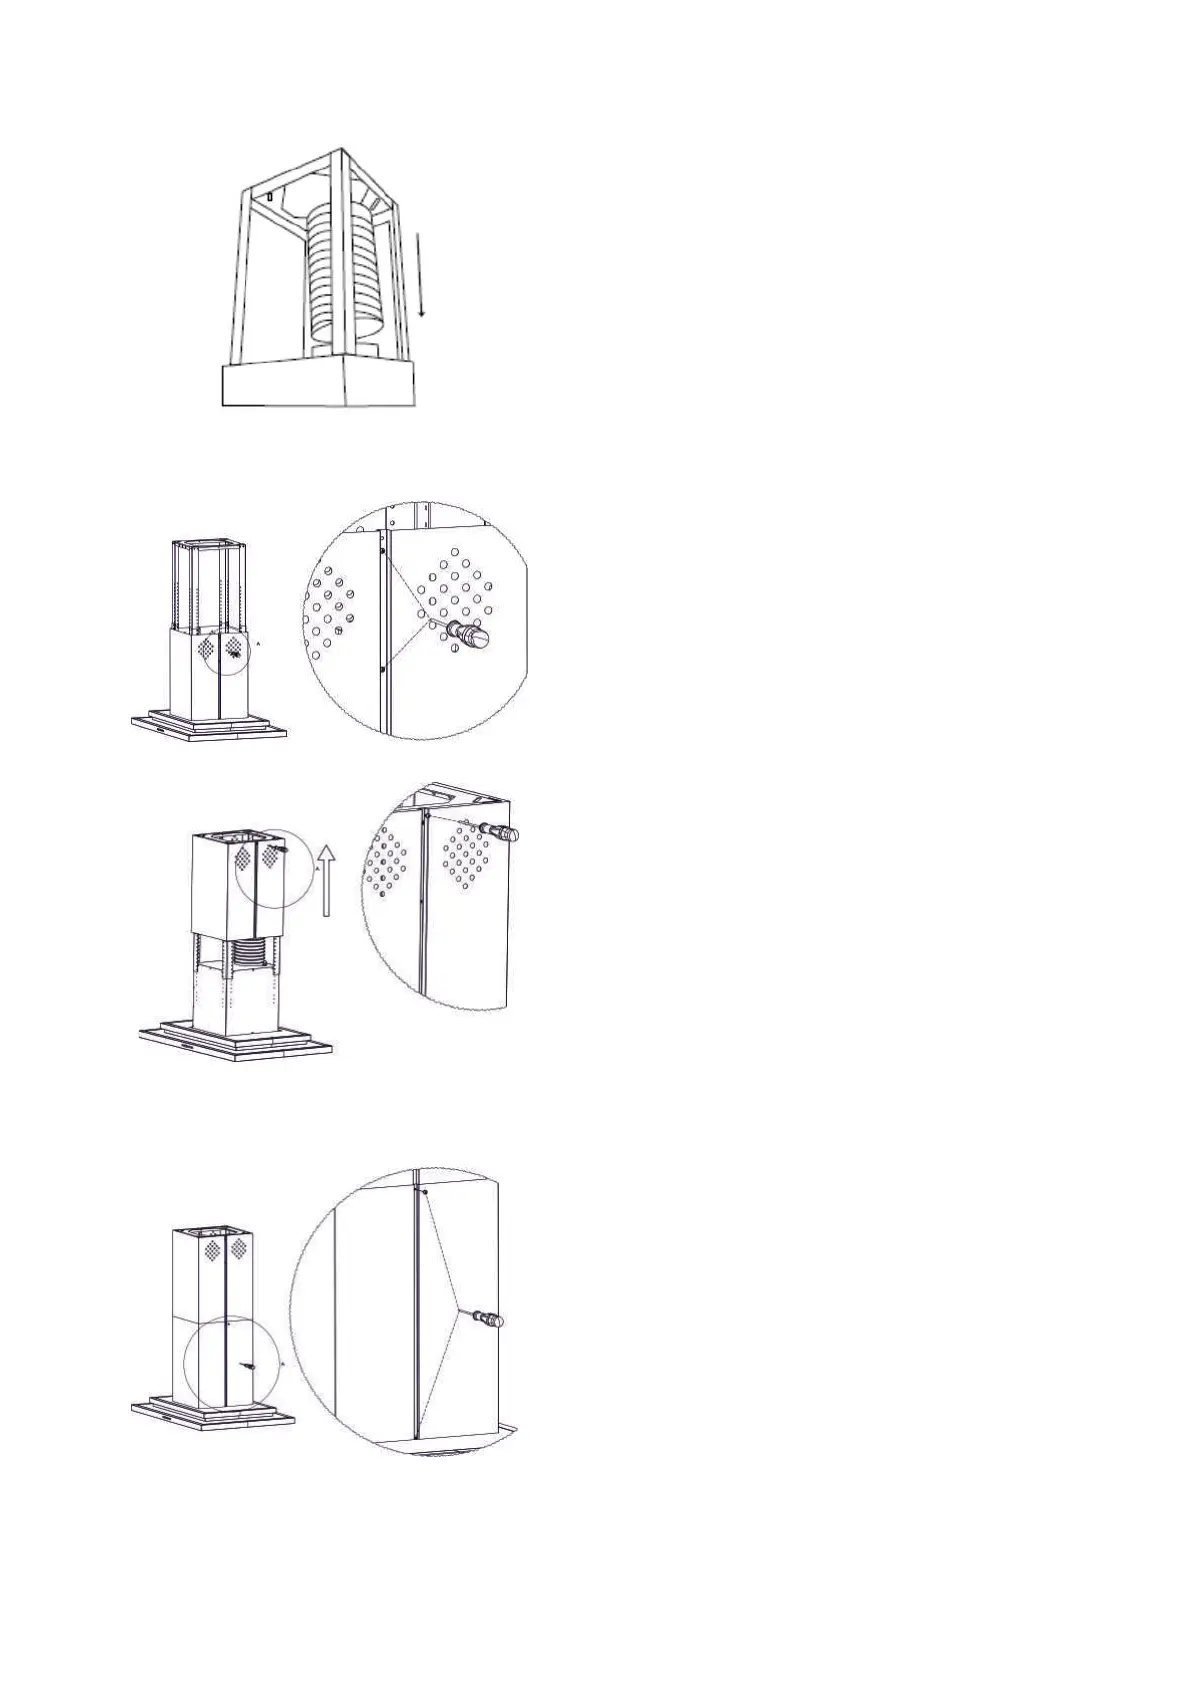
Screwing the Internal Sheet Metal Chimney Parts
Together
Install the internal sheet metal chimney parts together
on the hood by using 3,9x6,5 (J) screws.
Fixing the Internal Sheet Metal Chimney to the
Ceiling Connection Metal Sheet
Next, lift the internal sheet metal chimney upward and
screw it to the ceiling connection plate by using 4 x 8
(K) screws.
Screwing the External Sheet Metal Chimney Parts
Together
As the final step, install the external sheet metal chimney
parts together on the hood by using 3,9x6,5 (J) screws.
 Loading...