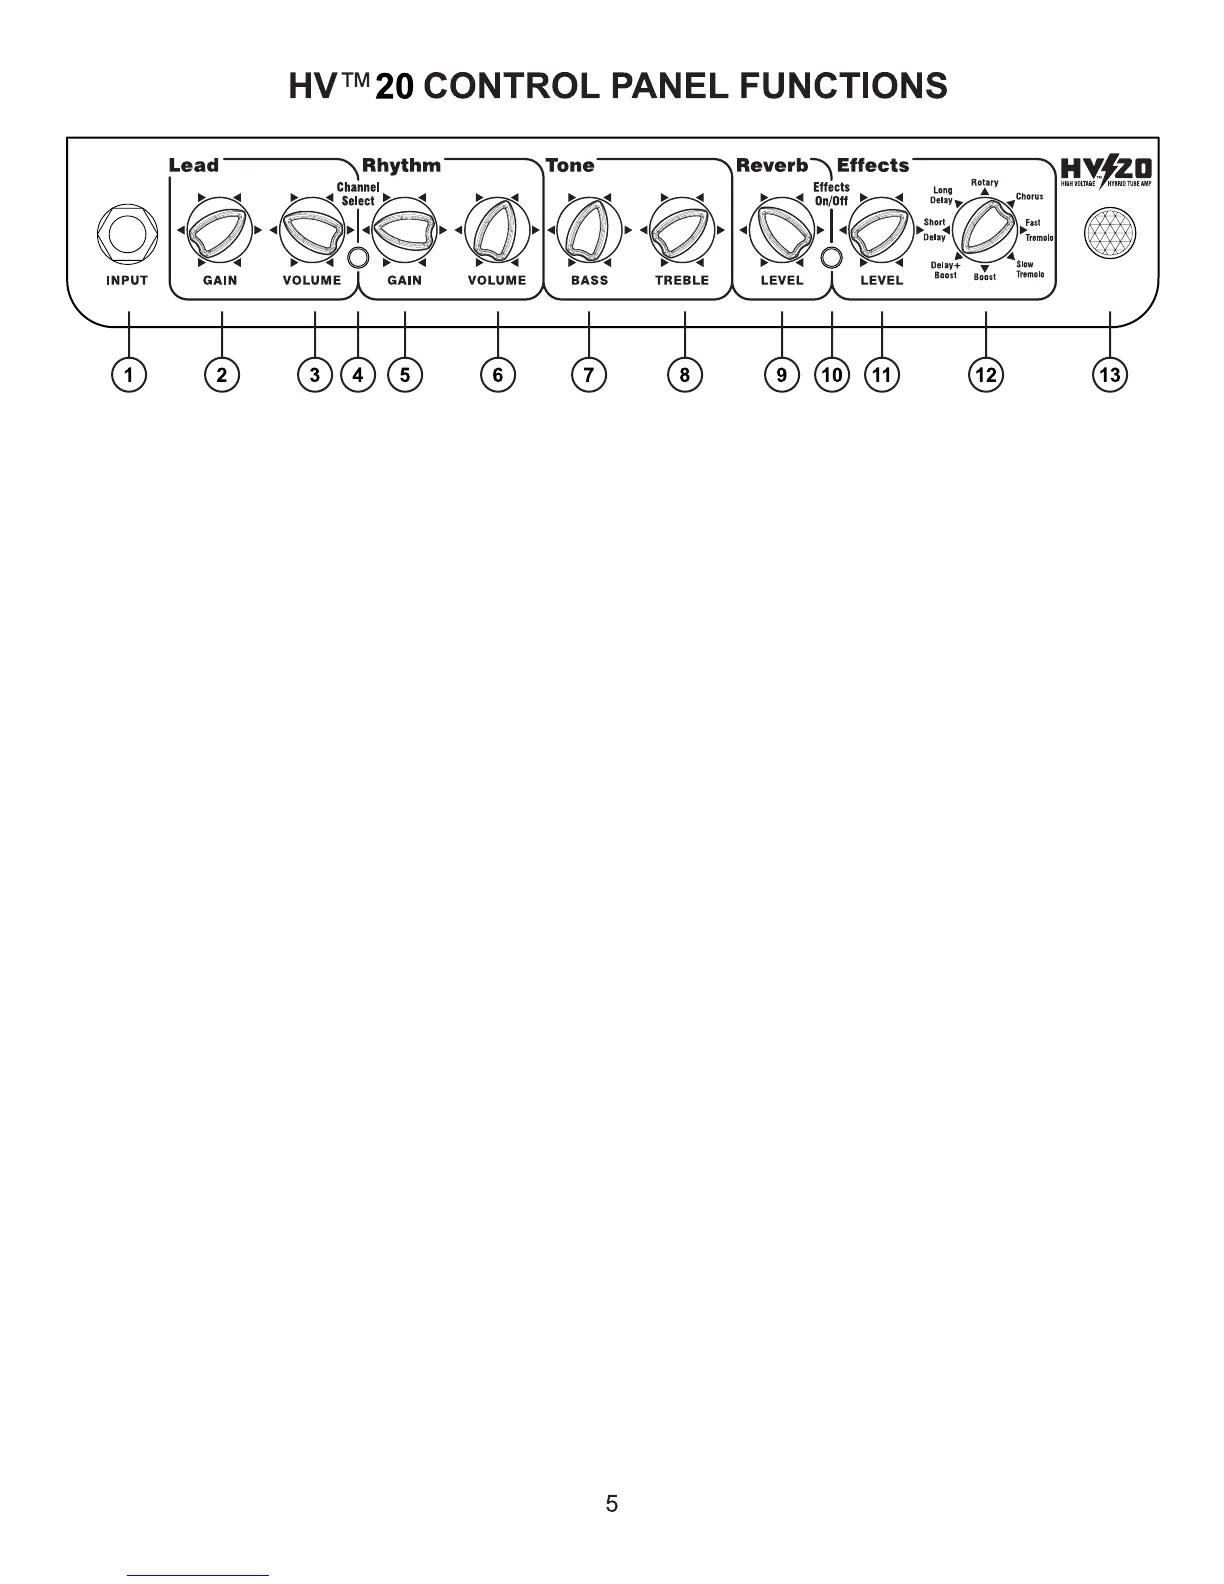
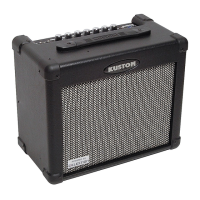
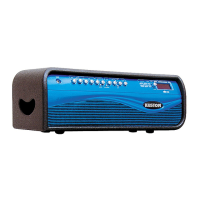
1.) Guitar Input Jack - this is a 1/4” 2-conductor input jack for plugging in your instrument. It is in-
tended for guitars but will accept other instruments as well.
2.) Lead Gain - adjust this clockwise to increase the amount of distortion. At lower ranges of the con-
trol, you get a less distorted sound. As you increase the gain, you add tremendous amounts of distor-
tion to the signal.
3.) Lead Volume - this is a volume control for the Lead Channel ONLY.
4.) Channel Select Switch - this switch selects between the Lead or Rhythm Channel.
5.) Rhythm Gain - adjust this clockwise to increase the amount of gain of the Rhythm Channel. The
gain is applied before the tone controls.
6.) Rhythm Volume - this is a volume control for the Rhythm Channel only.
7.) Bass - this passive EQ adjusts the low frequency equalization of the amplier. For tighter low-end
response, set the Bass control to lower settings. This is particularly helpful when using the amp at
very loud volume levels.
8.) Treble - this passive EQ adjusts the high frequency equalization of the amplier, but also interacts
with the Bass control as follows: As the Treble is increased, the Bass automatically decreases. Con-
versely, if the Treble is decreased, the Bass automatically increases. This interaction is typical of clas-
sic, passive tone controls and is responsible for the increased effectiveness of such a simple system.
9.) Reverb Level - adjust this clockwise to increase the amount of reverb. Reverberation lets notes
“hang in the air” longer, extending the sound. The Reverb is independent from the Effects, so that a
consistant Reverb setting can be chosen while using different Effects.
10.) Effects On/Off - this switch engages the digital effects section. The Footswitch over-rides this
switch when it’s plugged into the amp. Also, note that the Effects are independend from the Reverb.
11.) Effects Level - this control adds the effects section and mixes it into the main signal. Turning it
clockwise will increase the amount of audible effect.
12.) Effects Program Select - this switch will select any of eight different effects. Page 6 describes
each effect in detail.
13.) Jewel Light - this jewel light lets you know that the amplier is on.
*Power Switch on bottom rear chassis* - this switch turns on and off the AC power to the amp.