9
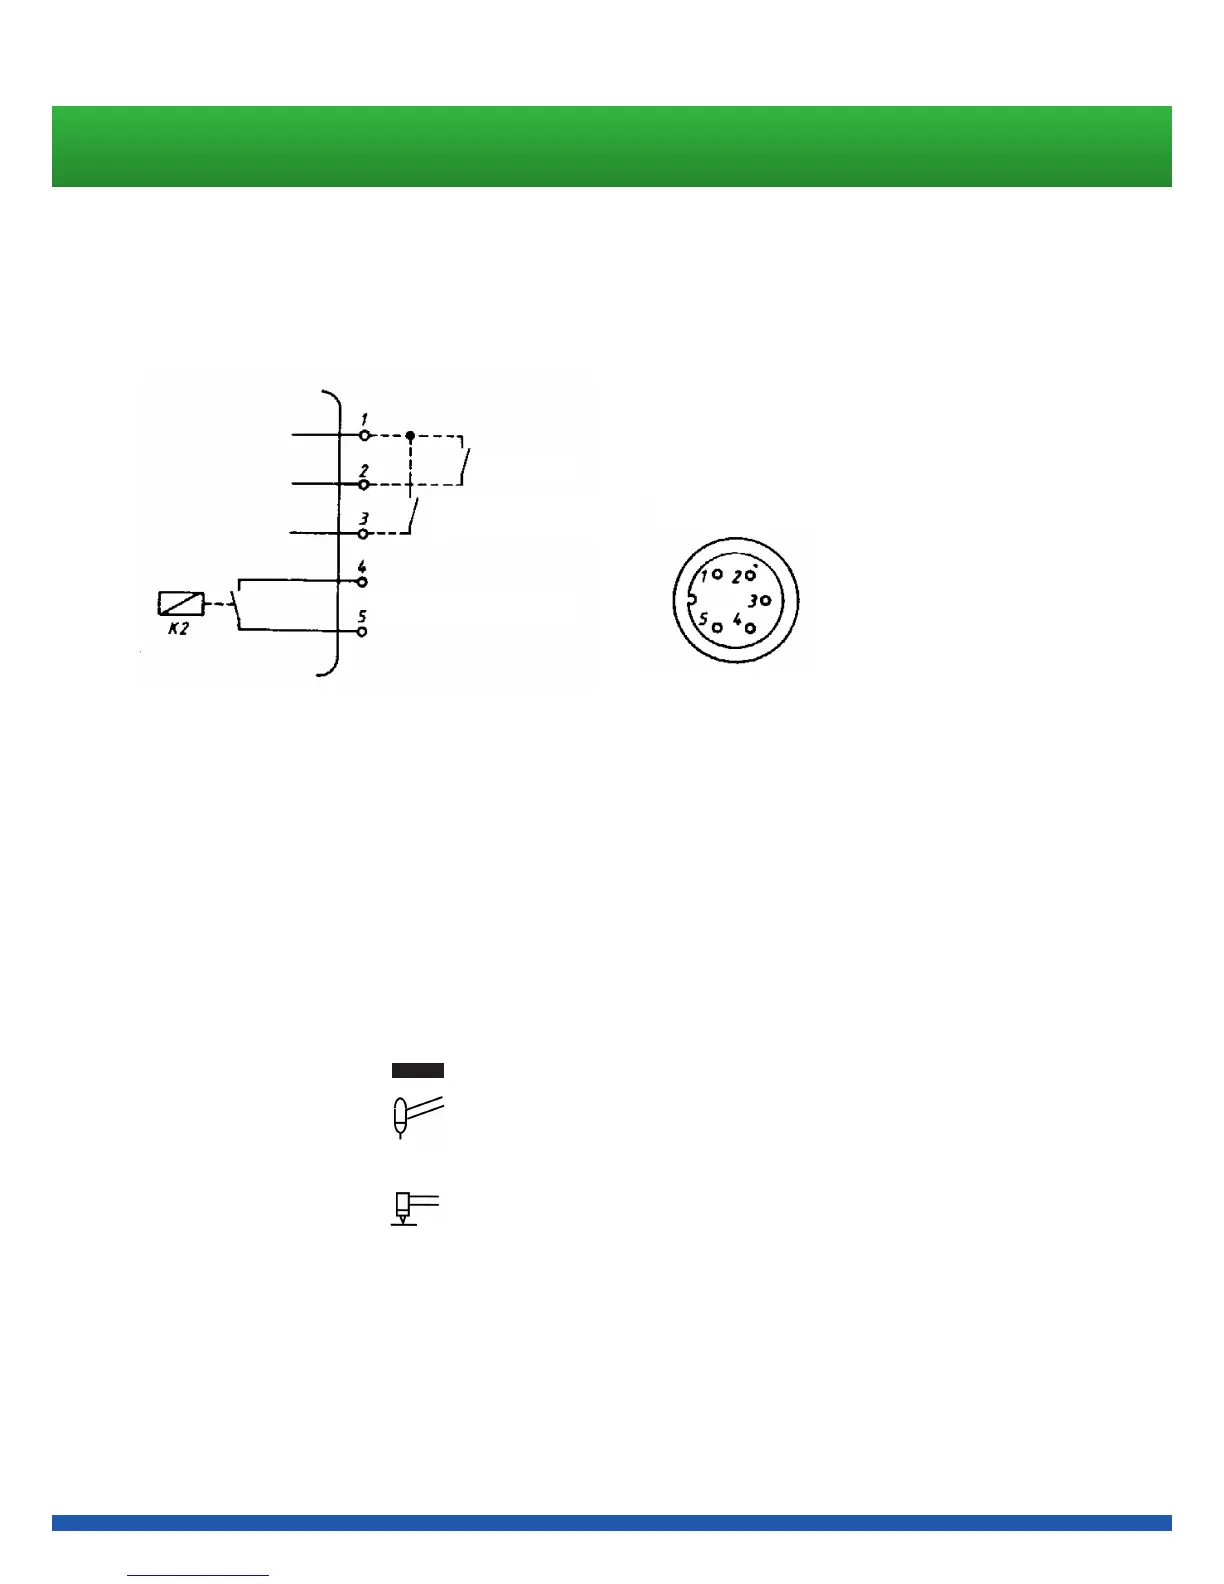
8. Connection for automatic welding
With socket b the machine can be connected to an automatic control (see wiring diagram)
Wiring diagram of 5-pole socket on adjusting board
* When switching on the pilot arc about the contacts 1 and 3 of the socket b the switch f remains
into mid position.
Starting up
A. Plasma Welding
1. Open cylinder valves and handwheels for gas flow rate at regulators.
2. Switch main switch F on. Fan and water pump will start, lamp d will light.
3. Keep torch away from work
4. Set switch i to symbol
5. set switch k to symbol
6. Push test button for plasma gas and adjust flow rate acc. to data sheet plasma welding
7. set switch f to symbol (Pilot arc will ignite after a gas pre-flow time of about 5 sec. and
lamp e will light up.
8. Keep button E depressed and adjust welding current. Amperage is preset at potentiometer a
and can be read from ammeter D.
9. Actuate torch switch or foot switch and adjust flow rate of shielding gas at the other regulator.
10. Adjust gas post-flow time on potentiometer l
Installation
Start
Pilot extern on*
View of the front
Current relais