EasyManua.ls Logo

La Crosse Technology 810-106 - User Manual

La Crosse Technology 810-106
4 pages
Print Icon
To Next Page IconTo Next Page
Loading...
La Crosse Technology, Ltd. Page 1
CONTENTS
810-106 FAQS ........................................................................................................................... 1
Weather Radio .......................................................................................................................... 1
Power Requirement ............................................................................................................ 1
Charging ............................................................................................................................... 1
ON/OFF Function ................................................................................................................. 2
Set Time ............................................................................................................................... 2
Radio Modes ......................................................................................................................... 2
Tune or Auto-scan .............................................................................................................. 2
Weather Band Channels .................................................................................................... 3
Weather Band Standby ...................................................................................................... 3
Weather Alerts..................................................................................................................... 3
Volume .................................................................................................................................. 3
AM or FM Radio ................................................................................................................... 3
White LED Light ................................................................................................................... 4
Reset Radio .......................................................................................................................... 4
Antenna ................................................................................................................................ 4
Optional Earphones (not included) .................................................................................. 4
Weather Radio
Power Requirement
Rechargeable Battery: LIR123/600MAH (included)
Charging
When the low battery symbol displays, charge the radio by solar/hand
crank/USB.
Turn off the radio before charging.
The red LED-charging indicator will illuminate to indicate the radio is being
charged.
Green light will indicate it is charged. (the light will not stay on when not
charging).
SOLAR:
Place the unit outside with the solar panel in direct sun.

Other manuals for La Crosse Technology 810-106

Question and Answer IconNeed help?

Do you have a question about the La Crosse Technology 810-106 and is the answer not in the manual?

Summary

Weather Radio Power and Charging

Solar Charging

Charge the radio by placing it outside with the solar panel in direct sun. Full charge takes 10-12 hours.

Hand Crank Charging

Extend and rotate the crank clockwise at 130 cycles/minute for 1 minute to get 30 minutes of power.

USB Charging

Use the mini USB port to charge the radio or other external devices. Max 5.0V, 500MA.

Radio Operation Basics

ON;OFF Function

Press and release the POWER button to turn the radio ON or OFF.

Set Time

Hold MODE for 5 seconds to enter menu. Use TUNE to adjust, MODE to confirm settings.

Radio Modes

Press MODE to toggle between AM, FM, and WB radio modes.

Tune or Auto-scan

Use TUNE buttons to adjust frequency or press/hold to auto-scan.

Weather Band Features

Weather Band Channels

Supports 7 NOAA weather band frequencies from 162.400MHz to 162.550MHz.

Weather Band Standby

Silences weather radio until an alert sounds. Enter by holding MODE for 3 seconds.

Weather Alerts

During an alert, backlight turns red, volume increases to 16 for 5 mins.

Volume Control

Use -/VOL to decrease and +/VOL to increase the volume.

Radio Reception and Controls

AM;FM Radio Reception

Supports worldwide AM (520-1710 kHz) and FM (64-108 MHz) bands.

White LED Light

Press LIGHT button to turn the white LED light ON or OFF.

Reset Radio

If display is blank, charge battery then press the reset button.

Antenna Usage

Extend and rotate antenna, place near a window for best signal reception.

Optional Earphones

Plug 3.5mm earphones into the jack for private listening.

Overview

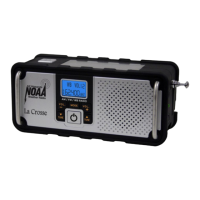
This document describes a multi-functional weather radio, model 810-106, designed for receiving weather alerts, AM/FM radio, and providing a white LED light. It offers multiple power options, including a rechargeable battery, solar charging, hand-crank charging, and USB charging, making it a versatile device for various situations.

Function Description:

The primary function of this device is to serve as a weather radio, capable of receiving all seven NOAA specified weather band (WB) frequencies (162.4 to 162.55 MHz). It is equipped with an integrated IC chip that supports narrowband FM de-emphasis and 1050 Hz alert tone detection, ensuring reliable reception of weather alerts. In WB mode, the radio continuously broadcasts weather information. A crucial feature is the "Weather Band Standby" mode, which silences the radio until an active alert sounds. When an alarm signal is received in standby mode, the backlight automatically flashes red for 60 seconds, drawing attention to the alert. During an active alert, if the radio is in WB mode, it automatically receives alarm signals, the backlight changes from blue to red, and the volume increases to level 16 for five minutes to ensure the beep alert tone and broadcast are heard. After five minutes, the radio automatically returns to WB standby.

Beyond weather alerts, the device also functions as a standard AM/FM radio. It supports worldwide AM band reception from 520 to 1710 kHz and FM broadcast band reception from 64 to 108 MHz. The integrated IC chip in both AM and FM modes utilizes a digital low-IF architecture, which enhances selectivity and signal-to-noise ratio (SNR) for AM and eliminates the need for external components and factory adjustments for FM, providing a clear and stable listening experience.

Another integrated function is a white LED light, which can be turned on and off as needed, providing illumination.

Usage Features:

Power and Charging: The radio is powered by a rechargeable LIR123/600MAH battery, which is included. The device offers three ways to charge this battery:

  • Solar Charging: Simply place the unit outside with the solar panel in direct sunlight. A full charge takes approximately 10-12 hours in bright sunlight.
  • Hand-Crank Charging: Extend the hand crank located on the back of the radio and rotate it steadily clockwise at a rate of 130 cycles per minute. One minute of cranking provides about 30 minutes of power. A red charge light indicates when the cranking speed is appropriate.
  • USB Charging: Connect the USB charging cord into the mini USB port on the radio and plug it into a USB power source. The voltage should not exceed 5.0V, and the current should not exceed 500MA.

When the low battery symbol displays, it's time to charge the radio. It is recommended to turn off the radio before charging. A red LED indicator illuminates during charging, and a green light indicates a full charge (this light will not stay on when not charging).

Basic Operation:

  • ON/OFF: Press and release the POWER button to turn the radio on or off.
  • Setting Time: With the radio off, press and hold the MODE button for 5 seconds to enter the program menu. You can then set the 12/24-hour format, hour, and minutes using the TUNE buttons. The clock remains on even when the power is off.
  • Radio Modes: With the radio on, press and release the MODE button to toggle between AM, FM, and WB radio modes.
  • Tuning: In any selected radio band, use the left TUNE button to decrease the frequency and the right TUNE button to increase it.
  • Auto-scan: Press and hold either the left or right TUNE button to auto-scan frequencies.
  • Volume Control: Use the -/VOL button to decrease the volume and the +/VOL button to increase it.
  • White LED Light: Press and release the LIGHT button to turn the white LED light on or off. Note that a slight shadow above and below the light beam is normal for a three-LED arrangement.

Weather Alert Specifics:

  • To enter Weather Band Standby, hold the MODE button for 3 seconds when in WB mode.
  • During an alert, while the volume is increased to level 16, you can press and release the MODE button to return the radio to WB standby.

Connectivity:

  • The device includes a mini USB input/output jack, which can also be used to charge other external USB devices using the hand crank.
  • A 3.5mm earphone jack is available for private listening with optional earphones (not included).

Maintenance Features:

Antenna: To ensure optimal reception, fully extend and rotate the telescoping antenna. Position it near a window to receive a steady, strong signal and avoid broken or noisy reception.

Resetting the Radio: If the display is blank, first ensure the battery is charged. Then, press the RESET button once. The RESET button is a small pinhole located near the antenna, where the crank handle rests.

La Crosse Technology 810-106 Specifications

General IconGeneral
BrandLa Crosse Technology
Model810-106
CategoryWeather Radio
Display TypeLCD
Radio Bands SupportedNOAA Weather Band
Power SourceAC Adapter
AlertsWeather Alerts
Frequency Range162.400 MHz to 162.550 MHz
Backup Power3 AA batteries (not included)
AntennaBuilt-in telescopic antenna