Vector
Last updated November 8, 2024
// 01
What’s Included
Vector workstatio
Power cabl
Wi-Fi antenn
Lambda swa
Quickstart guide
// 02
Getting Started
To set up the Vector, connect your monitor, keyboard & mouse, wired network, Wi-Fi
antenna, and power cable. You also need to remove the glass panel films and
Instapak foam used to protect your Vector during shipment.
Note: Ports on your Vector may be arranged differently than pictured.
// 03
Removing the Packaging Materials
You must remove the Instapak foam and protective film from your Vector before
using it.
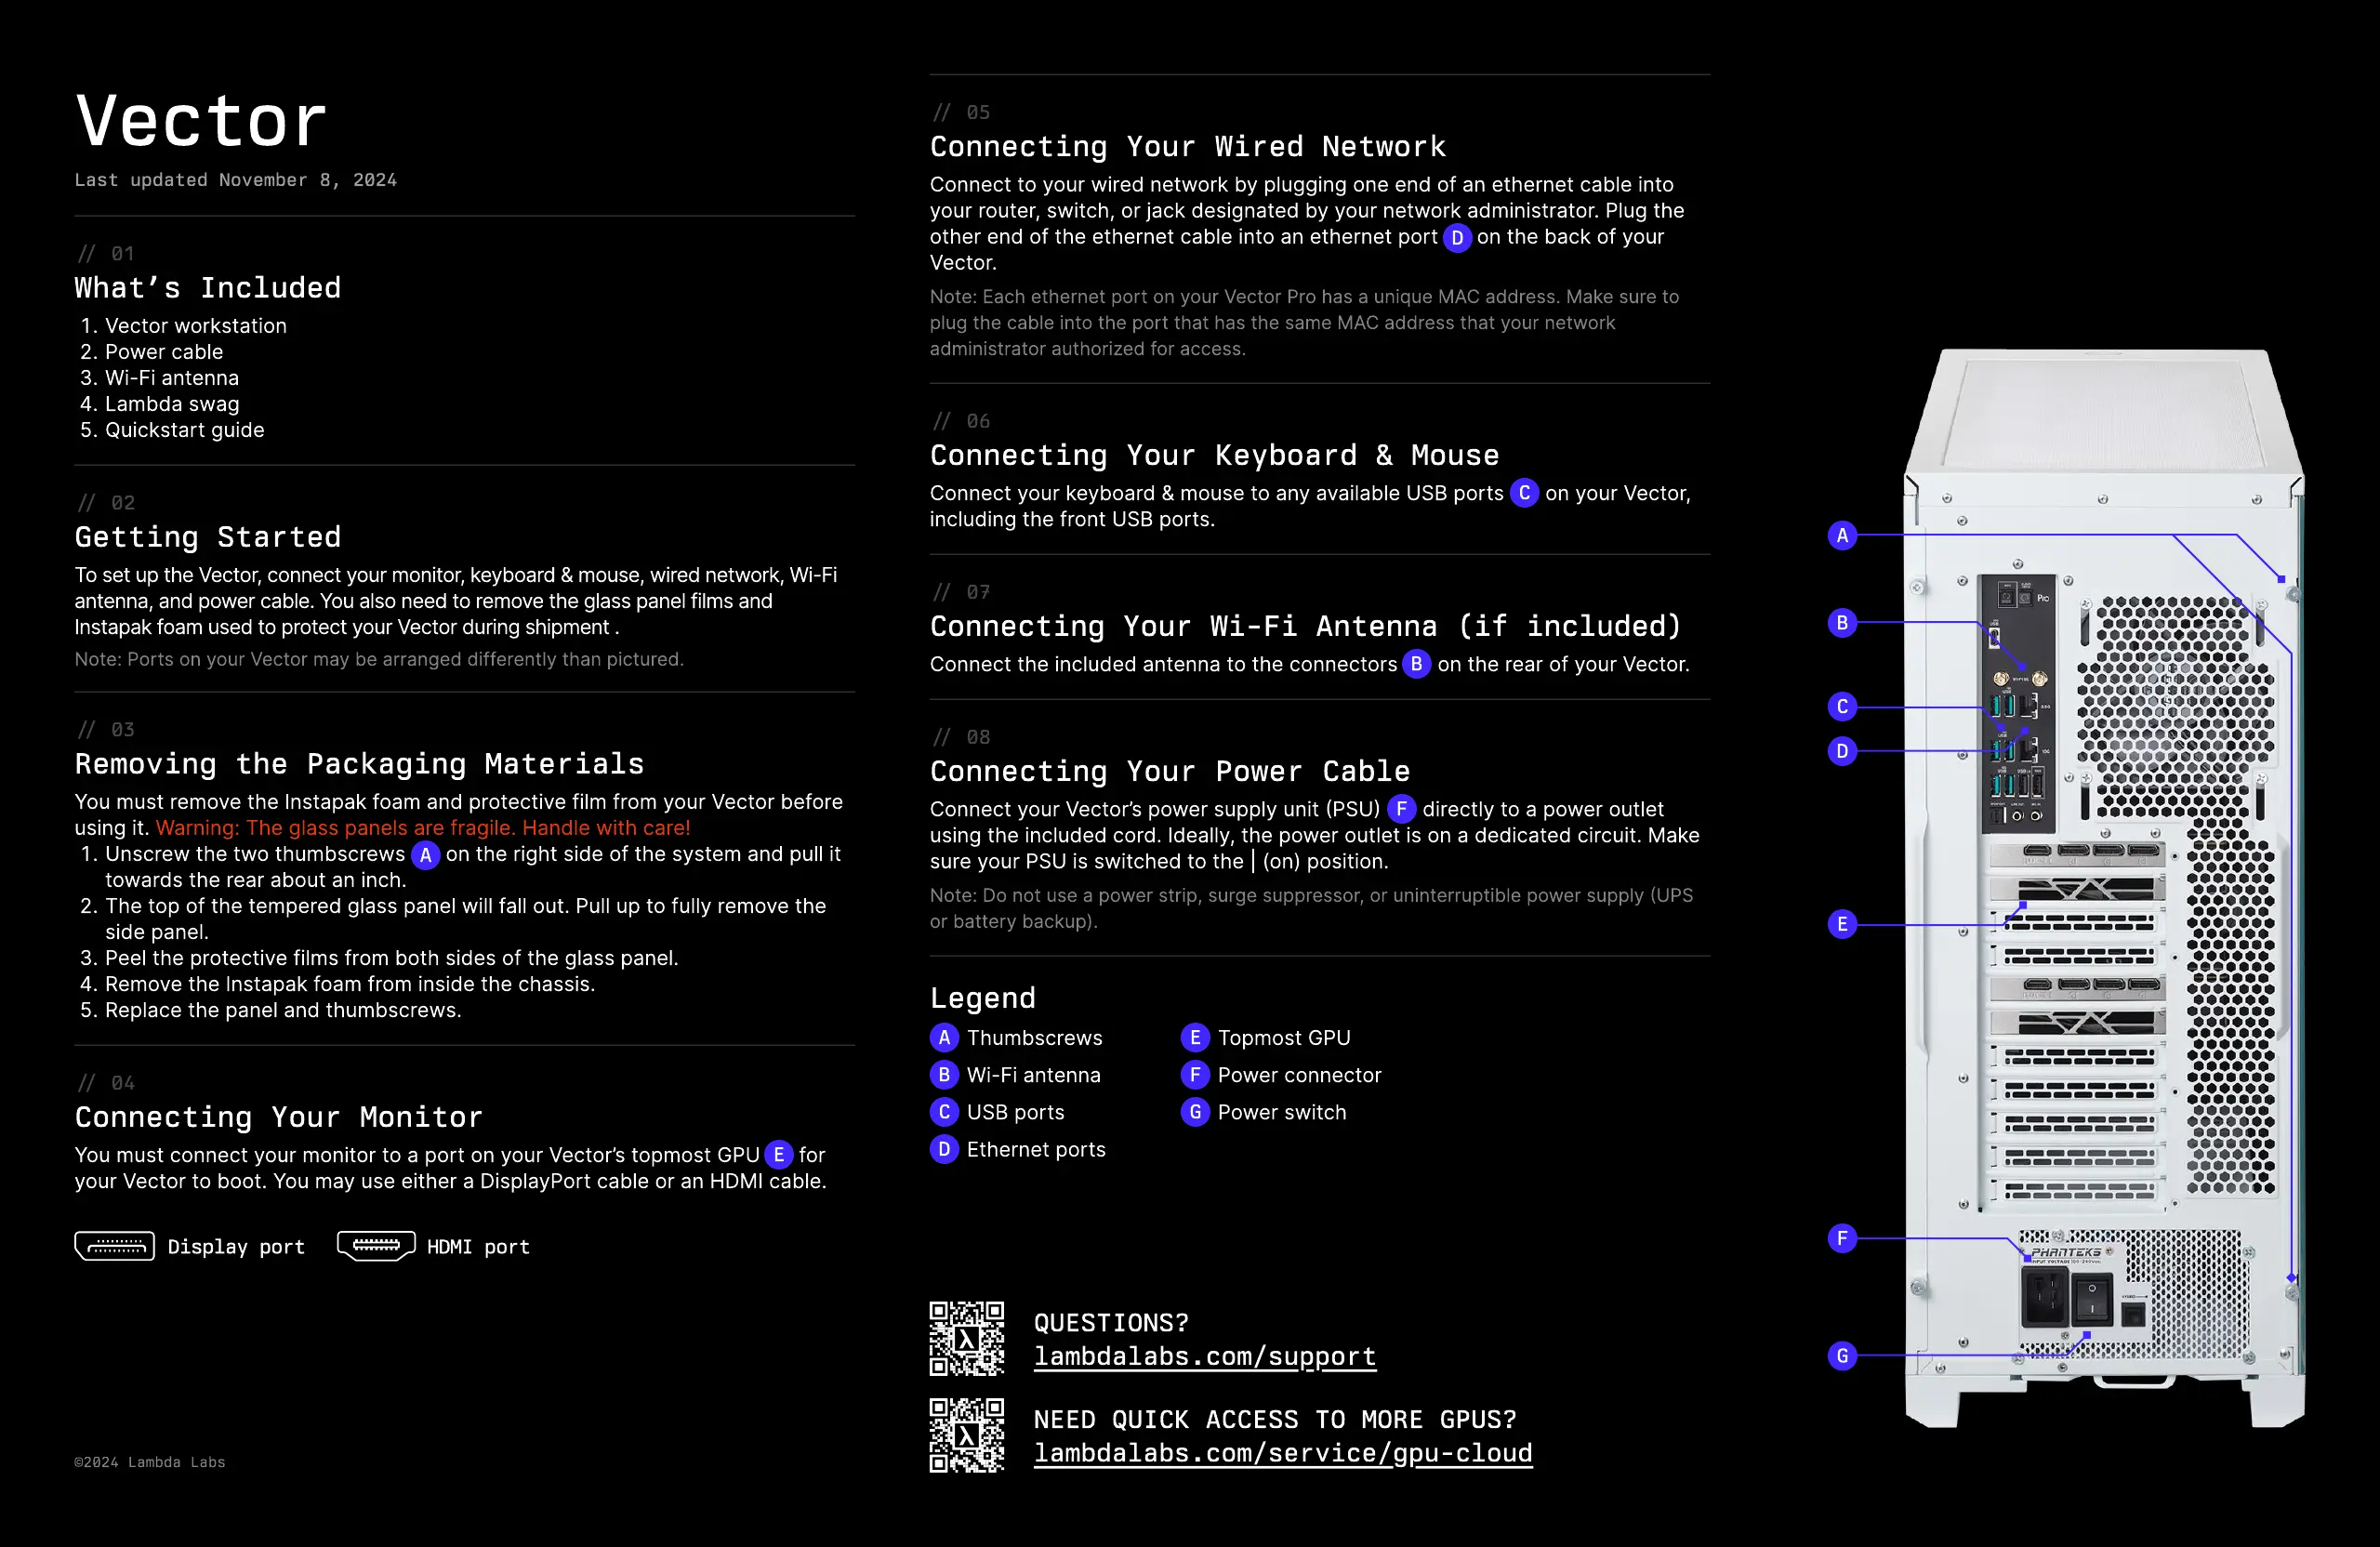
Unscrew the two thumbscrews (A) on the right side of the system and pull it
towards the rear about an inch.
The top of the tempered glass panel will fall out. Pull up to fully remove the
side panel.
Peel the protective films from both sides of the glass panel.
Remove the Instapak foam from inside the chassis.
Replace the panel and thumbscrews.
Warning: The glass panels are fragile. Handle with care!
A
// 04
C
onnecting
Y
our Monitor
You must connect your monitor to a port on your Vector
’
s topmost
G
PU (
E
) for
your Vector to boot. You may use either a
D
isplayPort cable or an
HDM
I cable.
D
ispla
y
port
HD
MI port
E
// 0
5
C
onnecting
Y
our Wired Net
w
ork
C
onnect to your wired network by plugging one end of an ethernet cable into
your router, switch, or
j
ack designated by your network administrator. Plug the
other end of the ethernet cable into an ethernet port (
E
) on the back of your
Vector.
Note:
E
ach ethernet port on your Vector Pro has a uni
q
ue
M
A
C
address.
M
ake sure to
plug the cable into the port that has the same
M
A
C
address that your network
administrator authori
z
ed for access.
D
// 0
6
C
onnecting
Y
our
K
e
y
board
&
Mouse
C
onnect your keyboard & mouse to any available U
SB
ports (
D
) on your Vector,
including the front U
SB
ports.
C
// 0
7
C
onnecting
Y
our Wi
-F
i Antenna
(
i
f
included
)
C
onnect the included antenna to the connectors (
B
) on the rear of your Vector.
B
// 08
C
onnecting
Y
our Po
w
er
C
able
C
onnect your Vector
’
s power supply unit (P
S
U) (
G
) directly to a power outlet
using the included cord. Ideally, the power outlet is on a dedicated circuit.
M
ake
sure your P
S
U is switched to the
|
(
on
)
position.
Note:
D
o not use a power strip, surge suppressor, or uninterruptible power supply (UP
S
or battery backup
)
.
F
Legend
A
B
C
D
Thumbscrew
Wi-Fi antenn
U
SB
port
E
thernet ports
E
F
G
Topmost
G
P
Power connecto
Power switch
Questions?
lambdalabs
.
com
/
support
N
eed
Quick
access
to
more
GP
Us?
lambdalabs
.
com
/
service
/
gpu
-
cloud
A
B
C
D
E
F
G
©2024
Lambda
Labs
 Loading...