10
12
11
14
16
13
6
7
8
1
3
2
4
5
9
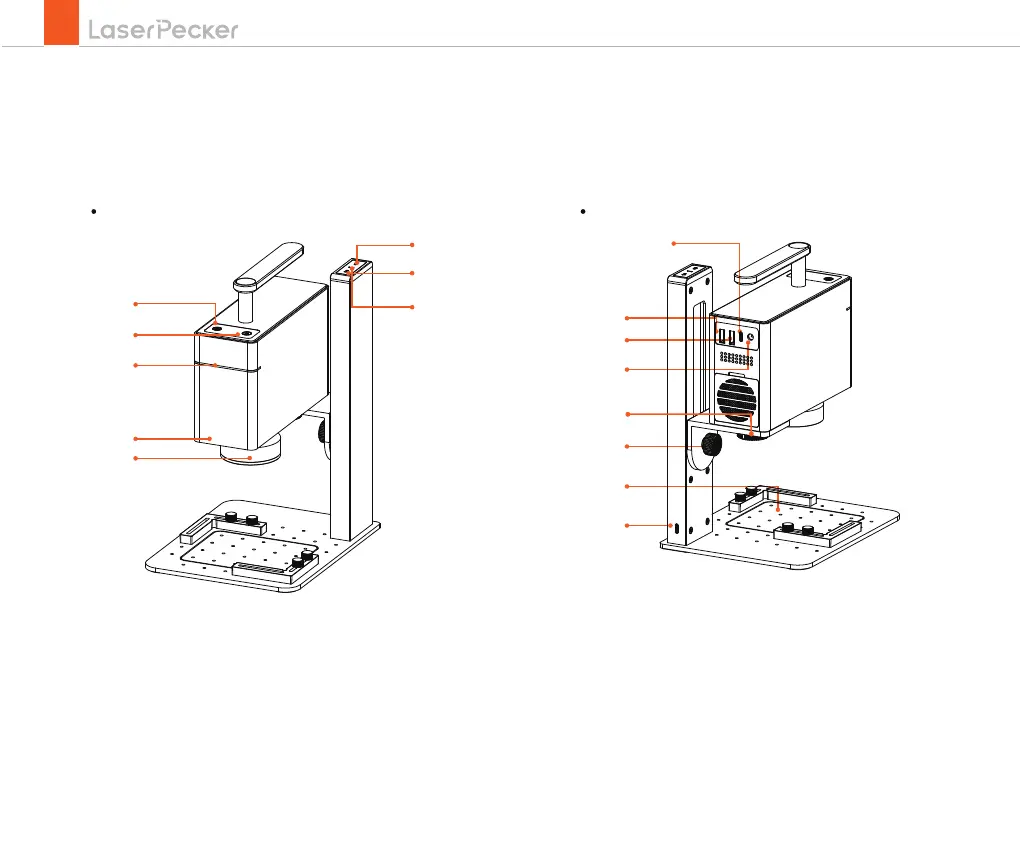
/Buttons/ indicator instructions
02
Indicator of laser unit/electric stand
Power ports
1. Preview button
2. Short press to pause/long press to power off
3. Laser unit indicator
4. Red laser ranging dots
5. Field lens and lens cover
6. Long press for continuous rise or short press for 1mm rise
7. Long press for continuous down or short press for
1mm down
8. Electric stand indicator light
9. Computer (PC software) connection port
10. Output port for the electric stand
11. Output port for the versatile electric roller
12. DC input port for the laser unit
13. Positioning plate
14. Input port of the electric stand
15. Hold-down bolt
16. Angle adjusting bolt
15