EN
MACHINE SETTINGS
2
Press the co ee brew switch.
3
Dispense all the water in the
tank from the steam / hot
water wand. To stop dispen-
sing, press the co ee brew
switch again and close the
knob.
4
Fill the water tank again.
5
Insert the pod holder WITHOUT the pod, and rotate it from left to right
until it locks rmly into place. Then place a container under the pod
holder.
6
Press the co ee brew switch and dispense all the water in the tank.
Once the tank is empty, stop dispensing by pressing the co ee brew
switch again.
7
Fill the water tank again. When the co ee ready light is steady on, the
machine is ready for use.
8
Remove the container used.
PRIMING THE WATER CIRCUIT
If the water in the tank is completely fi nished, you need to
prime the water circuit as explained below.
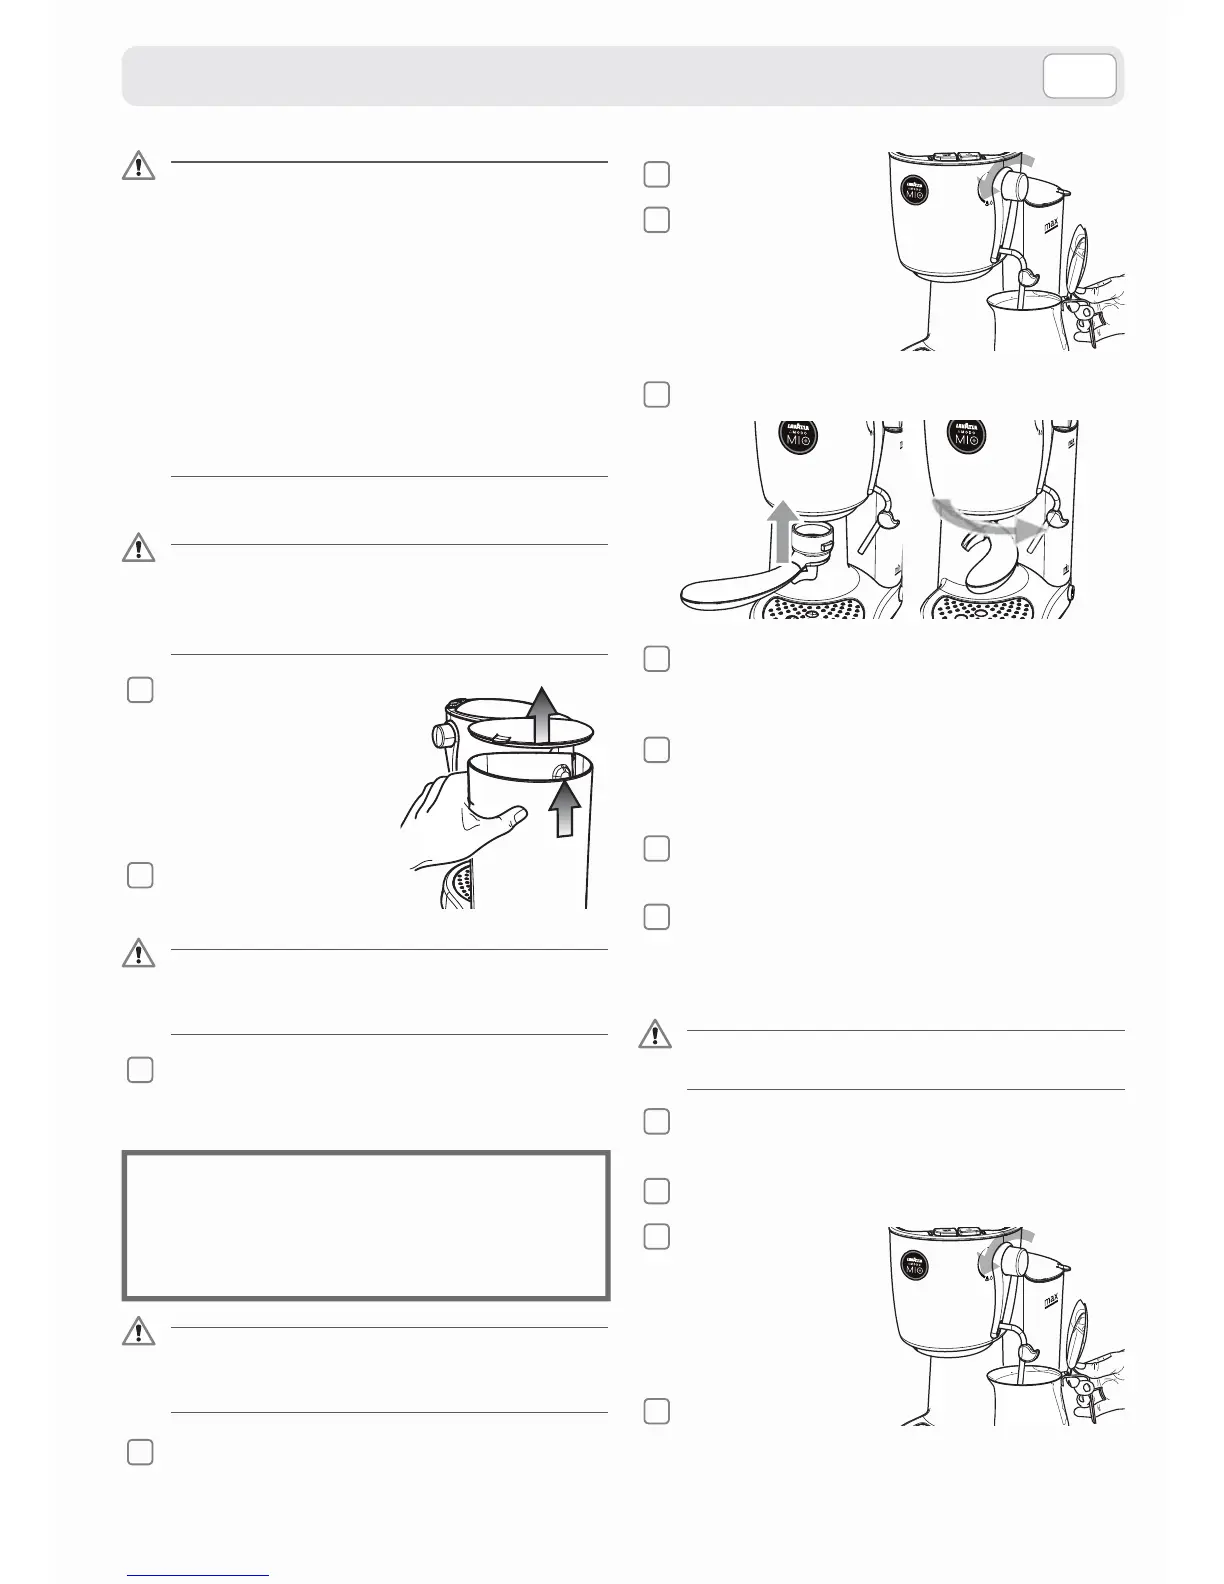
1
Place a container under the steam / hot water wand and open the
knob by turning it counter-clockwise.
2
Press the co ee brew switch.
3
Dispense water from the ste-
am / hot water wand until a
steady stream of water comes
out. To stop the operation,
press the co ee brew switch
again and close the knob.
4
Remove the container used.
No liability is held for damage caused by:
• Incorrect use not in accordance with the intended purposes;
• Repairs not carried out in authorised service centres;
• Tampering with the power cord;
• Tampering with any parts of the machine;
• The use of non-original spare parts and accessories;
• Failure to descale;
• Storage at temperatures below 0°C (32°F);
• Use at temperatures below 10°C or above 40°C;
• Use at a relative humidity above 95%;
• Use of pods other than those indicated.
In these cases, the warranty is not valid.
STARTING THE MACHINE
Place the machine on a at and stable surface, away from water and
heat sources. Disconnect the power supply if connected. Damages to
the machine resulting from the failure to follow these instructions will
not be covered by the warranty.
1
Lift and remove the water tank co-
ver, then the water tank itself.
2
Fill the water tank up to the MAX
level indicated, using only fresh,
drinking, non-sparkling water.
Hot water or any other liquid may damage the tank. Do not operate the
machine if water is not present: Make sure there is enough water in the
tank.
3
Connect the power cord and press the main switch (see MACHINE
COMPONENTS
- Picture B). When the co ee ready light is on, the
machine is ready for brewing.
The use of a water lter improves the quality of the water and
increases the operational life of the machine by preventing lime-
scale build-up. Saeco recommends using the INTENZA BRITA FILTER
(optional accessory). To install the lter follow the instructions
provided with the accessory.
Upon the machine’s fi rst start up and after a long period of
inactivity you need to rinse the water circuit as explained be-
low.
1
Place a container under the steam / hot water wand and open the
knob by turning it counter-clockwise.
 Loading...