Rev: 09.20.18
Page 2
CCD-0002197
SOLERA
®
CLASSIC AWNING ARM
REPLACEMENT INSTRUCTIONS
TI-231
AWNINGS
Installation of the New Arm
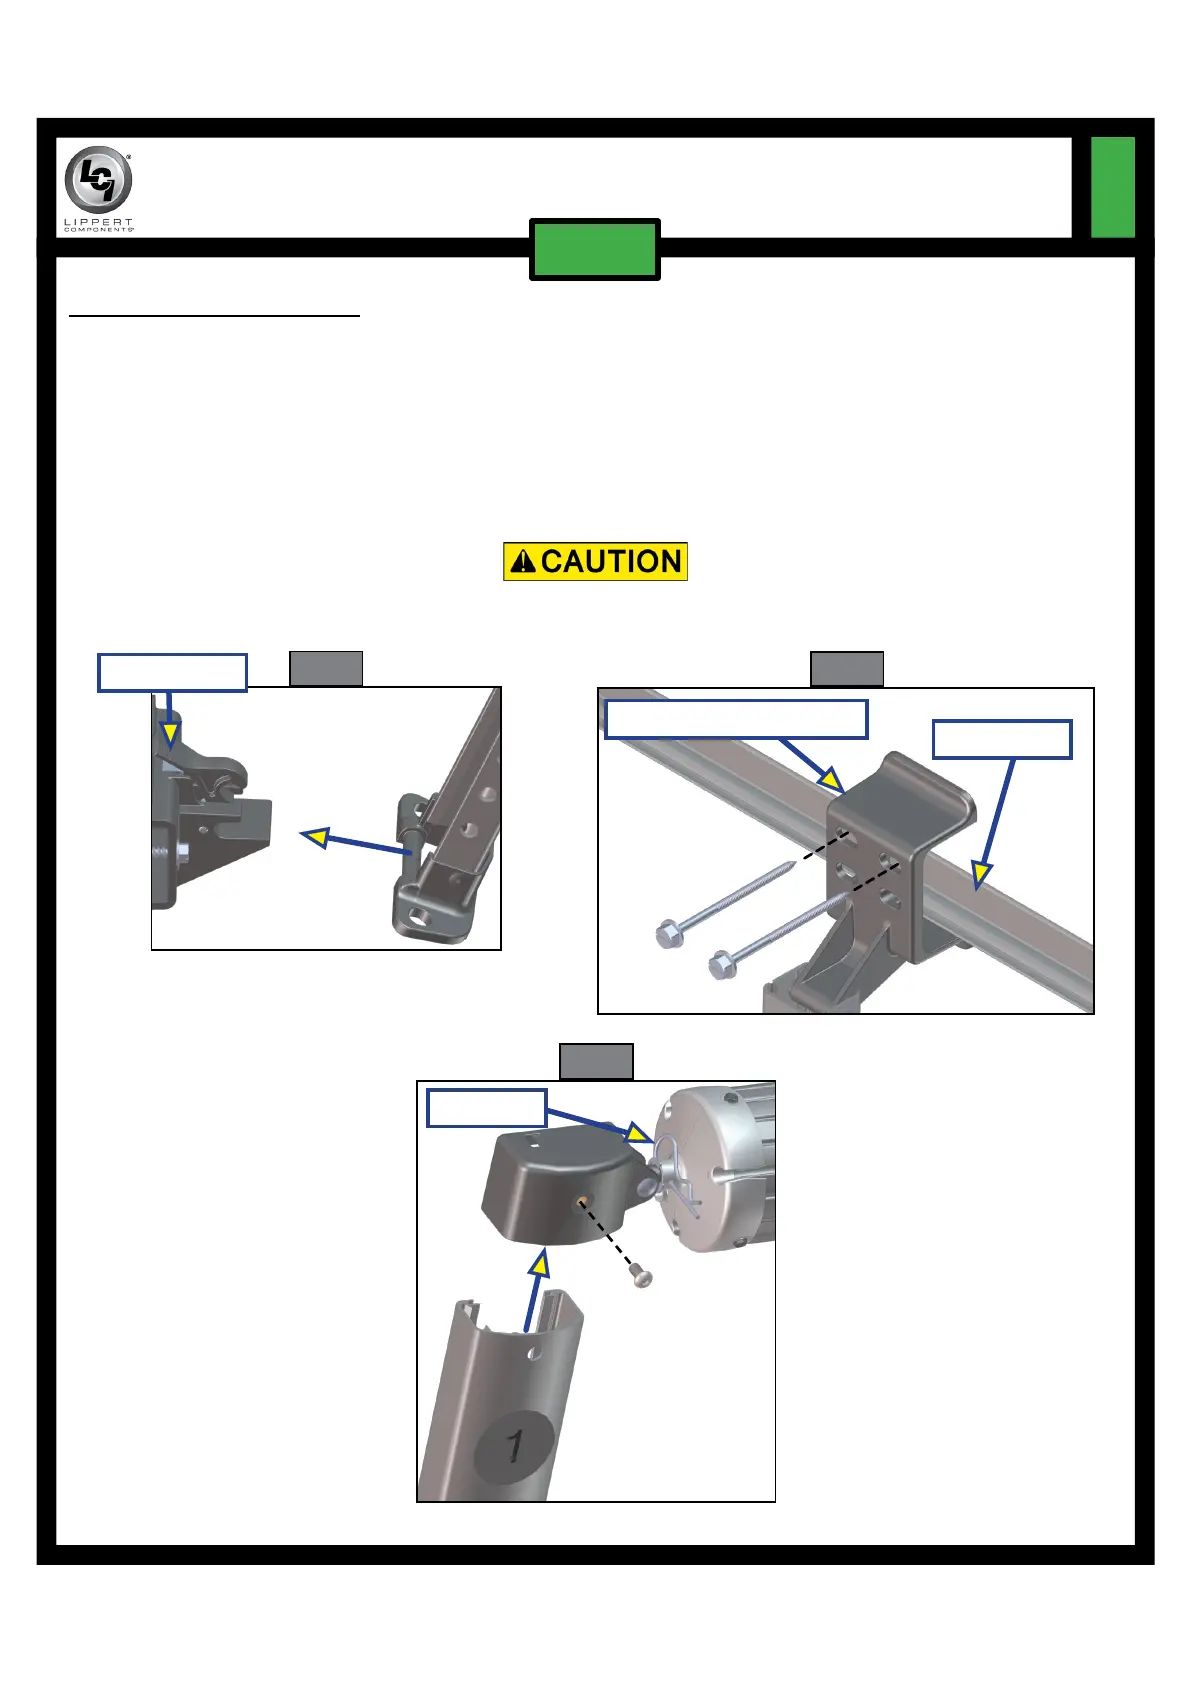
1. Secure the support arm assembly in the lower mounting bracket (Fig. 4).
2. Place the upper bracket in place over the awning rail in the same position from which the old bracket
was removed. Apply a liberal amount of sealant over the holes and attach the bracket using the ¼" x 3"
lag screws provided (Fig. 5).
3. Slide the support arm assembly into the head assembly and secure with the screw that was previously
removed (Fig. 6).
4. Ensure the locking lever is still in the roll out position and remove the cotter pin (Fig. 6) from the end
cap and head shaft holes.
Cotter Pin
Upper Mounting Bracket
Awning Rail
Fig. 4
Fig. 5
Fig. 6
Firmly grasp the pull strap on the awning fabric before removing the cotter pins to prevent the awning from
retracting on its own. Failure to do this may result in serious personal injury or property damage.
Push to open
 Loading...