13
Connecting Room and Plug Load Controllers
211
102
221
102 102 102
213
213
212213 213
101
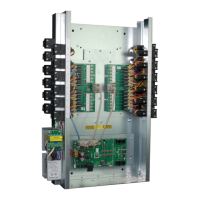
LMCP-24
LMPL-
101
Maximum # of connected devices per network
: 48 (including 1 for LMCP),
for a total of 96. In this example there are 10 devices on Network A and
12 on Network B.
Maximum number of loads, including those in the panel, and on both
networks: 64. In this example, there are 50 loads (24 in the panel, 11 on
Network A, and 15 on Network B).
Maximum of 4 LMRC-10x or LMPL-101 allowed in a network. In this
example, you could add two more 10x controllers to Network A, but
none to Network B.
Room
Controllers
Controller
Network A
Network B
Load Control Arbitration
After the room or plug load controllers are connected to the DLM Local Network and powered up, they automatically negotiate to
determine which controller becomes the Master. This is referred to as load arbitration. The controllers also determine the load numbers
for each relay on the DLM Local Network. By design, the Master is the controller powering the bus with the highest serial number. The
panel will have the highest serial number and therefore be the Master. As a general rule, controllers with more loads have a higher serial
number than lower ones, and room controller have higher numbers than plug load controllers.
Example: The LMCP-24 is connected to an LMRC-101, LMRC-212, and LMPL-201. The panel uses load IDs 1–24, the LMRC-212 uses
IDs 25 and 26, the LMRC-101 uses ID 27, and the LMPL-201 uses ID 28.
NOTE: The panel will reserve IDs based on the number of slots on the LMRD card, not the number of relays installed. So an LMCP-24
with only 16 relays installed will still reserve IDs 1-24.
PROGRAMMING THE LMCP
There are five methods for programming the behavior of the relays in the LMCP. All programming is stored in the memory of the LMCP.
• Directly on the LMCP, using Smartwire, to bind loads to groups 1–8
• Directly on the LMCP and connected switches and sensors, using Push n’ Learn, to bind loads to individual switches and sensors
• Using the LMCT-100 hand-held remote. This provides all the functionality as Smartwire, but allows you to program all 99 groups in
a panel, instead of just groups 1–8. It also provides the ability to program connected switches and sensors to groups. Additionally,
you can use the LMCT-100 to bind switches and sensors to individual loads, the same as using Push n’ Learn.
• Using the LMCS-100 software. You can connect a PC running LMCS-100 to the panel directly, using an LMCI (USB to LMRJ
adapter), or via BACnet. LMCS-100 provides the largest amount of control. If using multiple panels networked together, this is the
recommended method. Programming using LMCS-100 is not described in this guide, but instead in the LMCS-100 User Guide.
For the latest version, go to http://www.wattstopper.com/products/digital-lighting-management/configuration-tools/dlm-computer-
interface-tools-and-software.aspx and click on the Resources tab.
• Using an LMSM-3E or LMSM-6E Segment Manager or other BAS application through BACnet. A limited number of parameters are
exposed directly through BACnet. For details, see “Appendix A” on page 32. Also see the Segment Manager User’s Guide.
NOTE: It is strongly recommended that if you are using LMCS-100 software, you do not use the LMCT-100 to program the panels or
any connected devices. In a distributed network situation where groups might be assigned across more than one panel, LMCS-
100 will determine which panel’s memory will store the schedules. Sending information to the panels via the LMCT can create
conflicting messages between panels.
 Loading...