2009-2013 FLH RENEGADE
NOTE: Swingarm pivot shaft components are different between
2009-10 and 2011+ models. Be sure to use the correct procedure
for your specific model year. See Fig. 1. Swingarm pivot shaft
bushings for 2011 models (S001661) will have a larger inside di-
ameter.
2009-2010 Models
NOTE: If all original components of H-D swingarm are in good
working order, they may be re-used.
1. Press bearing assemblies out of HD swingarm using appropriate
press collar. Refer to HD service manual.
NOTE: Make sure swingarm bore is clean where bearing will
be pressed in.
2. Press bearings into Lehman swingarm following H-D service man
ual procedure (H-D tool # HD-45327). H-D tool will set bearings at
correct location in Lehman swingarm collar.
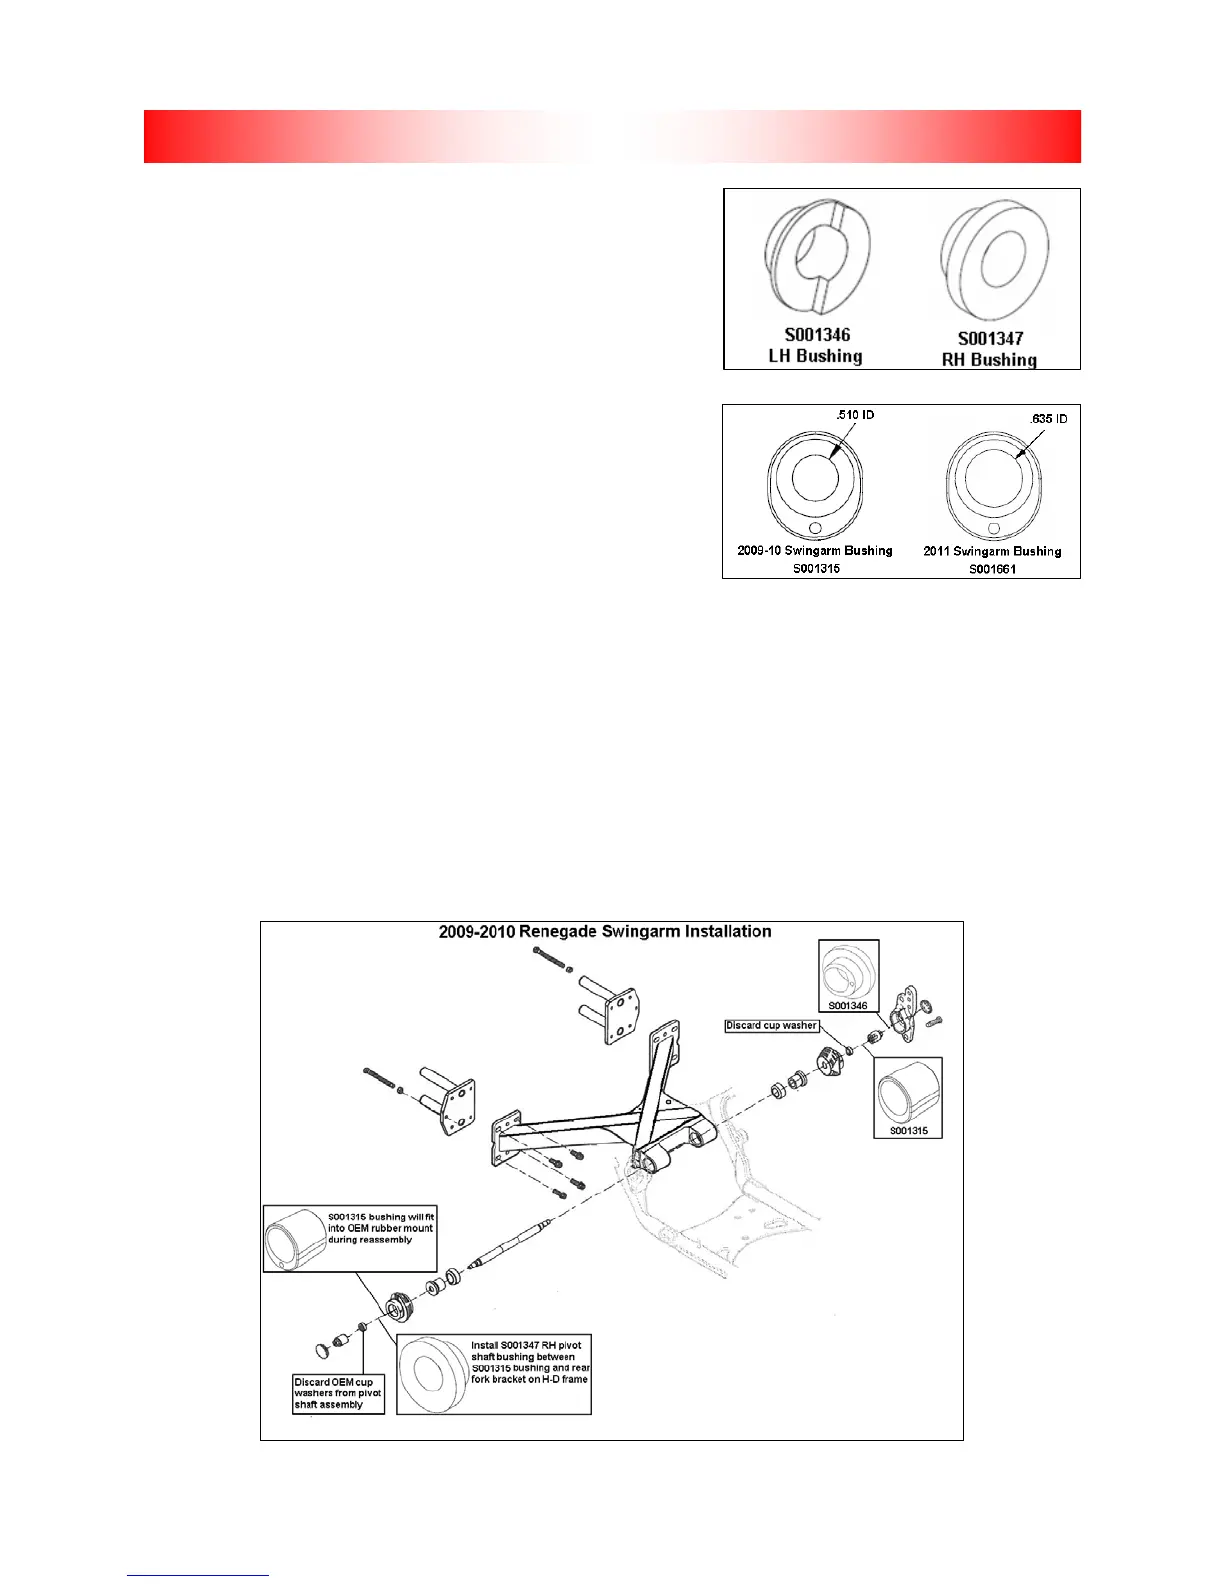
3. See Fig. 1 & Fig 2. OEM cup washers will be replaced by new
swingarm reinforcement bushings (S001346-LH, S001347-RH &
S001315).
4. See Fig. 3. Install RH swingarm reinforcement bushings (S001347 & S001315) into original rubber mounts. Be
sure to align offset in mount and bushings.
5. Install Lehman swingarm with word “TOP” (stamped into swingarm collar) facing upward.
6. See Fig. 3. Assemble parts for LH side (S001346 & S001315) as shown.
7. See Fig. 3. Re-install LH swingarm fork bracket. Apply Loctite 242 and torque bolts to 55 ft.-lbs.
8. Apply Loctite 242 to pivot shaft nuts and install. Torque swingarm pivot shaft nuts to 55 ft.-lbs and
reinstall chrome caps.
NOTE: Refer to HD service manual for swingarm installation procedures and torque specifications for spe-
cific model of motorcycle.
9.
Verify swingarm assembly moves freely with no side to side play. Light resistance when moving up
and down is normal.
Fig. 2
Fig. 3
INSTALLING LEHMAN SWINGARM
Fig. 1
11
 Loading...