EN-11
4 MACHINE ADJUSTMENTS
Ensure that no-one is near the machine when it is switched
from the transport position to the working position.
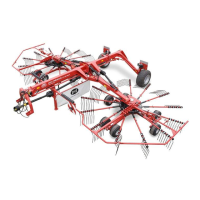
Put the machine into the working position as follows:
- Place the wheel supports of the lateral rotors in the same position
as those of the middle rotor segments.
- Lower the machine to the ground.
- Tighten the control cord of the locking hook. Use the hydraulic
valve to gently lower the rotor segments.
- Remove the locking pin from the steering device and place it in
the appropriate hole on top of the headstock (fig. 8).
4.1 Tine adjustment
- Adjust the tines to the outer position (A, fig. 9).
Headland tedding:
Adjust the tines of the rotor on the plot side to the inner position
(B).
4.2 Rotor angle and working height
The wheels have the following preferred setting:
- LOTUS 460 Stabilo: highest/second-to-highest position;
- LOTUS 520 Stabilo: second-to-highest/ middle position.
A more level machine adjustment may be required when handling
light crops or in windy conditions.
- Lift the rotors clear from the ground using the tractor hydraulics.
- Switch off the tractor engine and take the necessary precautions
to ensure the machine does not suddenly lower before you start
adjusting the wheel supports.
Adjust the wheels to the desired position (A, fig. 10).
Headland tedding:
Adjust the rotor on the plot side 1 or 2 positions lower than the
other rotors.
- Lower the rotors.
- Adjust the working angle of the rotors in relation to the ground
via the top link in such a way that the tines gently sweep the
ground ensuring adequate crop pick-up. Rule of thumb: the tines
should touch the ground over a width of approximately 25 cm.
Deep adjustment causes an excessive load, which increases
wear and tear as well as the risk of tine breakage. The crop
will also become contaminated more easily.
 Loading...