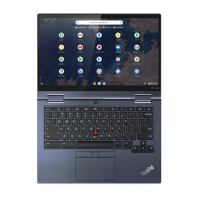
Do you have a question about the Lenovo 500e Yoga Chromebook Gen 4 and is the answer not in the manual?
Follow rules to ensure general safety, including housekeeping, lifting, and personal conduct during maintenance.
Observe rules for working on electrical equipment, including using approved tools and proper grounding.
Guide to identify potentially unsafe conditions and hazards before servicing a computer.
Protect against electrostatic discharge (ESD) damage by equalizing charges and using grounding systems.
Ensures operator safety and correct system function through proper electrical grounding.
Provides safety notices in multiple languages for user awareness.
Information required when returning a FRU, including technician and failure details.
Lists Customer Replaceable Units (CRUs) with their types (self-service, optional-service).
Learn how to create and use a USB repair shim for system refresh and diagnostics.
Exploded illustrations help identify FRUs or CRUs for replacement servicing.
Lists tools required for servicing Lenovo computers, with model applicability.
Follow general guidelines for safe and correct FRU/CRU removal and replacement.
Step-by-step instructions for removing the electronic pen from the Chromebook.
Procedure for removing the dummy pen cap from the Chromebook.
Detailed steps for removing the keyboard, including screw specifications and latch manipulation.
Steps for reinstalling the keyboard, including connecting the cable and securing latches.
Instructions for removing the bottom cover, including screw details and number of screws.
Steps to disconnect the battery cable and remove the SIM card.
Procedure for disconnecting and removing the 14-pin I/O board cable.
Steps to disconnect the battery pack cable, 40-pin I/O board, and remove the cable.
Instructions for removing the battery pack, including screw specifications and number of screws.
Steps to disconnect the electronic pen cable and remove it.
Procedure to peel tape, disconnect antennas, and remove speakers.
Steps to disconnect battery pack cable and remove the I/O board bracket.
Disconnect I/O board cables, remove screws, and then remove the I/O board.
Disconnect battery pack cable, peel tape, and disconnect antennas to remove the Wi-Fi card.
Remove screw, antennas, and then remove the WWAN card.
Disconnect WWAN antennas and touchpad cable, then remove WWAN antennas.
Disconnect battery pack cable, WFC camera cable, and remove the WFC camera.
Disconnect battery cable, remove screws, and then remove the type-C bracket.
Disconnect touchpad cable and remove the touchpad cable.
Disconnect all cables, remove screws, and then remove the system board.
Remove the Wi-Fi antennas from the system.
Procedure to remove the WWAN absorber and AL foil.
Loosen screws in alphabetical order and then remove the heatsink.
Disconnect cables, remove screws, open hinges, and remove the LCD module.
Detailed steps to remove the upper case, listing all preceding FRU removals.
Remove strip cover screw mylar, then remove screws and the strip cover.
Pull LCD cable, remove hinge rubber, remove screws, and remove LCD panel.
Remove eight screws and then remove the hinges.
Peel tape, disconnect EDP cable, remove camera board, and remove microphone rubbers.
Disconnect and remove the EDP cable.
Disconnect EDP cable, then remove the G sensor board.
Details of the rating label, including dimensions and applicability.
Details of the rating print label, including dimensions and applicability.
Details of the CO2 Offset label, including dimensions and applicability.
Details of the asset tag, including dimensions and applicability.
Details of the IMEI label, including dimensions and applicability.
Details of the country label, including dimensions and applicability.

