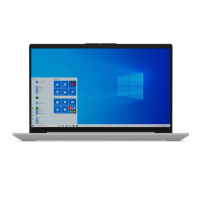
Do you have a question about the Lenovo IdeaPad 5 2-in-1 14 9 and is the answer not in the manual?
| Touchscreen | Yes |
|---|---|
| Display Size | 14 inches |
| Display Type | IPS |
| Storage | Up to 1 TB PCIe Gen4 SSD |
| Operating System | Windows 11 Home |
| Convertible | Yes |
| Ports | 2 x USB-C, 2 x USB-A, HDMI, headphone/mic combo jack |
| GPU | AMD Radeon Graphics |
Follow safety rules for general machine maintenance and handling.
Observe rules for working on electrical equipment.
Assists in identifying potentially unsafe conditions before servicing.
Protect against ESD damage by equalizing charge between components.
Ensures operator safety and correct system function via proper grounding.
Provides important safety warnings and precautions in multiple languages.
Information to include when returning a FRU for exchange or repair.
Lists Customer Replaceable Units (CRUs) and their corresponding types.
Use exploded illustrations to identify FRUs or CRUs for replacement.
Lists tools and consumables required for servicing Lenovo computers.
Provides essential rules to follow when removing or replacing FRUs.
Details on the proper handling of thermal interface materials for heat sinks and CPUs.
Steps to remove the computer's lower case for 14-inch models.
Steps to remove the computer's lower case for 16-inch models.
Procedure for safely disconnecting and removing the battery pack.
Steps to disconnect and remove the Wi-Fi card.
Steps to disconnect and remove the 2242 solid-state drive.
Steps to disconnect and remove the heat sink.
Steps to disconnect and remove the fan.
Steps to disconnect and remove the USB board.
Steps to remove speakers for 14-inch models.
Steps to remove speakers for 16-inch models.
Steps to disconnect and remove the antennas.
Steps to remove the fingerprint bracket for 14-inch models.
Steps to remove the fingerprint bracket for 16-inch models.
Steps to disconnect and remove the fingerprint cable.
Steps to remove the fingerprint board for 14-inch models.
Steps to remove the fingerprint board for 16-inch models.
Steps to disconnect the touchpad cable.
Steps to disconnect cables and remove the touchpad.
Detailed steps for removing and replacing the system board for 14-inch models.
Detailed steps for removing and replacing the system board for 16-inch models.
Steps to remove the LCD module for 14-inch models.
Steps to remove the LCD module for 16-inch models.
Instructions for removing the computer's upper case and integrated keyboard.
Guide to using a Golden Key U1 tool to flash-write system information.
Details on base cover labels, including description, country/region, and dimensions.
