Do you have a question about the Lenovo Star Wars and is the answer not in the manual?
Ensure your phone is compatible by checking the official website for device compatibility information.
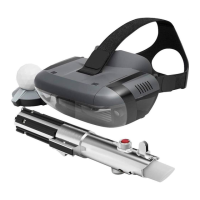
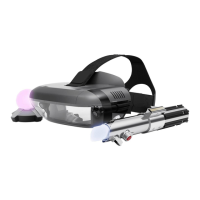
List of required components for Star Wars: Jedi Challenges, including headset, controller, and smartphone.
Connect to WiFi, download the Star Wars: Jedi Challenges app from the official website or app store.
Adjust phone settings like brightness, location, and Bluetooth for optimal performance.
Launch the Star Wars: Jedi Challenges application and proceed by tapping the screen to continue.
Set phone volume to maximum for the best gaming experience; headphone use is optional.
Enable Bluetooth on your phone and activate the Lightsaber controller using its power switch.
Connect the lightsaber via Bluetooth. On Android, ensure location services are enabled for successful pairing.
Follow on-screen instructions to perform a figure-eight motion for accurate calibration.
Insert batteries into the tracking beacon, turn it on, and place it in your play area at the recommended distance.
Remove phone case and connect the correct headset cable to your phone, ensuring it extends upwards.
Grant necessary display permissions on your Android phone after connecting it to the headset.
Carefully pull out the phone tray from the headset to prepare for phone insertion.
Position the stopper correctly, then place the phone face down in the tray and secure it.
Slide the tray, with the phone inside, back into the headset until it clicks into place.
Connect the micro-USB cable to the headset port; the indicator light should turn red.
Wear the headset and begin your Star Wars: Jedi Challenges training experience.
Details on the headset buttons: Select, Back/Cancel, and Menu for navigation and settings.
Explanation of lightsaber controls: Control button, Activation Matrix for validation, and Power Switch.
| Type | Standalone VR Headset |
|---|---|
| Display Resolution Per Eye | 1440 x 1440 |
| Refresh Rate | 75 Hz |
| Connectivity | Wi-Fi, Bluetooth |
| Field of View | 110 degrees |
| Tracking | Inside-Out |
| Included Accessories | Controller |