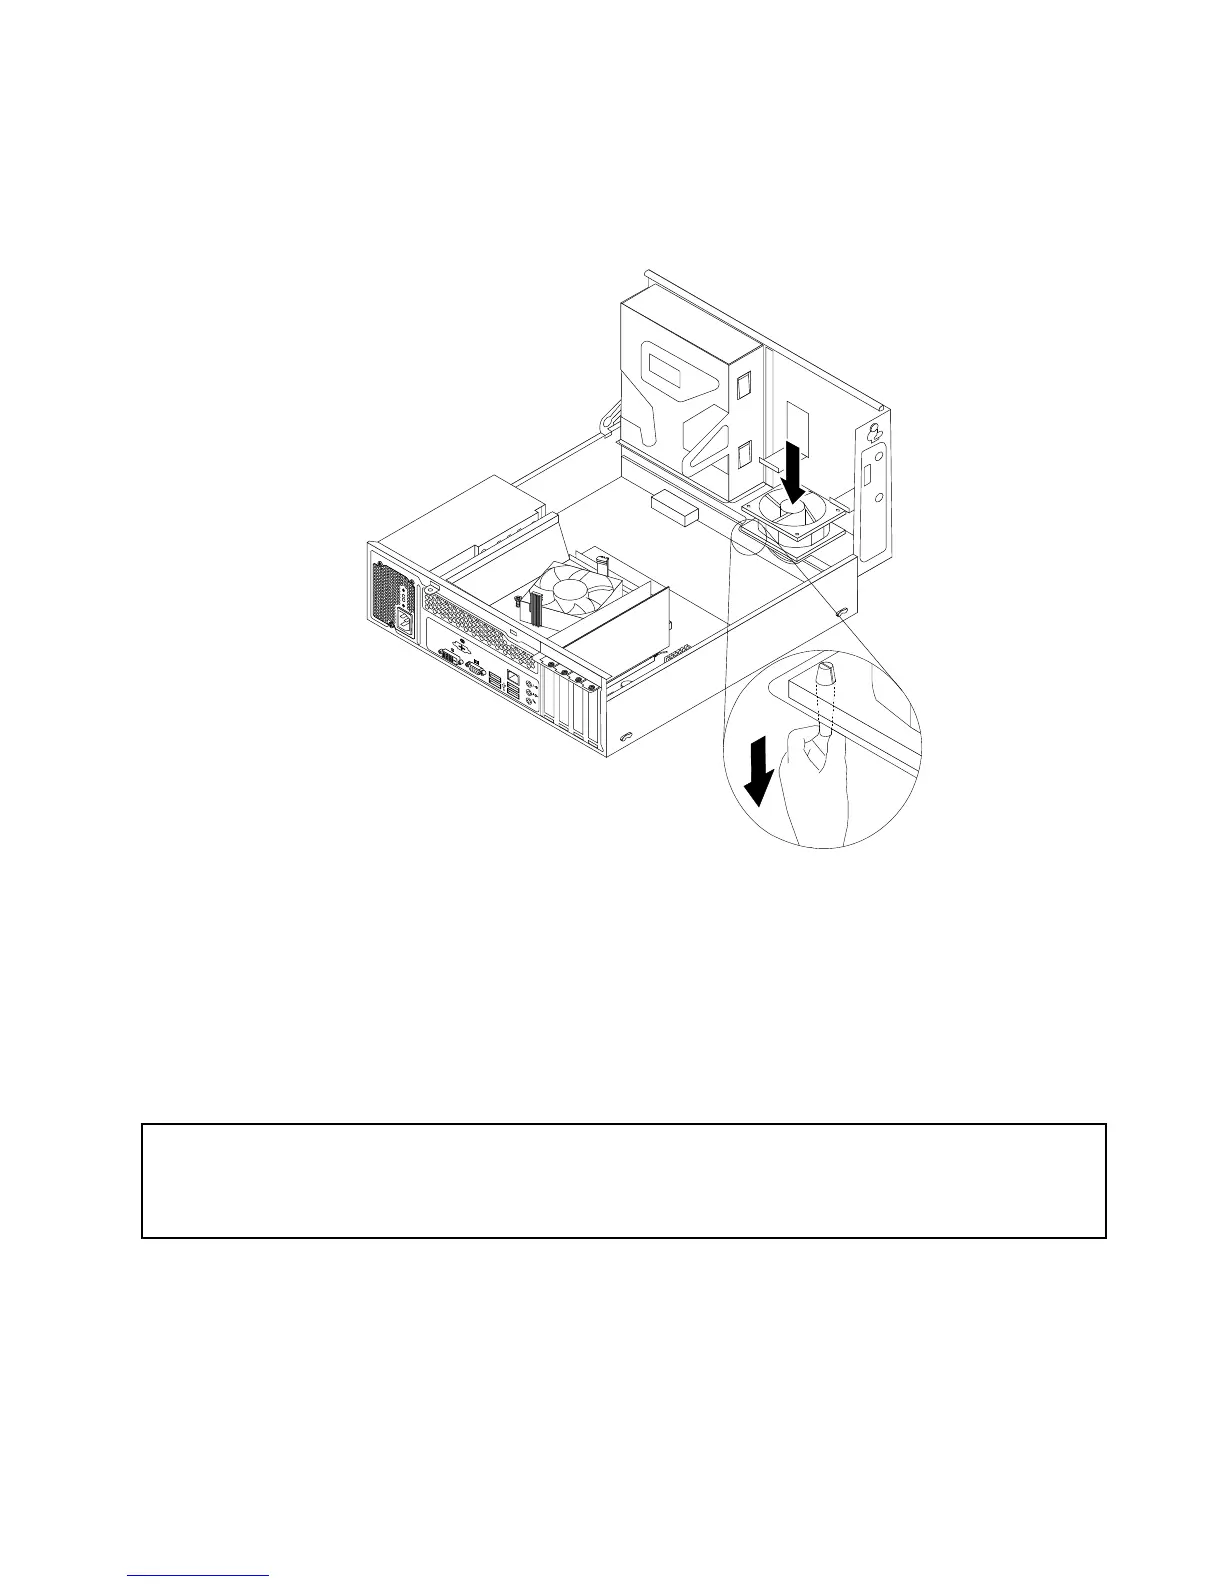
9.Installthenewsystemfanassemblybyaligningthenewrubbermountsthatcamewiththenewsystem
fanassemblywiththecorrespondingholesinthechassis,andthenpushtherubbermountsthroughthe
holes.Then,carefullypullonthetipsoftherubbermountsfromthebottomuntilthenewsystemfan
assemblyissecuredinplace.
Figure73.Installingthesystemfanassembly
10.Connectthenewsystemfanassemblycabletothesystemfanconnectoronthesystemboard.See
“Locatingpartsonthesystemboard”onpage107.
11.Reinstalltheheatsinkfanduct.See“Replacingtheheatsinkandfanassembly”onpage127.
12.Reinstalltheharddiskdrive.See“Replacingtheharddiskdrive”onpage117.
13.Tocompletetheinstallationorreplacement,goto“Completingthepartsreplacement”onpage139.
ReplacingthefrontaudioandUSBassembly
Attention:
Donotopenyourcomputerorattemptanyrepairbeforereadingandunderstandingthe“Importantsafetyinformation”
intheThinkCentreUserGuide.ToobtainacopyoftheThinkCentreUserGuide,goto:
http://www.lenovo.com/ThinkCentreUserGuides
ThissectionprovidesinstructionsonhowtoreplacethefrontaudioandUSBassembly.
ToreplacethefrontaudioandUSBassembly,dothefollowing:
1.Turnoffthecomputeranddisconnectallpowercordsfromelectricaloutlets.
2.Removethecomputercover.See“Removingthecomputercover”onpage109.
3.Removethefrontbezel.See“Removingandreinstallingthefrontbezel”onpage110.
Chapter9.ReplacingFRUs(MachineTypes:1578,1583,and1652)137

 Loading...


