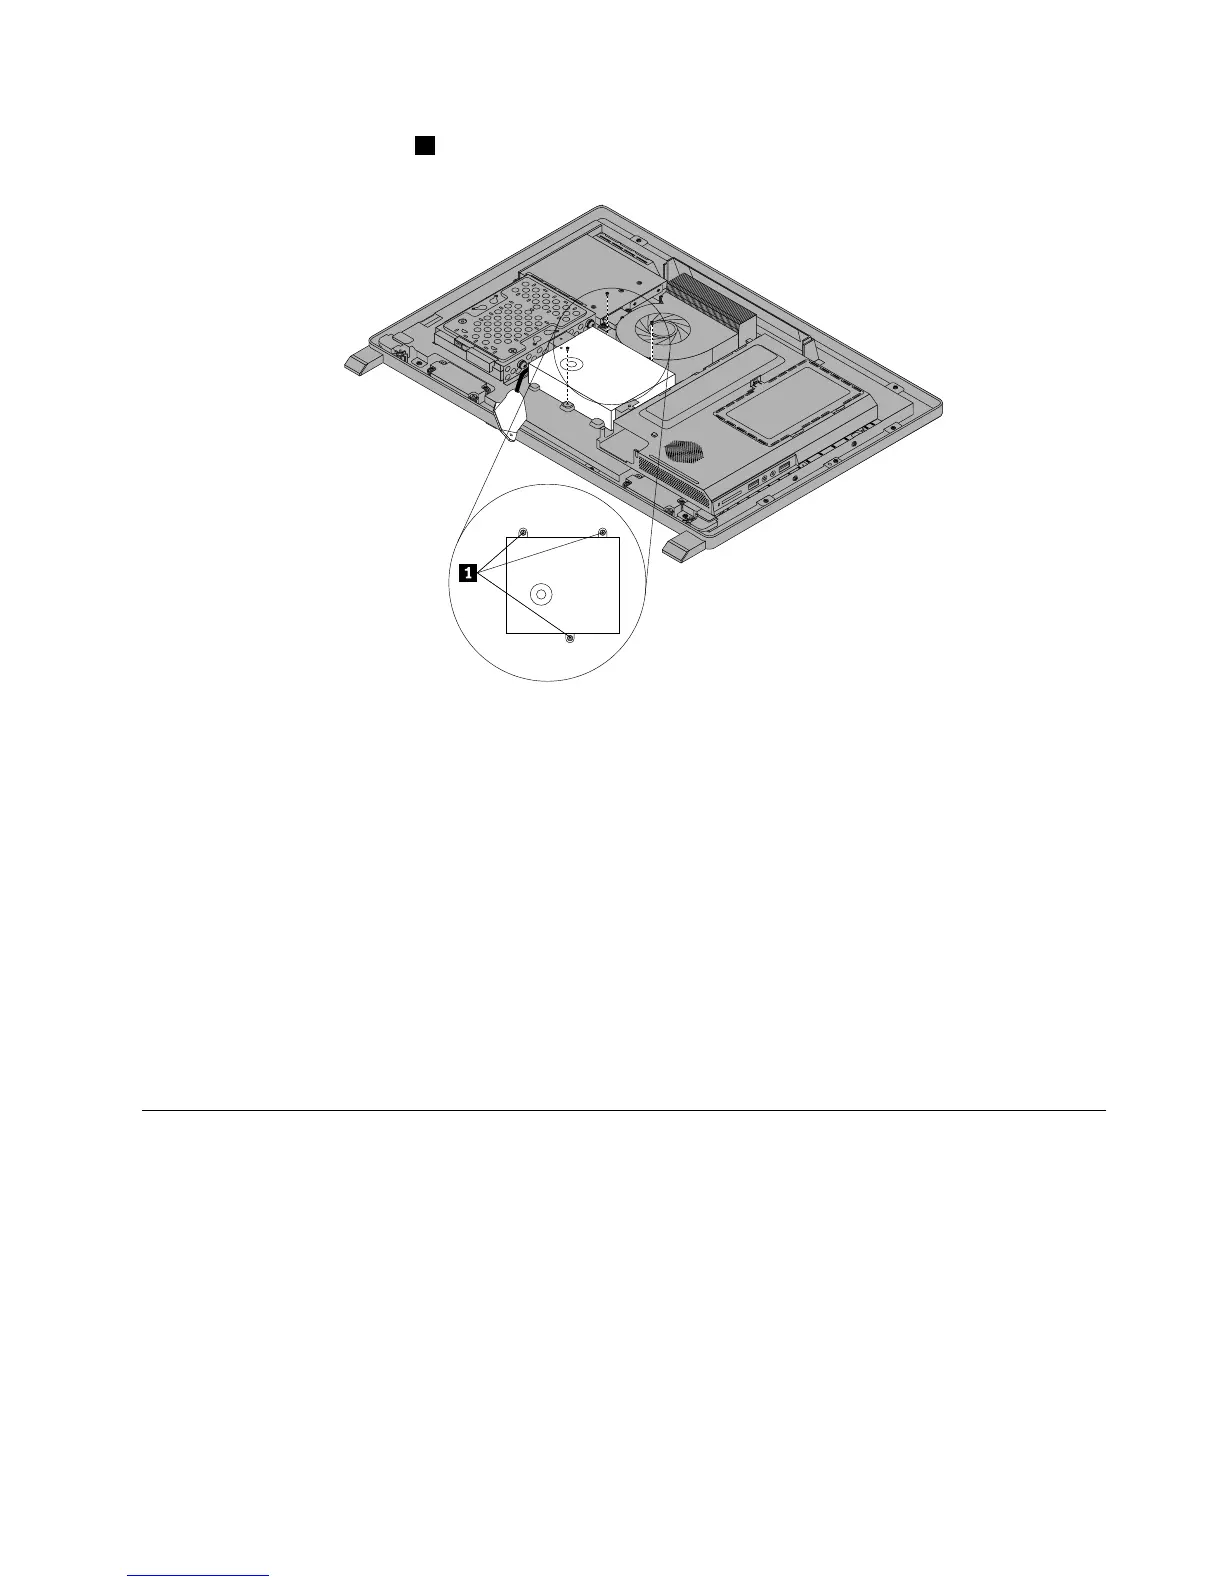
9.Removethethreescrews1thatsecurethepowersupply.
Figure25.Removingthethreescrewsthatsecurethepowersupply
10.Toreinstallthepowersupply,reinstallthetwoscrewsthatsecurethepowercordconnectortothe
powerconnectorbracket.See“ReplacingtherearI/Oassembly”onpage99
11.Positionthenewpowersupplyinthecomputerandalignthethreescrewholesinthenewpowersupply
withthoseinthecomputermainbracket.Installthethreescrewstosecurethenewpowersupply.
12.Routethenewpowercordconnectorcable,andthenreinstalltherearI/Oassembly.See“Replacing
therearI/Oassembly”onpage99.
13.Connectthenewpowersupplycablestothepowersupplyconnectorsonthesystemboard.See
“Locatingpartsonthesystemboard”onpage86.
14.Reinstallthesystemboardshield.See“Removingandreinstallingthesystemboardshield”onpage101.
15.ReinstalltheVESAmountbracket.See“RemovingtheVESAmountbracket”onpage98.
16.Reinstallthecomputercover.See“Removingthecomputercover”onpage94.
17.Goto“Completingthepartsreplacement”onpage124.
Replacingthemicroprocessorfan
Attention
Donotopenyourcomputerorattemptanyrepairbeforereadingandunderstandingthe“Importantsafety
information”intheSafety,Warranty,andSetupGuidethatcamewithyourcomputer.Toobtainacopyofthe
Safety,Warranty,andSetupGuide,goto:
http://www.lenovo.com/support
Thissectionprovidesinstructionsonhowtoreplacethemicroprocessorfan.
Toreplacethemicroprocessorfan,dothefollowing:
Chapter9.ReplacingFRUs103

 Loading...


