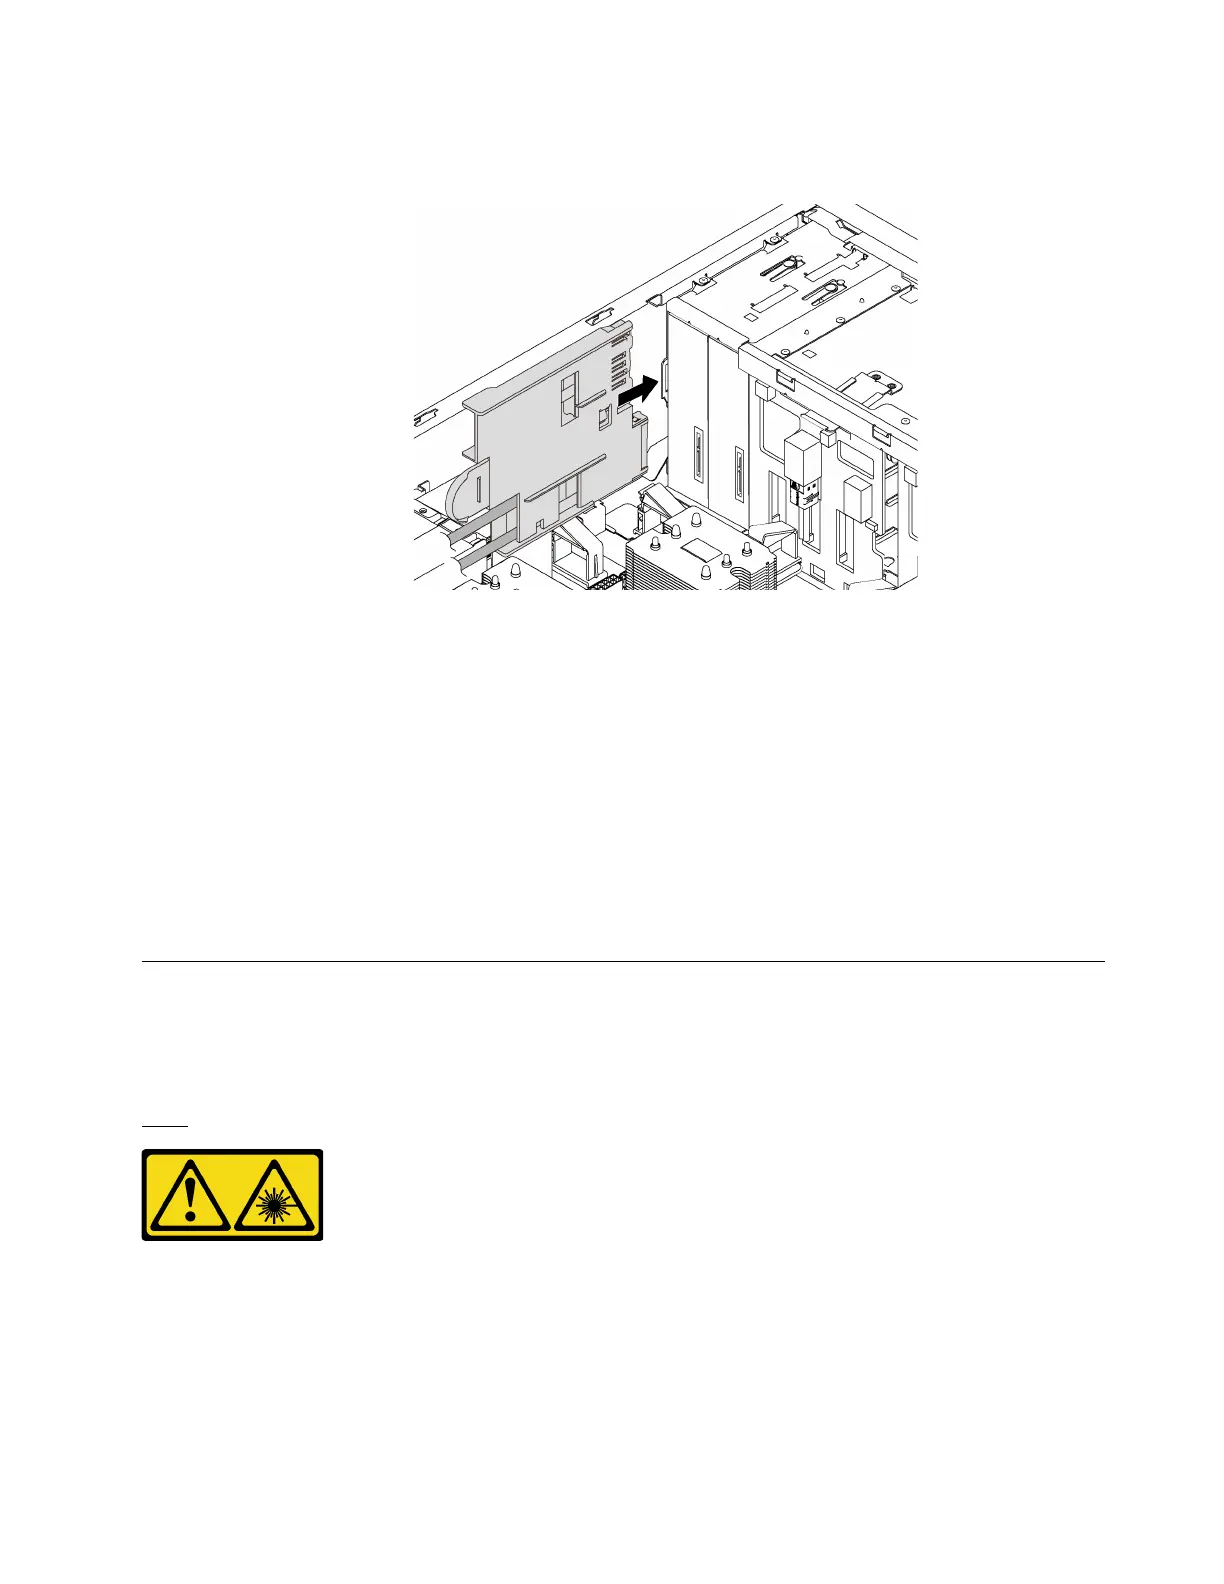
Step 2. Insert the front panel into the dedicated bay as shown. Then, carefully slide the front panel into the
bay until it snaps into place.
Figure 54. Front panel installation
Step 3. Carefully route the two front panel cables from the secured front panel along the back side of the
storage drive bays. Manage the cables so that they are secured by the clips under the front fans or
fan fillers.
Important: The front panel cables and all other cables in this space must be secured by the clips
so that it is possible to install the fans or fan fillers over the cables.
Step 4. Connect the front panel cables to the corresponding connectors on the system board. For more
information, see “Front panel” on page 29.
After installing the front panel, complete the parts replacement. See “Complete the parts replacement” on
page 178.
Optical drive or tape drive replacement
Use this information to remove and install the optical drive or tape drive.
Note: This section applies only to server models that have an optical drive or a tape drive installed.
S006
CAUTION:
When laser products (such as CD-ROMs, DVD drives, fiber optic devices, or transmitters) are
installed, note the following:
• Do not remove the covers. Removing the covers of the laser product could result in exposure to
hazardous laser radiation. There are no serviceable parts inside the device.
• Use of controls or adjustments or performance of procedures other than those specified herein
might result in hazardous radiation exposure.
Chapter 3. Hardware replacement procedures 85

 Loading...


