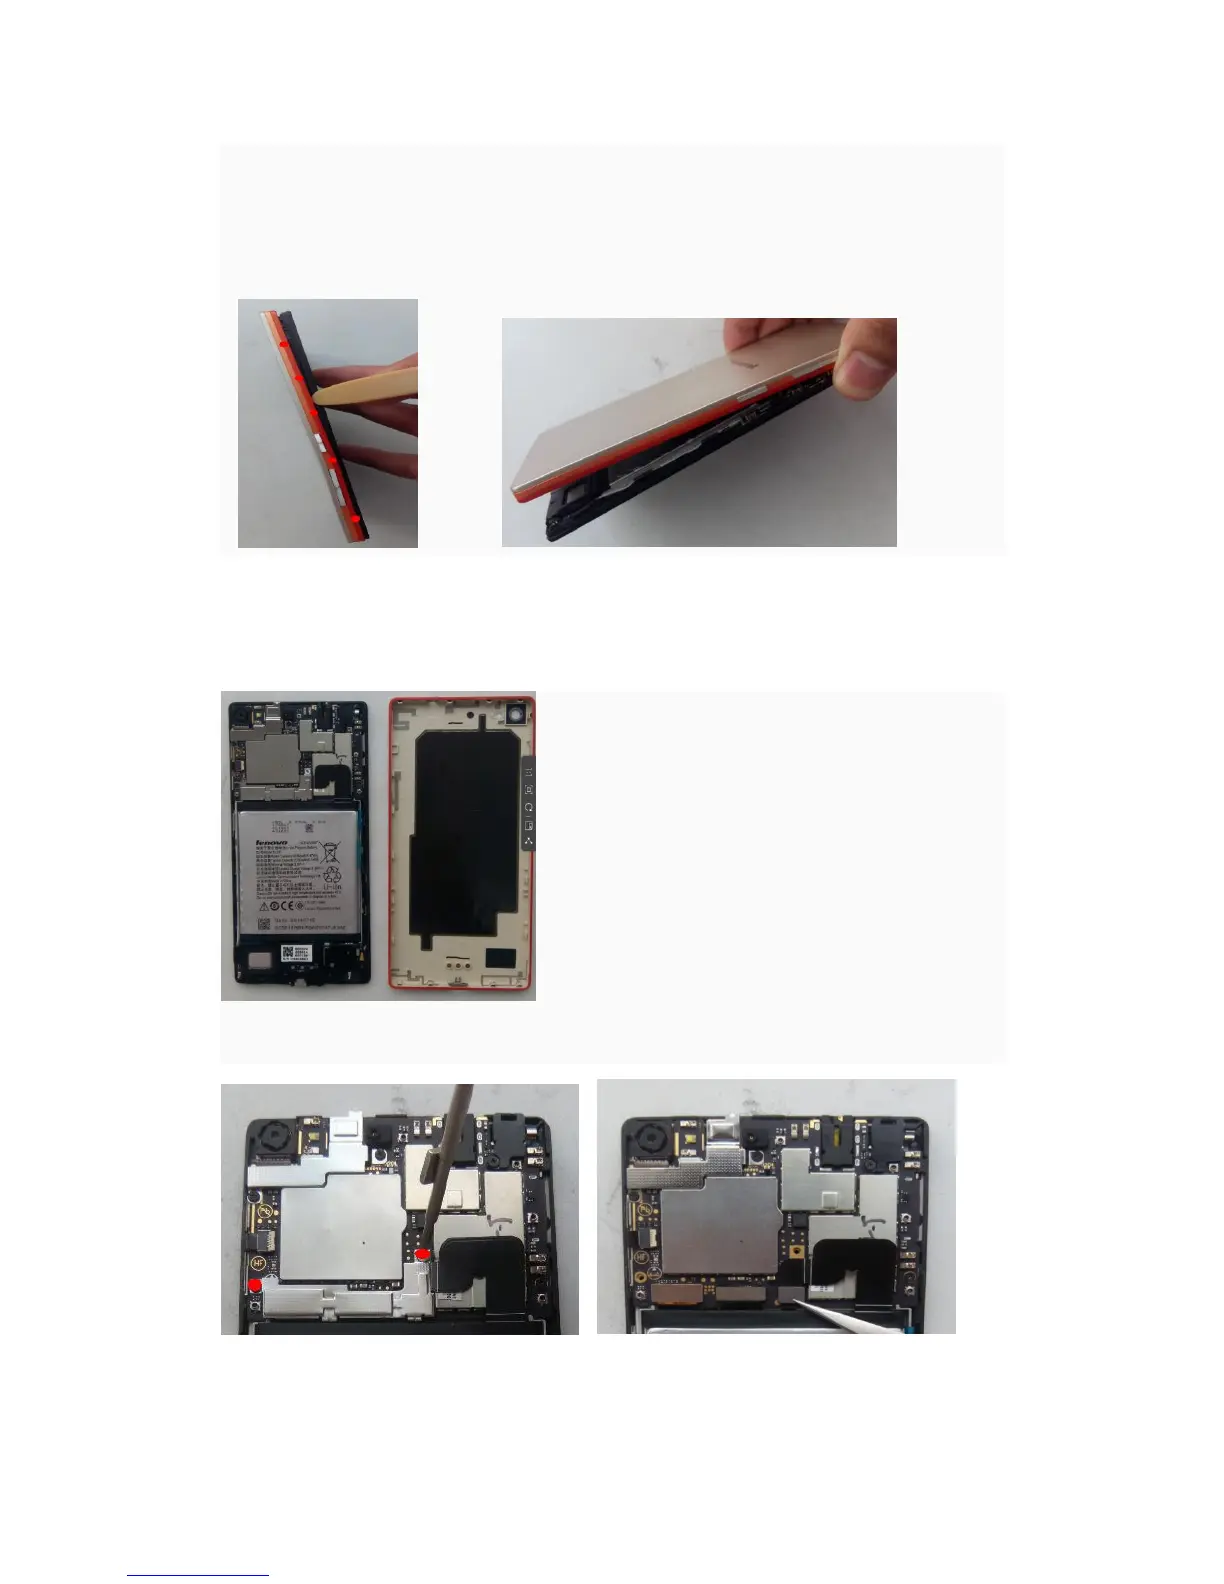
Note:1,The solid red dots are hooks position
2, Disassemble tools:Tweezer、Disassemble bar;in order to protect the cover from
destroy ,the disassemble bar insert just about 2mm
Using the disassemble bar to pry hooks
Released the hook1 from the lower left corner . The direction of from bottom to top to released
the hooks
4)Disassemble the main board
Disassemble the battery connector pressure Release the battery connector
sheet steel,2 screws
 Loading...