Do you have a question about the Lepa AquaChanger 120 and is the answer not in the manual?
Attach the fan and the radiator to the case.
Install screws into the back plate for specific Intel LGA CPU socket compatibility.
Attach the square washer to the center of the back plate for LGA 775.
Install the back plate on the motherboard using stand-offs.
Fasten LGA 2011/2011-3 screws directly to the motherboard.
Attach the Intel bracket to the CPU cooler's pump unit.
Apply thermal paste onto the CPU surface for heat transfer.
Remove the protective film from the CPU cooler's cold plate.
Place the pump on the CPU and tighten the four spring screws.
Connect the pump power connector to the motherboard or PSU.
Connect the fan connector to the 4-pin header on the motherboard.
Attach the fan and the radiator to the case.
Stick the insulating sheet on the corresponding position.
Remove the original heatsink mount holder before installation.
Attach square washer and install screws into the back plate for CPU socket.
Install the back plate on the motherboard using stand-offs.
Attach the AMD bracket to the CPU cooler's pump unit.
Apply thermal paste onto the CPU surface for heat transfer.
Remove the protective film from the CPU cooler's cold plate.
Place the pump on the CPU and tighten the four spring screws.
Connect the pump power connector to the motherboard or PSU.
Connect the fan connector to the 4-pin header on the motherboard.
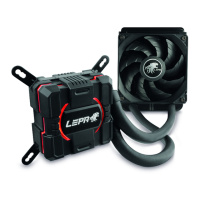
The LEPA AquaChanger 120 is a high-performance all-in-one liquid CPU cooler designed to provide efficient heat dissipation for a wide range of Intel and AMD processors. Its primary function is to cool the CPU, preventing overheating and ensuring stable system performance, especially during demanding tasks like gaming, video editing, or heavy multitasking. The cooler achieves this by circulating a liquid coolant through a closed loop, transferring heat away from the CPU to a radiator, where it is then dissipated into the surrounding air by a fan.
One of the key usage features of the AquaChanger 120 is its compatibility with numerous CPU sockets, including Intel LGA 775, 1150, 1151, 1155, 1156, 1366, 2011, and 2011-3, as well as AMD AM2, AM2+, AM3, AM3+, FM1, FM2, and FM2+. This broad compatibility makes it a versatile cooling solution for various PC builds and upgrades. The installation process is designed to be user-friendly, with separate instructions provided for Intel and AMD platforms, guiding users through each step from attaching the fan and radiator to the case, to mounting the pump on the CPU.
For Intel installations on LGA 775/1150/1151/1155/1156/1366 sockets, the process begins by installing position screws into the corresponding holes on the back plate. For LGA 775, a square washer is attached to the center of the back plate. The back plate is then installed on the back of the motherboard, and stand-offs are placed to secure it. For LGA 2011/2011-3 sockets, the LGA 2011 screws are fastened directly to the motherboard, eliminating the need for a back plate. Following this, the Intel bracket is installed onto the pump.
For AMD installations, a similar structured approach is followed. The first step involves attaching the fan and radiator to the case, identical to the Intel setup. Then, an insulating sheet is stuck onto the corresponding position on the back plate. Users are instructed to remove the original heatsink mount holder from the motherboard before proceeding. A square washer is then attached to the center of the back plate, and position screws are installed into the appropriate holes. The back plate is then installed on the back of the motherboard, and stand-offs are placed to fix it securely. Finally, the AMD bracket is installed onto the pump.
A crucial step in both Intel and AMD installations is the application of thermal grease onto the CPU surface. This ensures optimal heat transfer from the CPU to the cold plate of the pump. Before placing the pump, users must remember to remove the protective film from the cold plate. Once the pump is positioned on the CPU, the four spring screws are tightened to secure it firmly and evenly, ensuring good contact for efficient cooling.
The power connection for the pump is another important usage feature. The pump power connector can be connected to either a 3-pin or 4-pin connector on the motherboard. However, a notable feature is the inclusion of a 4-pin Molex adaptor. This adaptor is provided for situations where the mainboard's CPU fan or PWM sockets might not supply sufficient voltage to power the pump, allowing users to connect the pump directly to their power supply unit (PSU) for reliable operation. The fan connector is then connected to a 4-pin connector on the motherboard, allowing the system to control fan speed based on CPU temperature.
In terms of maintenance features, while the manual doesn't explicitly detail routine maintenance, the all-in-one closed-loop design inherently simplifies upkeep compared to custom liquid cooling loops. Users do not need to worry about refilling coolant or performing complex leak checks. The primary maintenance would typically involve periodic cleaning of the radiator fins and fan blades to remove dust buildup, which can impede airflow and reduce cooling efficiency. The design of the cooler, with its separate fan and radiator components, allows for relatively easy access for cleaning these parts. The robust ceramic bearing in the pump is designed for long-term reliability, contributing to the overall low-maintenance nature of the device. The inclusion of thermal grease in the package ensures that users have the necessary material for initial installation, which is a key aspect of ensuring proper thermal contact and long-term performance. The two-year warranty also provides peace of mind regarding the product's durability and support. The clear, step-by-step instructions with visual aids for both Intel and AMD platforms contribute to ease of installation, which is a form of maintenance in itself, ensuring the cooler is set up correctly from the start to avoid future issues.
| Type | Liquid Cooling System |
|---|---|
| Radiator Size | 120mm |
| Fan Size | 120mm |
| Radiator Material | Aluminum |
| Fan Dimensions | 120 x 120 x 25 mm |
| Fan Connector | 4-Pin PWM |
| Tube Length | 310 mm |
| LED Lighting | No |
| Compatibility | AMD AM2/AM2+/AM3/AM3+/FM1/FM2/FM2+ |
| Radiator Dimensions | 120 x |
| Fan Noise | 16 - 30 dBA |